Sunday, September 30, 2012

Crock Pot Chicken Soft Tacos

This has got to be the most simple meal I've ever put together!  I utilizes a slow cooker, so the kitchen remains cool during the hot summer days, and it's a perfect go-to meal when my guys have crazy schedules and I'm feeding everyone at different times.


I found this recipe on Pinterest, but it originated at mychocolatetherapy.blogspot.com.  I guess the author likes more than just chocolate!  This is very similar to the Slow Cooker Mexican Pulled Pork Tacos I posted recently, except that I don't even have to get an extra bowl dirty mixing the sauce.  This recipe got 8s and 9s on the Melnarik rating scale.


The first time I try a new recipe, I usually make it exactly as written, unless there is an ingredient I know my family doesn't care for (i.e. I always omit olives).  In this case, the author suggested Newman's Own brand salsa.  The jar lid indicates this is a medium salsa, but we all felt as though it could use a little more heat, so next time, I will use a different brand which will give me our desired heat level.  I used the Lawry's brand taco seasoning, as that is our favorite. 


You're not going to believe how easy this is:  In the bottom of my crock pot, I dumped the jar of salsa and the packet of taco seasoning.


Using a spoontula, I mixed those two ingredients together.  


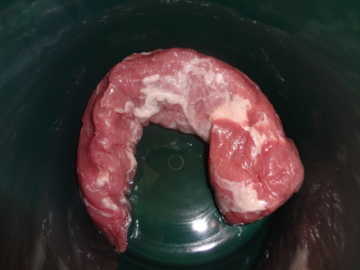
Then I added the chicken, stirring as I added each breast to make sure they all were covered in the sauce.


After cooking them on high for 4 hours (they can also be cooked on low for 8 hours), they were completely cooked and the sauce was a bit thinner.


I removed the chicken to a cutting board, where I shredded it using two forks.


As I shredded each breast, I returned it to the crock pot.


Once I stirred the shredded chicken back into the sauce, it was ready to be built into soft tacos.


Using flour tortillas, I added some of the chicken, then topped it with shredded medium cheddar cheese, shredded lettuce and diced tomatoes.  Sour cream and guacamole can also be added, if desired.  These are tasty soft tacos that are so simple to make and there was a enough chicken left over for another evening meal, plus a couple of lunches!  Enjoy!

Crock Pot Chicken Soft Tacos

1pkg. taco seasoning mix
1 (16 oz.) jar salsa
6 boneless skinless chicken breasts (2 lbs.)

In a 4 qt. crock pot, combine taco seasoning mix and salsa.  Add chicken, turning in sauce so all pieces are coated. Cover and cook on low for 6 to 8 hours or on high for 4 to 6 hours.  Using 2 forks, shred chicken and stir into sauce.  Serve on tortillas with toppings of your choice.

Suggested toppings:
shredded cheddar cheese
shredded lettuce
diced tomatoes
guacamole
sour cream

Cheesy Corn Cakes with Avocado Salsa


This recipe just looked interesting and yummy, so I decided to give it a try.  I love corn and it was pretty simple to make, but I think the avocado salsa makes this dish.


I found this recipe on Pinterest but it originated at simply-delicious.co.za.  This isn't the healthiest side dish because it's fried, but if you like corn and avocados, this recipe is for you.  My family gave this dish 8s and 9s on the Melnarik rating scale.


In a large bowl, I combined the creamed corn, corn kernels, eggs, paprika, and salt.


To that mixture, I added the shredded cheddar cheese.  This recipe calls for sharp cheddar, but if you're like me and want the cheese flavor to come through more, use extra sharp cheddar.  I stirred everything together until well combined.


Then I added the flour and baking powder, mixing well.


I added the milk a little bit at a time until the batter was not too thick, yet not making it too thin.  It needed to drop off the spoon easily but not spread like a pancake in the frying pan.


To my frying pan, I added some oil and heated it over a medium-high flame.  Then I dropped in spoonfuls of the batter.  As you can see, the one in the front spread into a wonky shape, but most of them remained round.  Once I could see at the edges that the bottom was nicely browned, I flipped them and cooked the other side.


Once fully cooked, I placed the corn cakes on folded paper towels to let the towels absorb some of the fat.


In the meantime, I began to prepare the avocado salsa.  I'm sure there is an easier way, but I chose to dice the avocado in the skin, so the chunks were more uniform in size.


As I separated the flesh from the skin, using a spoon, it was already in small in cubes.


To the avocado, I added the chopped red onion, and the diced red chili pepper.


Then, I added the salt and pepper to taste plus the fresh lemon juice and tossed gently to combine.


As I said before, I think the salsa made this dish and I would make it again to accompany other meals.


The warm corn cakes are crunchy on the outside and soft on the inside and when topped with the avocado salsa are a great side dish to serve with a Southwestern or Mexican style meal.  Enjoy!


Cheesy Corn Cakes with Avocado Salsa

2 cups corn
1 (8 oz.) can creamed corn
2 eggs
1 ½ cups grated sharp cheddar cheese
½ teaspoon paprika
1 teaspoon salt
1 ½ cups flour
1 teaspoon baking powder
½ cup milk
salsa:
2 avocados, chopped
1 small red onion, diced
1 red jalapeno, diced (remove seeds if you don’t want it really hot)
juice of ½ a lemon
salt and pepper to taste

In a large bowl, combine the corn kernels, creamed corn, eggs, cheddar cheese, paprika and salt; mix well.  Add the flour and baking powder; mix well.  Gradually stir in the milk until the batter is not too thick and drops off a spoon easily (it should also not be so thin that it spreads too much when you fry the cakes).  Heat a large frying pan and add some oil.  Fry spoonfuls of the batter until bubbles appear at the top; flip.  Allow to cook on the other side.  Remove from the pan once both sides are browned and cakes are fully cooked and place on paper towels to drain.  In the meantime, combine all the ingredients for the salsa and mix well.  Serve warm cakes with the avocado salsa.


Thursday, September 27, 2012

Slow Cooker Mexican Pulled Pork Tacos

This dish has got to be the most simple and yet tasty dish I've ever made and it cooks in a slow cooker or crock pot.  It's great if my family needs to eat at different times as the meat stays warm in the crock pot until they are ready to eat.  This is one of my new favorite recipes!


I found this recipe on Pinterest, but it originated at canyoustayfordinner.com.  I've already made a point of thanking her for sharing this recipe.  Three of us ate this for dinner one night, but my oldest son wasn't home for dinner that night so took some to work the next day for lunch.  He made a point of calling me to tell me how awesome his lunch was!  Needless to say, this recipe got all 9s on the Melnarik rating scale!


You won't believe how few steps there are to make this dish.  It begins with placing a pork tenderloin in the bottom of a crock pot.


In a medium bowl, the tomato sauce gets combined with the garlic, spices and sugar.


That mixture gets poured over the pork to completely cover it.  Put the lid on and cook it either on low for 8 hours or on high for 4 hours.  Then using a fork (most recipes call for 2 forks to shred, but this was so tender that it only needed one fork to shred) shred the meat into the sauce.  The meat was so tender, I was basically stirring it with my fork to shred it and mix it into the sauce.


To serve it, I put it in small flour tortillas and topped it with shredded cheddar cheese, sour cream, lettuce and tomatoes.  This has to be one of the tastiest tacos I've ever eaten!  Enjoy!


Slow Cooker Mexican Pulled Pork Tacos

1 lb. pork tenderloin
1 15 oz can tomato sauce

1 tablespoon chili powder

1 tablespoon ground cumin
1 tablespoon brown sugar
1 teaspoon cayenne pepper
½ teaspoon salt
3 cloves garlic, minced

Place pork in the bottom of your slow cooker.  In a small bowl, stir together all remaining ingredients.  Pour evenly over pork.  Cook on low for 8 hours or on high for 4 hours.  When done, shred the pork using two forks, pulling against the grain of the meat.  Serve in warmed tortillas with shredded lettuce, chopped tomatoes, grated cheddar cheese and sour cream.  Garnish with chopped scallions.


Monday, September 17, 2012

Italian Seasoned Super Sub

A couple of weeks ago, I posted a recipe for the sandwich my oldest son calls "The Holy Spirit Sandwich" (see Turkey Club Sandwich with Avocado Aioli).  Before I introduced him to that sandwich, this one was his favorite and he named it "The Jesus Sandwich" because it's that good!


I've been making this sandwich so many years that I don't remember where I found the recipe and the original copy has disappeared.  Luckily, I had typed it up for someone, so I had it saved in my computer.  This is one of my personal favorite sandwiches that I make and feel that the bread is what helps put this one at the top of my list.  This sandwich gets all 9s on the Melnarik rating scale.


For some reason, the pictures of the process of preparing the bread disappeared from my camera, so there is only the finished loaf pictured above.  It's a fairly easy process which begins by spraying a nonstick cooking spray on a baking sheet.  Then the bread dough is removed from the can and placed seam side down on the sprayed baking sheet.  Using a serrated knife, I cut 5 diagonal slices in the top of the loaf (they can be seen in the picture above), which allows for expansion as the bread bakes.  I then spray the top with additional nonstick cooking spray and in a small bowl combine the Parmesan cheese, oregano and garlic salt.  This mixture gets sprinkled on top of the loaf and it gets baked at 350°F for about 30 minutes.  It needs to be completely cool before assembling the sandwich.  When it's really hot outside, I bake the bread in the morning and once it's cooled completely, I wrap it in plastic wrap to keep it from drying out until I'm ready to assemble the sandwich in the evening.


Once cool, I cut the loaf in half horizontally.  The assembly begins by spreading the creamy Italian salad dressing on both halves of the bread.  When I couldn't find creamy Italian salad dressing in the market, I would make a mixture of mayonnaise and regular Italian salad dressing, which gave me the same result.


Then I begin layering the fillings.  I begin with the swiss cheese, overlapping so the cheese is in every bite.  I also think the tips that hang over the edge help give the sandwich a stuffed full of goodness look when it is completed.


The next layer is deli thin slices of ham.


This is followed by the bell pepper rings.  I overlap them also for the best coverage.


I angle and overlap the cheddar cheese slices as I did with the Swiss cheese.  I use the sharp cheddar cheese as I think it has more flavor.


Next is the Italian dry salami, where again I overlap each slice.


The sliced tomato goes on next.  I like to use the Roma tomatoes on this sandwich, but you can use any kind.


To make this sandwich faster to assemble, I use the prepackaged shredded lettuce on top.


I put the top half of the loaf on top and it's ready to cut and serve.  It even looks good from an aerial point of view!


Does this sandwich look like it's packed full of goodness, or what?  


I cut this sandwich into four equal pieces for my family.  I didn't measure them, but I'd say each piece is somewhere between 4 and 5 inches long.  I think this sandwich not only rivals but beats any sandwich you can buy at Subway or Jersey Mike's!  Enjoy!


Italian Seasoned Super Sub

BREAD
Nonstick cooking spray
1 (11 oz.) can Pillsbury Refrigerated Crusty French Loaf
2 tablespoons shredded fresh Parmesan cheese
½ teaspoon dried oregano leaves
¼ teaspoon garlic salt

FILLING
3 tablespoons purchased creamy Italian salad dressing
5 slices Swiss cheese
¼ lb. thinly sliced cooked ham
1 small green bell pepper, sliced into rings
5 slices cheddar cheese
¼ lb. sliced Italian dry salami
1 medium tomato, sliced
1 cup shredded lettuce

Preheat oven to 350°F.  Spray baking sheet with nonstick cooking spray.  Remove dough from can; place seam side down on baking sheet.  With sharp or serrated knife, cut 5 (1/4-inch deep) diagonal slices on top of dough.  Spray dough with nonstick cooking spray.  In small bowl, combine Parmesan cheese, garlic salt and oregano; mix well.  Sprinkle on top of bread dough.  Bake at 350°F for 26 to 30 minutes or until light golden brown.  Cool 20 minutes or until completely cooled.

Cut bread in half lengthwise.  Brush cut sides of bread with salad dressing.  Layer bottom half with Swiss cheese, ham, bell pepper, cheddar cheese, salami, tomato and lettuce.  Cover with top half of bread.  Cut into 4 pieces.


Mexican Chicken and Rice

When it's hot outside, I like to make dishes that don't heat up my kitchen by turning on the oven.  This dish is made entirely in one skillet on top of the stove, and it makes enough for the four of us plus lunch for one of us the next day!


This recipe came enclosed with one of my Quick Cooking magazines years ago.  This hearty dish is served family style where I put the skillet in the center of the table and everyone helps themselves.  The salsa and spices give this dish a Mexican flavor and the melted cheddar is the perfect topping.  This recipe gets 8s and 9s on the Melnarik rating scale.


In a large skillet, I combine the chicken, bell pepper and onion.  I cook them over medium-high heat until the chicken is no longer pink and the vegetables are crisp-tender.


Then I add my seasonings.  My cooking teacher way back in 7th grade said to always add the seasonings directly to the meat as it will adhere to it and therefore will be more evenly distributed in your dishes.  That made sense to me, so I've been doing it that way ever since!


Next, I add the salsa, stirring to make sure it's fully incorporated.


The corn gets added next, followed by the chicken stock.  I stir until everything is well combined.


Once everything comes up to a boil, I add the Minute Rice.


It's important, that all of the rice is submerged in the liquids of this dish to ensure it cooks properly.  


I cover the skillet and remove it from the heat for 5 minutes to let the rice cook.  Then I remove the lid and "fluff" the rice by stirring gently.  You can see that the rice has absorbed all of the liquid.


While the rice was cooking, I was shredding the cheese so I could sprinkle it on top as soon as the rice was cooked.  I replaced the lid to trap in the heat, so the cheese would melt more quickly, and brought the skillet to the table for serving.


There aren't too many ingredients or steps to this dish, so I can have it on the table in about 30 minutes. No, I'm not trying to compete with Rachel Ray.  I just wanted you to know how quickly this complete meal can be put together.  Enjoy!


Mexican Chicken and Rice

2 pounds boneless skinless chicken breasts, cut into 1-inch pieces
1 medium green pepper, diced
1 small onion, diced
2 tablespoons vegetable oil
1 can (8-3/4 oz.) whole kernel corn, drained
1 cup chicken broth
1 cup salsa
½ teaspoon salt
1 teaspoon chili powder
¼ teaspoon pepper
1-1/2 cups uncooked instant rice
1-1/2 cups shredded sharp cheddar cheese

In a large skillet, sauté chicken, green pepper and onion in oil until chicken is no longer pink and vegetables are crisp-tender.  Add corn, broth, salsa, salt, chili powder, and pepper; bring to a boil.  Stir in the rice; cover and remove from the heat.  Let stand for 5 minutes.  Fluff with a fork.  Sprinkle with cheese.  Cover and let stand for 3 minutes or until cheese is melted.