Showing posts with label Mexican. Show all posts

Friday, March 22, 2013

Crock Pot Mexican Chicken

I love using my crock pot to fix meals when I have to feed my family members at different times.  This particular dish is super easy to assemble, because there is no browning, or chopping required in getting this meal started.  This is also a good meal to make if you're on a tight budget.


I always like to give credit for the source of the recipes I make, but in this case, I don't have any idea where I got this one.  I think someone shared it with me, so if you recognize this as a recipe you gave me, let me know and I'll add your name to this post!  This dish gets all 8's on the Melnarik rating scale.


I begin by placing the chicken in my crock pot.  The recipe calls for boneless, skinless chicken breasts, but I used chicken tenders this time, because they were on sale!  Helpful tip:  When using a slow cooker, always put cold or room temperature foods in a cool crock pot, and if they are warm (browned meat, etc.) put them in a pre-warmed crock pot.  It takes a little while for the crock pot to come up to full temperature, so this helps ensure that the food cooks well from the beginning of the cooking time, and helps avoid bacteria from beginning to grow.


Directly on top of the chicken, I add the frozen corn (no need to defrost), the black beans which I drain and rinse, the canned tomatoes, as well as the seasonings (chili powder, cumin, oregano, cayenne pepper, salt, pepper, and minced garlic).  I place the lid on the crock pot and turn it on low for 8 hours.  If you don't have that much cooking time, it can be cooked on high for 4 hours.


About half an hour before the end of the cooking time, I cook 3 cups of white rice according to the package directions.  At the end of the cooking time, I remove the chicken and, using two forks, shred it and return it to the crock pot.  I thoroughly mix it into the vegetables and replace the lid to keep it warm while I shred some cheese and chop some cilantro.


To plate this dish, I put some white rice on the bottom, then add the Mexican chicken.  I top that with some shredded cheddar cheese and some chopped cilantro.  It's nice to come home to a dinner that needs very little attention to get it on the table!  Enjoy!


Crock Pot Mexican Chicken

1 ½ pounds boneless, skinless chicken breasts
1 (16 oz.) jar salsa
1 (15 oz.) can black beans, drained
½ pound (8 oz.) frozen corn
1 tablespoon chili powder
1 ½ teaspoons cumin
1 ½ teaspoons minced garlic
½ teaspoon dried oregano
¼ teaspoon cayenne pepper
¼ teaspoon salt
¼ teaspoon pepper
2 cups dry rice
8 oz. cheddar cheese, shredded
½ bunch cilantro, optional

Place chicken in a cool crock pot.  Add salsa, black beans and corn, making sure the chicken is covered.  Sprinkle chili powder, cumin, minced garlic, oregano, cayenne, salt and pepper on top.  Cover and cook on low for 8 hours or on high for 4 hours.  About ½ hour before the end of the cooking time, prepare rice according to package directions.  When fully cooked, remove chicken from crock pot and shred with 2 forks.  Stir back into ingredients in crock pot.  Serve over hot rice, adding shredded cheese and chopped cilantro to the top.

Friday, November 9, 2012

Mexican Chicken Soup

The weather has been crazy lately.  We think it's finally fall because the temperatures are down to a reasonable level, then a few days later we have 90 degree days again.  We had some rain and some cool days this week, so I figured that meant it was time to break out the soup recipes.


This Mexican Chicken Soup (some may call it a tortilla soup because there are tortillas in the soup plus crushed tortilla chips on top) is pretty tasty and it warms me from the inside out on a cold day.   This recipe originated in the Barefoot Contessa at Home cookbook.  The original recipe told how to roast chicken breasts to be added to this soup, but I substituted the breasts with the meat from a whole rotisserie chicken.  This saves on preparation time and the combination of white and dark meat gives this dish more flavor.  This soup gets 8's all around on the Melnarik rating scale.


I begin by placing the onions, carrots and celery in a Dutch oven and drizzle them with olive oil.  I cook these vegetables over medium heat until the onions are translucent.


Then, I add the garlic, stir it in and cook for an additional minute.


Next, I add the dry spices.  I didn't realize that the steam was a problem in getting a clear shot.  I guess I should have paid attention and taken a second shot.  The spices are at about 1 o'clock in this picture, in case you were wondering.


The next ingredient I add is the jalapeno peppers.


The peppers are followed by the can of crushed tomatoes.


It was hard to get a picture showing the chicken stock being added.  This picture makes it look more like tomato soup!  Trust me, this is where I added the chicken stock.


Then I added the fresh cilantro.  I also increased the heat to high here to begin to bring the soup to a boil.


The corn tortilla strips were added next.  You can tell by the froth that it won't be long until this soup is boiling.   Once it comes to a boil, I lower the heat and let it simmer for 25 minutes.


After simmering, I add the chicken and stir to combine.  I let it simmer for another couple of minutes to let the chicken heat through.  This makes a full Dutch oven of soup, so there's plenty for leftovers, to freeze or to share with friends.


The soup is ready to serve.  As you can see, there is plenty of chicken; enough to get some in each bite!  In fact, I let our neighbors have some and they commented on how great it was to have a nice amount of chicken in the soup.


I like to top mine with crushed tortilla chips first.


Then, some shredded Mexican blend cheese (Monterey Jack and Cheddar).


And I top the cheese with a dollop of sour cream and some avocado slices.  I think I'm going to borrow the old Campbell's slogan here and say Mmmm Mmmm Good!  Enjoy!


Mexican Chicken Soup

3 tablespoons olive oil
2 cups brown onions, chopped
1 cup celery, sliced
2 cups carrots, sliced
4 large garlic cloves, diced
1 teaspoon ground cumin
1 teaspoon ground coriander seed
2 jalapeno peppers, seeded and minced
1 (28 oz.) can crushed tomatoes
2 1/2 cups chicken stock
1/2 cup chopped fresh cilantro
6 (6-inch) white corn tortillas
1 rotosserie chicken, meat removed from bones and shredded
Toppings:
sliced avocado
sour cream
grated Mexican blend cheese (Monterey Jack and Cheddar)
tortilla chips

In a Dutch oven, cook onions, celery, and carrots in olive oil over medium heat for 10 minutes, stirring occasionally, until the onions are translucent.  Add the garlic and cook for an additional minute.  Add the cumin and coriander; stir to mix thoroughly.  Add the crushed tomatoes; stir.  Add the chicken stock and cilantro; stir.  Increase heat to high.  Cut the tortillas in half, then cut them crosswise into 1/2-inch strips and add to the soup; stir.  Bring the soup to a boil, then lower the heat and simmer for 25 minutes.    Add the chicken; stir to combine.  Heat through.  Serve the soup hot, topped with sliced avocado, a dollop of sour cream, grated cheese, and broken tortilla chips.

Thursday, September 27, 2012

Slow Cooker Mexican Pulled Pork Tacos

This dish has got to be the most simple and yet tasty dish I've ever made and it cooks in a slow cooker or crock pot.  It's great if my family needs to eat at different times as the meat stays warm in the crock pot until they are ready to eat.  This is one of my new favorite recipes!


I found this recipe on Pinterest, but it originated at canyoustayfordinner.com.  I've already made a point of thanking her for sharing this recipe.  Three of us ate this for dinner one night, but my oldest son wasn't home for dinner that night so took some to work the next day for lunch.  He made a point of calling me to tell me how awesome his lunch was!  Needless to say, this recipe got all 9s on the Melnarik rating scale!


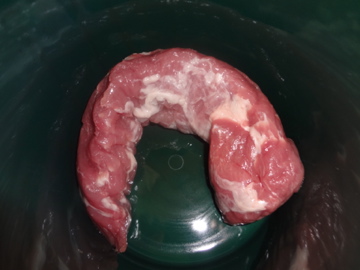
You won't believe how few steps there are to make this dish.  It begins with placing a pork tenderloin in the bottom of a crock pot.


In a medium bowl, the tomato sauce gets combined with the garlic, spices and sugar.


That mixture gets poured over the pork to completely cover it.  Put the lid on and cook it either on low for 8 hours or on high for 4 hours.  Then using a fork (most recipes call for 2 forks to shred, but this was so tender that it only needed one fork to shred) shred the meat into the sauce.  The meat was so tender, I was basically stirring it with my fork to shred it and mix it into the sauce.


To serve it, I put it in small flour tortillas and topped it with shredded cheddar cheese, sour cream, lettuce and tomatoes.  This has to be one of the tastiest tacos I've ever eaten!  Enjoy!


Slow Cooker Mexican Pulled Pork Tacos

1 lb. pork tenderloin
1 15 oz can tomato sauce

1 tablespoon chili powder

1 tablespoon ground cumin
1 tablespoon brown sugar
1 teaspoon cayenne pepper
½ teaspoon salt
3 cloves garlic, minced

Place pork in the bottom of your slow cooker.  In a small bowl, stir together all remaining ingredients.  Pour evenly over pork.  Cook on low for 8 hours or on high for 4 hours.  When done, shred the pork using two forks, pulling against the grain of the meat.  Serve in warmed tortillas with shredded lettuce, chopped tomatoes, grated cheddar cheese and sour cream.  Garnish with chopped scallions.


Monday, September 17, 2012

Mexican Chicken and Rice

When it's hot outside, I like to make dishes that don't heat up my kitchen by turning on the oven.  This dish is made entirely in one skillet on top of the stove, and it makes enough for the four of us plus lunch for one of us the next day!


This recipe came enclosed with one of my Quick Cooking magazines years ago.  This hearty dish is served family style where I put the skillet in the center of the table and everyone helps themselves.  The salsa and spices give this dish a Mexican flavor and the melted cheddar is the perfect topping.  This recipe gets 8s and 9s on the Melnarik rating scale.


In a large skillet, I combine the chicken, bell pepper and onion.  I cook them over medium-high heat until the chicken is no longer pink and the vegetables are crisp-tender.


Then I add my seasonings.  My cooking teacher way back in 7th grade said to always add the seasonings directly to the meat as it will adhere to it and therefore will be more evenly distributed in your dishes.  That made sense to me, so I've been doing it that way ever since!


Next, I add the salsa, stirring to make sure it's fully incorporated.


The corn gets added next, followed by the chicken stock.  I stir until everything is well combined.


Once everything comes up to a boil, I add the Minute Rice.


It's important, that all of the rice is submerged in the liquids of this dish to ensure it cooks properly.  


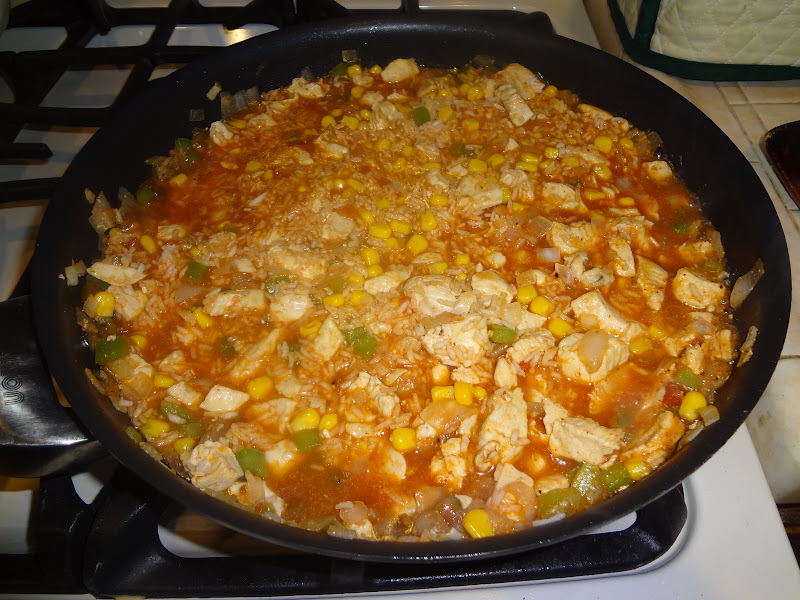
I cover the skillet and remove it from the heat for 5 minutes to let the rice cook.  Then I remove the lid and "fluff" the rice by stirring gently.  You can see that the rice has absorbed all of the liquid.


While the rice was cooking, I was shredding the cheese so I could sprinkle it on top as soon as the rice was cooked.  I replaced the lid to trap in the heat, so the cheese would melt more quickly, and brought the skillet to the table for serving.


There aren't too many ingredients or steps to this dish, so I can have it on the table in about 30 minutes. No, I'm not trying to compete with Rachel Ray.  I just wanted you to know how quickly this complete meal can be put together.  Enjoy!


Mexican Chicken and Rice

2 pounds boneless skinless chicken breasts, cut into 1-inch pieces
1 medium green pepper, diced
1 small onion, diced
2 tablespoons vegetable oil
1 can (8-3/4 oz.) whole kernel corn, drained
1 cup chicken broth
1 cup salsa
½ teaspoon salt
1 teaspoon chili powder
¼ teaspoon pepper
1-1/2 cups uncooked instant rice
1-1/2 cups shredded sharp cheddar cheese

In a large skillet, sauté chicken, green pepper and onion in oil until chicken is no longer pink and vegetables are crisp-tender.  Add corn, broth, salsa, salt, chili powder, and pepper; bring to a boil.  Stir in the rice; cover and remove from the heat.  Let stand for 5 minutes.  Fluff with a fork.  Sprinkle with cheese.  Cover and let stand for 3 minutes or until cheese is melted.


Friday, May 25, 2012

Chicken Taco Burgers and Mission Baked Beans


We had a couple of hot days, so I decided to heat up the grill for dinner and make Chicken Taco Burgers.  For side dishes I made Mission Baked Beans and a Mexican Salad, which I will share with you in a separate post.  The recipe for the Chicken Taco Burgers came from the Taste of Home August/September 2009 issue and I cut out the Mission Baked Beans recipe from a magazine.  The author was Mrs. Charles Lewis of Yucaipa, CA.


These recipes compliment each other nicely.


I began with the baked beans because it takes a while for them to cook.  I know, baked beans should be baked, but when it's hot outside I resist turning on the oven and converted this recipe to cook on top of the stove.


This recipe calls for cooked and crumbled bacon, so I begin with that.  I've decided that by cutting the bacon into small strips before cooking them, I get uniform sized pieces that are a bit bigger than when the bacon is cooked first and then crumbled.  This means that you get more bacon flavor in each bite of the dish, and we all love the taste of bacon!


While I prepare the rest of the ingredients, I stir the bacon occasionally as it renders, so that it doesn't stick to the bottom of the saucepan.


Once the bacon is fully cooked. I put it on several paper towels to absorb the excess fat.  I used to put the bacon fat in a bowl and throw it in the trash can once it cooled.  On Pinterest, I discovered that I can line my little bowl with foil, so when the fat has cooled and is solid, I can wrap it up in the foil to throw it away and then I don't have a bowl to wash!


All of the ingredients, other than the cheese, go into the saucepan.  I mix them gently and bring them to a boil over high heat.  Once it reaches a full boil, I turn the heat down to low to let the beans simmer for 45 minutes.  I know this seems like a long time, but the onions need to cook so they aren't crunchy and it needs to reduce to a thick baked bean consistency.  While the beans simmer, I stir them every once-in-a-while so they don't stick to the pan and begin working on the main course, the Chicken Taco Burgers.


These burgers are simple to make and are healthy because they're made from ground chicken.  I place all of the ingredients in a bowl large enough to give me room for mixing.  I've tried using a spoon and a spatula for this, but find that clean hands (minus rings) are the best tools for getting this completely mixed.


You'll know it's fully mixed when you no longer see any areas with the light pink chicken meat.  The taco seasoning and chili powder will give it a darker hue.  The mixture at this point is very soft, much softer than hamburger meat which is easily pressed into patties.


The first time I made these burgers, I tried patting them out on a cutting board, but they stuck to the board and when I tried to lift them off with a spatula, it altered the round shape.  Then I discovered a product called Dispens-a-wax that I found at Smart & Final.  They are 5-inch square pieces of paper that are somewhere between wax paper and parchment paper, and are oh, so handy.  There are 1,000 sheets in the box, so it will last me a very long time.  I even use them when making regular burgers, to put between patties so they don't stick to one another.  They are a real time saver.  With these soft burgers, I put the paper on my cutting board and gently press out the shape of the burger.


Not only do they not stick to my cutting board, but these little sheets of paper make it easier to get them on the grill!  I flip them over onto the grill and then gently peel back the paper and discard it.  I know there is a little bit of waste of meat sticking to the paper, but I feel it far outweighs the hassles I described above!


Because these patties are so soft, they can't be flipped too soon!  I keep them on the grill over medium heat for 5 minutes before even attempting to turn them.  From the picture above, you can tell that after that amount of time, they look more "solid" than the previous picture.


You can see that those aren't just grill marks on the first side, but deep groves due to the softness of the patties.  I grill them for an additional 5 minutes and then flip them again before adding the cheese.  I just think that the melted cheese looks better on the smoother side as opposed to this side with the deep ridges.


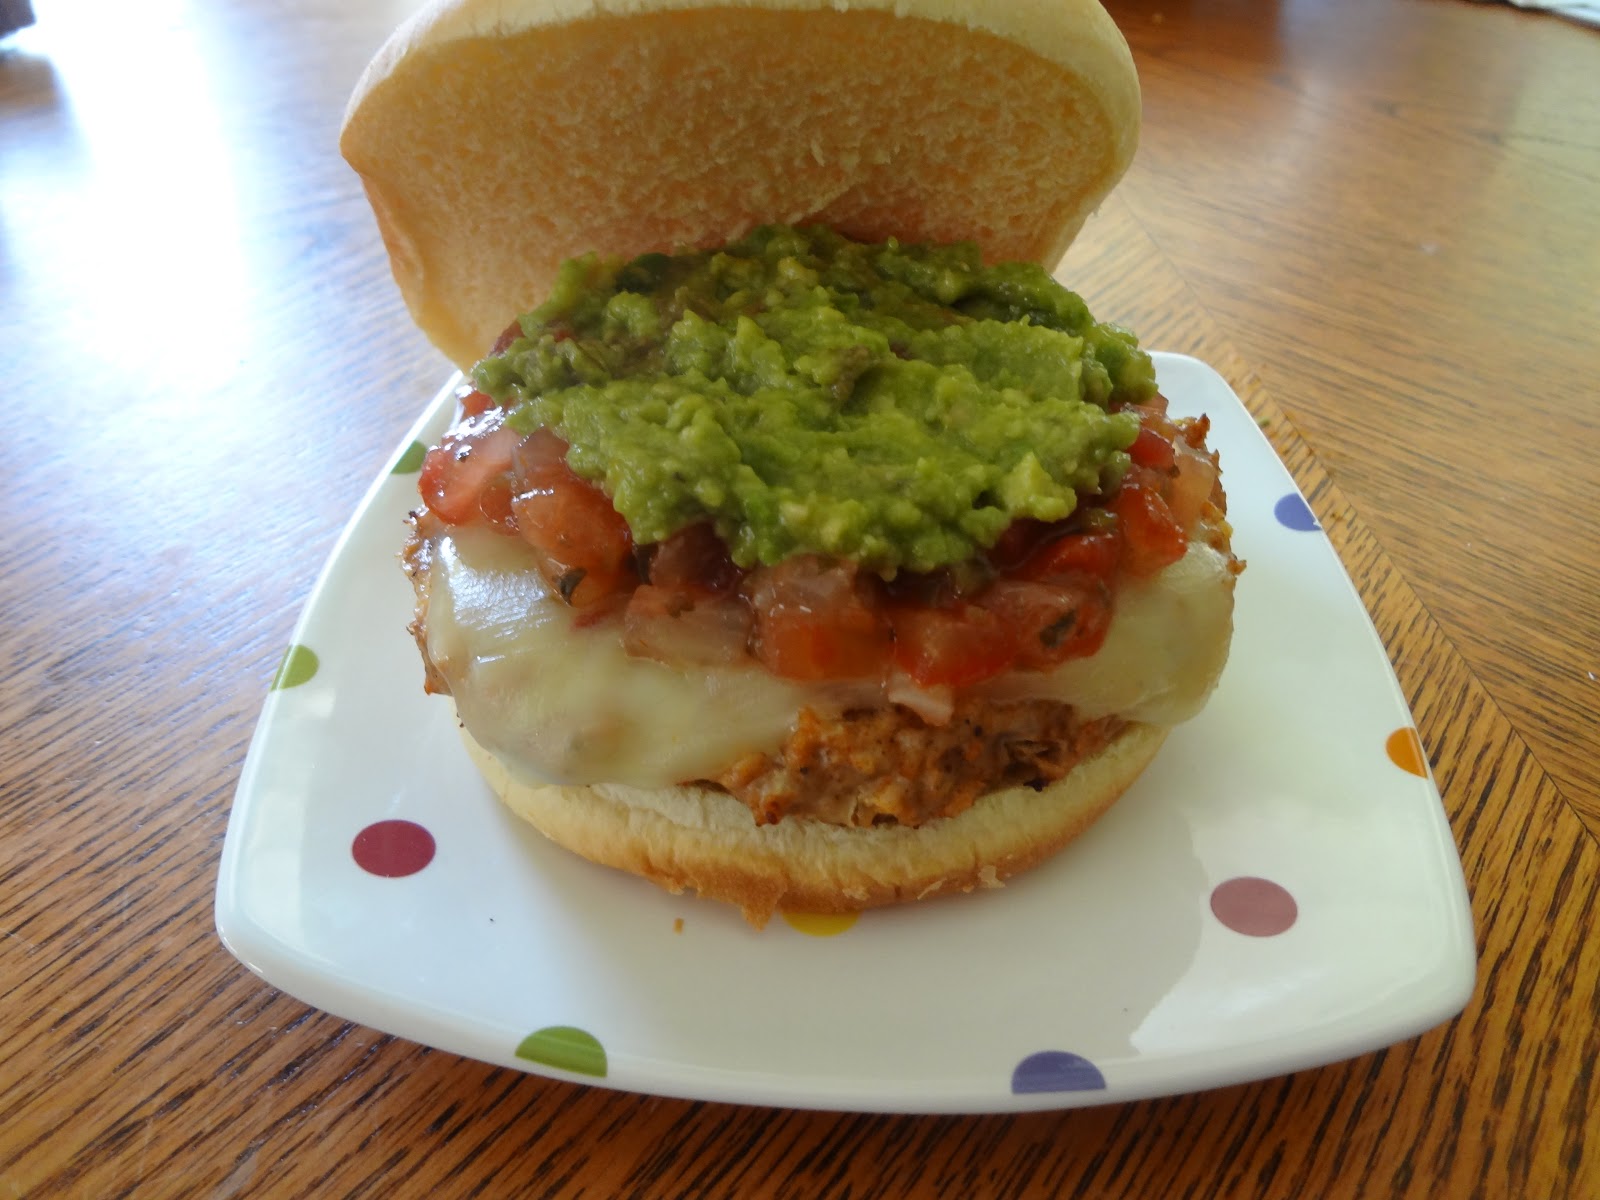
Because it's a taco burger, the normal condiments just won't do.   We always add salsa and if I make fresh guacamole, we add that too!  I forgot to take a picture of the beans once I added the cheese, but the picture at the top shows how wonderful and thick these beans are when they are ready to serve. The spices and enchilada sauce give them a Mexican flavor that makes them a perfect addition to the Taco Burgers.   Enjoy!

Again, I also made my Mexican Salad to complete the meal, but will share that recipe at another time.  On extremely hot days, it's a cool main dish that I serve with fresh quesadillas.  As we near summer and the heat rises, I'm sure I'll be adding it to my blog, so stay tuned!


Chicken Taco Burgers

½ cup finely chopped onion
1 pkg. taco seasoning
2 cloves garlic, minced
½ tsp pepper
2 lbs. ground chicken
1 egg, beaten
8 slices pepper-jack cheese
1 pkg. (8) hamburger buns
Salsa and/or guacamole for toppings

In a large bowl, combine the first 6 ingredients, mixing thoroughly.  This mixture will be soft.  Shape into 6 patties.  Grill patties, covered, over medium heat for 5 minutes.  Flip and grill, covered, an additional 5 minutes; top with cheese, cover and grill for 1 minute to melt cheese.  Place on buns and top with salsa and/or guacamole.


Mission Baked Beans

8 slices bacon, cooked and crumbled
1 can (28 oz.) pork and beans
1 can (15 ½ oz.) chili beans, undrained
¾ cup finely chopped onion
½ cup packed dark brown sugar
1 can (10 oz.) enchilada sauce
1 tablespoon all-purpose flour
2 teaspoons chili powder
1 teaspoon ground cumin
1/8 teaspoon garlic powder
1 cup (4 oz.) shredded Monterey Jack cheese

Combine all ingredients, except cheese, in a large saucepan or Dutch oven; mix gently.  Bring to a boil over high heat; reduce heat and simmer for 45 minutes, stirring frequently so the beans don’t stick to the bottom of the pot. Sprinkle with cheese before serving.

Friday, February 17, 2012

Heart-Shaped Mexican Pizza


We typically don't go out to dinner on Valentine's Day, as the restaurants are usually crowded so the wait is long.  Each year I try to make something where I can cut something into a heart or decorate the meal with hearts.  This year, I found a recipe on Pinterest for a Mexican Pizza.  It originated at allrecipes.com and was called Jimmy's Mexican Pizza.  I doubled the recipe to have enough for my family.  The recipe is printed below.


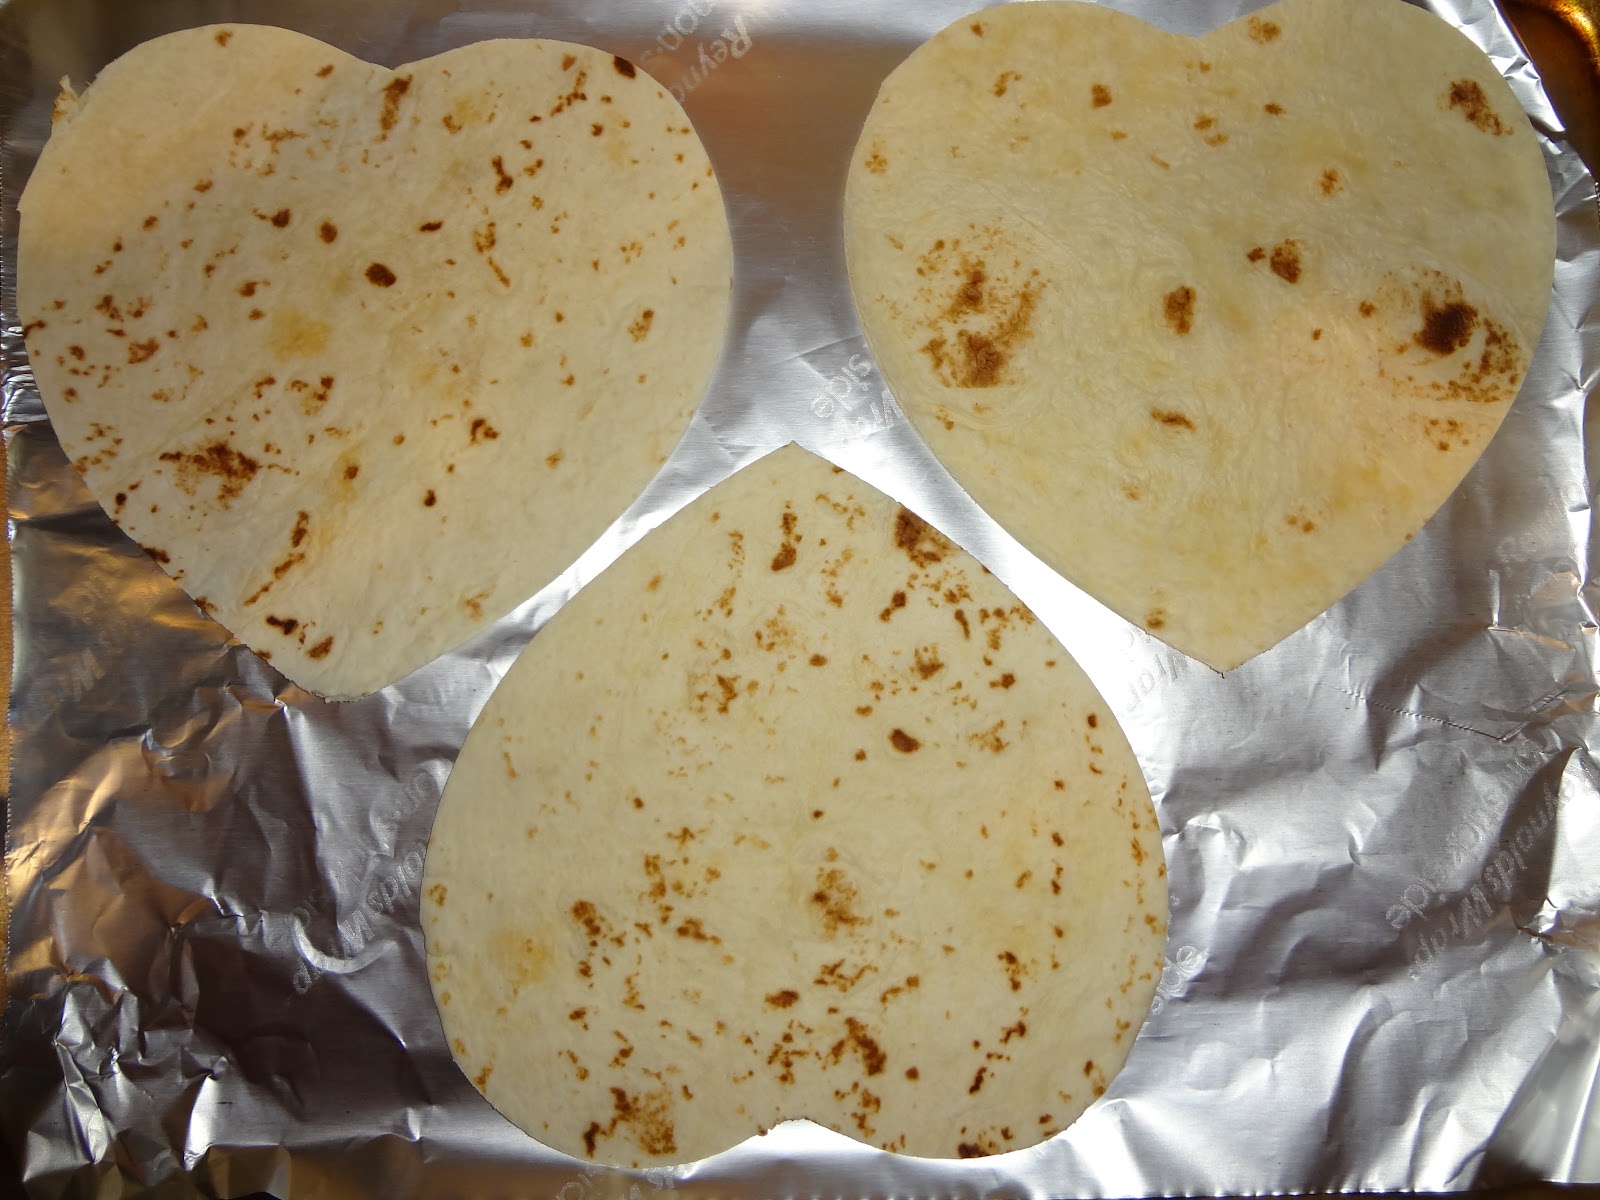
The recipe calls for 10-inch (medium - soft taco) tortillas.  I turned a heart-shaped plate upside-down on top of each tortilla and used a sharp knife to cut them into hearts.  Two tortillas are needed for each pizza.  Instead of using a pie plate for each one, I put them on a foil-lined baking sheet.  I used the Reynolds Non-stick Aluminum Foil.


While I had the ground beef, onions, garlic, and spices cooking in a large saucepan on the stove, I spread each tortilla with the refried beans.


When the meat mixture was ready, I applied a layer on top of the beans.


Next I put another tortilla on top of that and put the baking sheet in the pre-heated oven at 350 degrees for 10 minutes.  While that was in the oven, I cut my tomatoes and green onions.


Once out of the oven, I added a layer of salsa.  Our salsa of choice is Chachi's Salsa Pico de Gallo (medium heat).  


The recipe calls for Monterey Jack and Cheddar cheeses, but I opted for the pre-shredded Mexican cheese blend.  This was added on top of the salsa.


Next I put on the chopped tomatoes and green onions.  Back into the oven for another 5 minutes to melt the cheeses.


I served each one on a cute heart-shaped plate.  Believe me, they tasted as good as they looked.  Although I usually follow a recipe exactly the first time I try it, I did omit the diced jalapeno (we got enough heat from the salsa) and I may have used more cheese, tomato and green onion than the recipe called for, because I know my family's tastes.  This is definitely something I would make again, although I probably won't always take the time to make it heart-shaped. Enjoy!


Mexican Pizza
Ingredients
·       1/2 pound ground beef
·       1 medium onion, diced
·       1 clove garlic, minced
·       1 tablespoon chili powder
·       1 teaspoon ground cumin
·       1/2 teaspoon paprika
·       1/2 teaspoon black pepper
·       1/2 teaspoon salt
·       1 (16 ounce) can refried beans
·       4 (10 inch) flour tortillas
·       1/2 cup salsa
·       1 cup shredded Cheddar cheese
·       1 cup shredded Monterey Jack cheese
·       2 green onions, chopped
·       2 roma (plum) tomatoes, diced
·       1/4 cup finely chopped jalapeno peppers
·       1/4 cup sour cream (optional)

Directions
1.     Preheat the oven to 350 degrees F (175 degrees C).   Coat 2 pie plates with non-stick cooking spray.
2.     Place beef, onion and garlic in a skillet over medium heat.   Cook until beef is evenly browned.   Drain off grease.  Season the meat with chili powder, cumin, paprika, salt and pepper.
3.     Lay one tortilla in each pie plate, and cover with a layer of refried beans.   Spread half of the seasoned ground beef over each one, and then cover with a second tortilla.   Bake for 10 minutes in the preheated oven.
4.     Remove the plates from the oven, and let cool slightly.   Spread half of the salsa over each top tortilla.   Cover each pizza with half of the Cheddar and Monterey Jack cheeses.   Place half of the tomatoes, half of the green onions, and half of the jalapeno slices onto each one.
5.     Return the pizzas to the oven, and bake for 5 to 10 more minutes, until the cheese is melted.   Remove from the oven, and let cool slightly before slicing each one into 4 pieces.