Showing posts with label Taco. Show all posts

Friday, December 28, 2012

Taco Fiesta Chicken Lasagna

I know that lasagna is traditionally an Italian dish, but just to be different, I enjoy making this lasagna with a Mexican flavor.  The nice thing about this recipe is that it needs to be prepared the day before, so there is no real work the day you serve it as it only needs to be baked.  That makes it a great dish when having guests for dinner.  While the lasagna is in the oven, an appetizer can be prepared or a fresh salad can be tossed as an accompaniment.


I found this recipe in one of those little recipe books which are sold at the register in the market.  This is a go to dish when I know I won't have a lot of time to prepare a full meal, especially when I'm serving more than just our little family.  The nice thing is that there are usually leftovers for another meal or lunches.  My guys give this 8's and 9's on the Melnarik rating scale.


In a large bowl, I combine the tomatoes and taco sauce.


To that, I add the cubed chicken, stirring to combine.  This can be leftover chicken, or sometimes, I use the grilled chicken strips that are sold in the market.


In a medium bowl, I combine the refried beans and sour cream.


To assemble the lasagna, I begin by spraying a 9-x13-inch baking dish with nonstick spray.  Then I spread about 1 cup of the chicken mixture in the bottom of the pan.


Next, I add 5 lasagna noodles, breaking them to fit in the rounded corners of the pan.


I add 1/2 of the bean mixture over the noodles, spreading as evenly as possible.


I then add 1 1/2 cups of the chicken mixture over the bean layer.  I know it's hard to add this evenly, but do the best you can.


About 1 cup of the cheese is sprinkled evenly on top of the last layer.


That is followed by half of the onions, distributing them as evenly as possible.


Then I repeat with another layer of noodles, broken to fit.


The rest of the bean mixture is added next.


This is followed by another 1 1/2 cups of the chicken mixture.


Another cup of cheese is sprinkled on top of the chicken mixture.
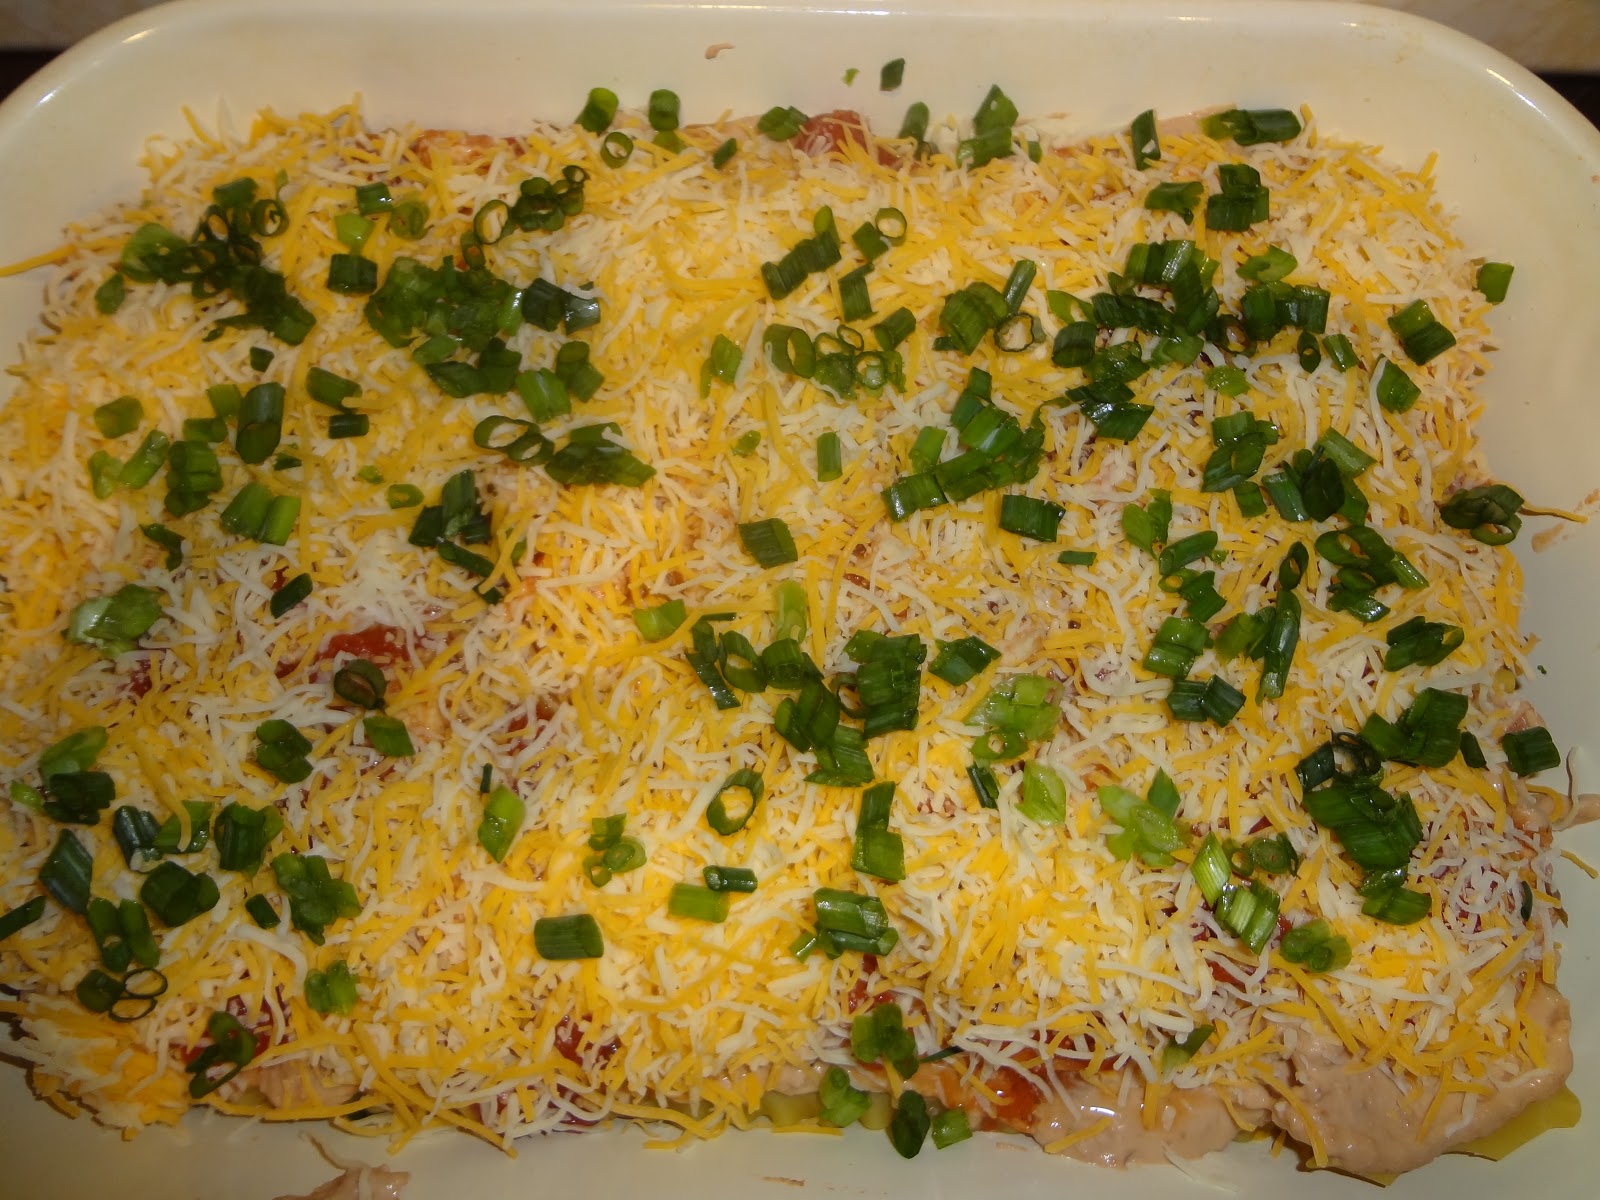

The last of the onions get added next.


The last layer of noodles goes on next, again breaking to fit.


This layer gets topped with the last of the chicken mixture, and I still had some green onions, so I added them.


The last layer is the rest of the cheese.  It's important to make sure that the final layer of noodles is completely covered.  I then cover the entire dish with the nonstick aluminum foil and place it in the refrigerator until baking time the next day.  If you do not have the nonstick foil, you can spray regular foil with a nonstick spray and put it on the dish spray side down.


This dish does take a considerable amount of time to bake, so allow for that.  Part of the reason is that it's been in the refrigerator, so it takes longer to heat before the cooking begins.  For this reason, I put it in the oven, then turn it on, so that as the oven heats, it can begin to heat up the lasagna also.  It gets baked covered at 350°F for 50 minutes.  Then it gets uncovered and baked about another 20 minutes.  It's easier to cut when I let it sit about 10 minutes before cutting.


Each piece can be topped with fresh cilantro, sour cream, chopped tomato and/or shredded lettuce.  Fiesta means party and with all the vibrant colors in this lasagna, it's like having a party on your plate!  Enjoy!


Taco Fiesta Chicken Lasagna

2 (14 ½ oz.) cans diced tomatoes with mild green chiles, undrained
¼ cup taco sauce
3 cups cubed cooked chicken
1 (16 oz.) can refried beans
½ cup sour cream
15 uncooked lasagna noodles
12 oz. (3 cups) shredded Mexican cheese blend (Monterey Jack and Cheddar)
½ cup chopped green onions
2 tablespoons chopped fresh cilantro

Spray a 9-x13-inch (3 quart) glass baking dish with nonstick cooking spray.  In a large bowl, combine tomatoes and taco sauce; mix well.  Stir in chicken.  In a medium bowl, combine refried beans and sour cream; mix well.

Spread about 1 cup chicken mixture in bottom of sprayed baking dish.  Top with 5 uncooked noodles, breaking to fit if necessary.  Spread with half of bean mixture and 1 ½ cups chicken mixture.  Sprinkle with 1 cup of the cheese and half of onions.

Layer 5 more noodles, remaining bean mixture, 1 ½ cups chicken mixture and 1 cup cheese.  Top with remaining 5 noodles, chicken mixture, onions, and cheese.  (Be sure top noodles are covered.)  Spray a 15-x12-inch sheet of foil with cooking spray and cover dish with sprayed side down.  Refrigerate at least 8 hours or overnight.

Heat oven to 350°F.  Bake covered lasagna for 50 minutes.  Uncover baking dish; bake an additional 18 to 22 minutes or until bubbly and thoroughly heated.  Let stand 10 minutes before serving.  Sprinkle with cilantro.  If desire, garnish each serving with dollop of sour cream, chopped tomato and shredded lettuce.

Taco Soup

This is one of my favorite soups.  It's hearty and oh so flavorful, but the best part is that it's so simple to make.  Even kids like this soup because it has all the flavors of a taco.


This recipe came to me by way of an advertisement for a cookbook that showed up in the mail.  I never order cookbooks that way, but I will keep any recipe they share in order to entice me.  This was one of those recipes I saved and tried later.  If I had thought that all of the recipes in the cookbook would have been as flavorful and wonderful as this one, I would have ordered a copy!  This recipe was a winner from the start and it gets all 9's on the Melnarik rating scale.


I begin by combining the ground beef and onion in a Dutch oven and cooking it over medium-high heat.  As it cooks, I stir it occasionally, breaking up the meat.  When fully cooked, I drain off the fat and discard it.


To the meat I add the taco seasoning and the Ranch dressing mix.  Years ago, my first cooking teacher said it was best to add spices and seasonings directly to the meat so that it gets seared to it and is evenly distributed.  I was a good student and still do it that way today.


I thought I'd throw in a picture of the chili beans I use in this dish.  This brand has a great flavor and since 3 cans are used in this soup, it is a major contributor to the flavor of the final product.


After returning the heat to medium-high, I add to the seasoned beef and onions, the chili beans, stirring to combine.


I then add the tomatoes and tomato sauce, and stir to combine.


Next, I add the corn and the green chilies, again, stirring to combine.  


After stirring in the water, I bring it to a boil.  Then I reduce the heat and simmer it for 15 minutes.  During this time, I shred the lettuce and cheese and cut the tomatoes.


When it's ready to serve, this is how we like to top our soup.  We begin with the soup in the bowl.


We then top it with Fritos.  The recipe calls for corn chips, but the picture on the original showed Fritos, so that's what we use.  Any corn chip may be used.


Then we add some shredded sharp Cheddar cheese.


We follow that up with the shredded lettuce.  I know, I thought it was weird to add lettuce to soup, too.    Trust me, it just adds to the taco flavor of the soup.  I've served this to many people, who have tried it without the lettuce and then with it once I've convinced them and they say it's much better with it added.


Next on are some diced tomatoes.


The last ingredient is the sour cream.  I know you can hardly see the soup any more!  But, when you eat this all together, it truly has the flavor of tacos.


There aren't too many soups that are as flavorful as this one.  Plus, it's stick-to-your-ribs good!  Enjoy!


Taco Soup

1 pound ground beef
1 large onion, chopped
3 (15 ½ oz.) cans chili beans
1 ( 15 ¼ oz.) can whole kernel corn, undrained
1 (15 oz.) can tomato sauce
1 (14 ½ oz.) can diced tomatoes, undrained
1 (4.5 oz.) can chopped green chilies
1 ( 1 ¼ oz.) envelope taco seasoning mix
1 (1 oz.) envelope Ranch-style dressing mix
1 ½ cups water

Toppings:

Corn chips, shredded lettuce, chopped tomato, sour cream, shredded Cheddar cheese

Cook beef and onions in a Dutch oven over medium-high heat until meat is browned and onions are tender, stirring until meat crumbles; drain.

Stir beans and next 7 ingredients into beef mixture; bring to a boil.  Reduce heat, and simmer, uncovered, 15 minutes, stirring occasionally.  In the meantime, shred lettuce and cheese and chop tomatoes.

Spoon soup into bowls; top with desired toppings.


Saturday, October 27, 2012

Taco Cornbread Squares

I know when my boys were younger, if I tried a new recipe that would in any way taste like tacos, it was sure to please.  This is one of those recipes.  I hadn't made this dish in quite some time, but as my guys gobbled it up they were raving about it.


This casserole really makes a pretty presentation with all of the vivid colors.  I got this recipe from a co-worker years ago and my guys liked it from the first time I made it.  Back then, I wasn't asking them to rate new recipes, but now this dish gets 8's and 9's on the Melnarik rating scale.


I begin by putting the ground beef and chopped onion in pan and cooking then until the meat is browned and the onions soft and translucent.


While that is cooking, I begin to prepare the cornbread for the first layer of the casserole.  In a medium bowl, I combine the milk and the egg, stirring to break up the egg yolk.


I add the cornbread mix to that and stir to combine.


This cornbread mixture gets poured into a greased 9-inch square pan and is put in the oven to bake at 350° for 15 minutes.


While the cornbread is in the oven and once the meat and onions are cooked, I drain off the fat.  Then I add the taco seasoning, mixing thoroughly to combine.


To the meat mixture I add the refried beans, mixing thoroughly.  Once combined, I let that simmer until the cornbread is ready to come out of the oven.


In the meantime, I put the sour cream in a medium bowl.


To the sour cream, I add 1 cup of the shredded cheese, mixing well to combine.


When the cornbread comes out the oven, it should not be browned yet as it will be going back into the oven again.  However, it should be fully baked so that it's ready to take the next layers.


The meat mixture gets spread directly on top of the cornbread layer.  I apologize, I must have forgotten to take a picture of the next layer, which is the sour cream and cheese layer.  This goes on next and the dish gets put back in the oven for an additional 20 to 25 minutes until it is heated through and the cheese is melted.


When the casserole comes out of the oven, it's ready to dress with the remaining cheese, shredded lettuce and tomatoes.  If one of my boys has a friend join us for dinner, I add the toppings directly to the casserole assuming the entire thing will be eaten at the one sitting.  But, if I expect leftovers, we apply the toppings to each individual serving so that the casserole can be reheated in the microwave and the toppings added later.  Enjoy!


Taco Cornbread Squares

1 lb. ground beef
1 medium onion, chopped
1 package (8.5 oz.) cornbread/muffin mix
1 egg
1/3 cup milk
1 envelope taco seasoning mix
1 can (1 lb.) refried beans
1 cup (8 oz.) sour cream
1-1/2 cups (6 oz) shredded cheddar cheese, divided
1 medium tomato, chopped
1 cup shredded lettuce

Preheat oven to 350°.  In a large saucepan, brown ground beef and onions until meat is no longer pink; drain.  In the meantime, in a medium bowl, combine the cornbread mix, egg and milk.  Spread in a greased 9-inch square baking pan.  Bake at 350° for 15 minutes.  Once the meat is cooked and drained, add the taco seasoning and mix well.  Add the refried beans and mix well.  Spread over cornbread.  Combine sour cream with 1 cup of cheese; spread over meat mixture.  Bake for 20 – 25 minutes or until heated through and cheese is melted.  Top with remaining cheese, lettuce and tomatoes.

Tuesday, July 3, 2012

Taco Turkey Sandwich on Herb Flatbread

When the weather is hot, one of the best things to make and eat is a nice cool sandwich.  The bread is one of the things that really makes this sandwich and it's quite easy because it starts with store-bought dough.  I found the recipe for the flatbread in the Pillsbury 39th BAKE-OFF contest cookbook and altered it slightly for my family's tastes.  The idea for the rest of the sandwich came from one that was pictured in a magazine years ago.


This is a family favorite, getting all 9's on the Melnarik rating scale!  This recipe makes 6 sandwiches, but I double it, using two cans of pizza dough and adding the herb mixture to one of them, when I have to feed more people.  If I take it to a large gathering of people such as our annual beach trip, I cut the pieces smaller in order to share with even more people.


I don't want to roll out the dough until I have all of my topping ingredients ready.  Dried rosemary comes in full leaf form, so I use my mortar and pestle to crush the leaves into smaller pieces.


In a small bowl, I mix together the rosemary, basil, salt, garlic and olive oil.


Then, I dice one Roma tomato, place it in another small bowl and with the back of a spoon, crush the pieces slightly.  This is so that the tomato seems to become "one with the bread" instead of just "sitting on top" of it.


Now I'm ready to prepare the dough. I remove it from the can and place it on a non-stick baking sheet, or one sprayed with a non-stick coating.  As you can see from this picture, the dough doesn't always come out of the can looking perfect!


Using my fingers, I repair any holes and starting in the center, press the dough out to form a 12 x 8-inch rectangle.  I use a small rolling pin to make it smooth and to refine the shape.


Next, I cut the dough in half to make a piece for the bottom of the sandwich and one for the top.  Using a spoon, I apply the herb mixture to the piece of dough intended to be the top; using the back of the spoon, I spread this mixture as evenly as possible over the dough.  The tomatoes get sprinkled on top and pressed lightly into the dough.


Into the oven it goes for 9 minutes or until lightly golden brown around the edges.  Tip:  Do not over bake!  Believe me, I've done this in the past.  It didn't look completely baked so I left it in the oven until it was more brown.  This made it much more "crisp" and nearly impossible to cut!  The dough is thin, so it doesn't take long to bake completely.  After a couple of minutes of cooling on the baking sheet, I remove the pieces to a cooling rack to cool completely.  This doesn't take too long, because the bread is so thin.


While the bread cools, I mix together the mayonnaise, sour cream and taco seasoning to make the spread.


I put the bottom piece of bread (the one without the herbs and tomatoes) on a cutting board and spread half of the taco seasoning mixture to the edges.


I cut the remaining three tomatoes into very thin slices and layer them on top of the spread.


The next layer is the turkey.  This can be sliced turkey breast or, as I've used here, the thinly sliced turkey available at the deli.  I fold each slice in half and make two layers covering evenly.


Next on is the pepper jack cheese.  This adds a little kick to the sandwich.  If you prefer not to have any heat at all, you can substitue regular Monterey Jack cheese for the Pepper Jack cheese.  I highly suggest you try it this way first.


Sharp cheddar slices are added next.  My husband isn't so keen on the sharp cheddar, so I make one of the slices medium cheddar.  I just have to remember which corner I put it on so he gets that sandwich once I cut it up.


The rest of the taco seasoning mixture gets spread on the top piece of bread.  Tip:  Invert the top piece on top of the cheddar cheese when adding the spread, that way, if any of the herbs or tomatoes fall off, they land on the cheese, so they are still contributing flavor to the sandwich!


At this point, if the entire sandwich is being served right away, I add lettuce leaves and cut the entire thing into six sandwiches.  If, however, we are not all eating at the same time and/or some will be eaten as leftovers the next day, I cut the sandwich into six pieces and add the lettuce to the individual sandwiches just before serving.  I simply don't like wilted lettuce leaves in my sandwiches and I assume everyone else feels the same way!


The combination of the wonderful flavor of the flatbread with the taco seasoning spread and the mild kick of the pepper jack cheese make this sandwich a winner!  Enjoy!


Taco Turkey Sandwich
on Herb Flatbread

1 (10 oz.) can Pillsbury Refrigerated Pizza Crust
1 teaspoon dried rosemary leaves, crushed
1 teaspoon dried basil leaves
1 teaspoon minced garlic
1/8 teaspoon salt
1 tablespoon olive oil
4 Roma tomatoes, divided
2 tablespoons mayonnaise
2 tablespoons sour cream
1 teaspoon taco seasoning
8 ounces thinly sliced cooked turkey
6 slices (4 oz.) Pepper Jack cheese
6 slices (4 oz.) sharp cheddar cheese
Fresh lettuce leaves

Preheat oven to 425°.  Spray a baking sheet with non-stick cooking spray.  Open can of dough and unroll it, placing it on the baking sheet.  Starting at the center, press out dough with hands to form a 12 x 8-inch rectangle.  Cut dough in half with a sharp knife to create 2 equal pieces; one for the top and one for the bottom of the sandwich.  In a small bowl, combine rosemary, basil, garlic, salt and oil; mix well.  Apply the herb mixture to one piece of dough, using the back of a spoon to spread evenly over the dough.  Dice one of the tomatoes and sprinkle evenly over the dough, pressing slightly into the dough.  Bake at 425° for 9 minutes or until edges are light golden brown.  Cool completely.

In a small bowl, combine mayonnaise, sour cream, and taco seasoning.  Place bottom piece of dough (without herbs) on a work surface; spread with half of the taco seasoning mixture.  Thinly slice the remaining tomatoes; apply evenly.  Add the turkey evenly, top with both cheeses.  Add lettuce leaves.  Spread remaining taco seasoning mixture to top half of bread; place on top of sandwich, cut into 6 pieces.