Showing posts with label Beans. Show all posts

Saturday, January 12, 2013

Beef and Bean Casserole

This is a dish that anyone would love, even kids.  Not only that, but it's got to be one of the most simple casseroles to prepare!


This is a well-loved recipe that my mom made for our family from the time I was a little girl.  We would request that she make this meal often.  This is one of many recipes she gave to me when I got married and my family loves it too!  This dish gets all 9's on the Melnarik rating scale!


I begin by placing the ground beef in a large saucepan and cooking it over high heat.  I break up the meat as it cooks until it is no longer pink, then I drain off the fat.


To the beef, I add the salt, beans, brown sugar, and onion.  When I open the can of beans, there is that little cube of mostly fat (it's the pork part of the pork and beans) on the top.  I always remove it, so I'm not adding extra fat, before adding the beans to the dish.  I stir these ingredients to combine them thoroughly.


Then I stir in the barbecue sauce and heat until bubbly.  I aways use K.C. Masterpiece brand barbecue sauce.


I transfer the hot mixture to a 2 quart baking dish.  After removing the biscuits from the can, I cut them in half and arrange them in an eye appealing pattern on top of the beef mixture.  I then put the dish in the oven to bake at 375°F for 25 minutes.


I then remove the dish from the oven, sprinkle the cheese evenly over the biscuits and return it to the oven for an additional 5 minutes to melt the cheese.


It doesn't get much simpler than that!  This recipe serves four people, so if you have hearty eaters or more than four to feed, I suggest doubling the recipe as my mom did and bake it in a 9- x 13-inch baking dish.  Every time I make this casserole, it takes me back to when I was a little girl!  Enjoy!


Beef and Bean Casserole

1 pound ground beef
1 teaspoon salt
1 (15 oz.) pork & beans
¾ cup barbecue sauce
2 tablespoons brown sugar
1 tablespoon instant minced onion
1 can (7.5 oz.) biscuits
1 cup shredded sharp cheddar cheese

Preheat oven to 375°F.  In a skillet, cook ground beef until no longer pink; drain.  Stir in salt, beans, barbeque sauce, brown sugar, and onion; heat till bubbly.  Transfer to a 2 qt. baking dish.  Remove biscuits from can and cut in half to form half circles.  Place on top of beef mixture.  Bake at 375°F for 25 minutes or until biscuits are golden brown.  Sprinkle cheese on top of biscuits; return to oven for an additional 5 minutes to melt cheese.

Yield:  4 servings

Friday, December 28, 2012

Taco Soup

This is one of my favorite soups.  It's hearty and oh so flavorful, but the best part is that it's so simple to make.  Even kids like this soup because it has all the flavors of a taco.


This recipe came to me by way of an advertisement for a cookbook that showed up in the mail.  I never order cookbooks that way, but I will keep any recipe they share in order to entice me.  This was one of those recipes I saved and tried later.  If I had thought that all of the recipes in the cookbook would have been as flavorful and wonderful as this one, I would have ordered a copy!  This recipe was a winner from the start and it gets all 9's on the Melnarik rating scale.


I begin by combining the ground beef and onion in a Dutch oven and cooking it over medium-high heat.  As it cooks, I stir it occasionally, breaking up the meat.  When fully cooked, I drain off the fat and discard it.


To the meat I add the taco seasoning and the Ranch dressing mix.  Years ago, my first cooking teacher said it was best to add spices and seasonings directly to the meat so that it gets seared to it and is evenly distributed.  I was a good student and still do it that way today.


I thought I'd throw in a picture of the chili beans I use in this dish.  This brand has a great flavor and since 3 cans are used in this soup, it is a major contributor to the flavor of the final product.


After returning the heat to medium-high, I add to the seasoned beef and onions, the chili beans, stirring to combine.


I then add the tomatoes and tomato sauce, and stir to combine.


Next, I add the corn and the green chilies, again, stirring to combine.  


After stirring in the water, I bring it to a boil.  Then I reduce the heat and simmer it for 15 minutes.  During this time, I shred the lettuce and cheese and cut the tomatoes.


When it's ready to serve, this is how we like to top our soup.  We begin with the soup in the bowl.


We then top it with Fritos.  The recipe calls for corn chips, but the picture on the original showed Fritos, so that's what we use.  Any corn chip may be used.


Then we add some shredded sharp Cheddar cheese.


We follow that up with the shredded lettuce.  I know, I thought it was weird to add lettuce to soup, too.    Trust me, it just adds to the taco flavor of the soup.  I've served this to many people, who have tried it without the lettuce and then with it once I've convinced them and they say it's much better with it added.


Next on are some diced tomatoes.


The last ingredient is the sour cream.  I know you can hardly see the soup any more!  But, when you eat this all together, it truly has the flavor of tacos.


There aren't too many soups that are as flavorful as this one.  Plus, it's stick-to-your-ribs good!  Enjoy!


Taco Soup

1 pound ground beef
1 large onion, chopped
3 (15 ½ oz.) cans chili beans
1 ( 15 ¼ oz.) can whole kernel corn, undrained
1 (15 oz.) can tomato sauce
1 (14 ½ oz.) can diced tomatoes, undrained
1 (4.5 oz.) can chopped green chilies
1 ( 1 ¼ oz.) envelope taco seasoning mix
1 (1 oz.) envelope Ranch-style dressing mix
1 ½ cups water

Toppings:

Corn chips, shredded lettuce, chopped tomato, sour cream, shredded Cheddar cheese

Cook beef and onions in a Dutch oven over medium-high heat until meat is browned and onions are tender, stirring until meat crumbles; drain.

Stir beans and next 7 ingredients into beef mixture; bring to a boil.  Reduce heat, and simmer, uncovered, 15 minutes, stirring occasionally.  In the meantime, shred lettuce and cheese and chop tomatoes.

Spoon soup into bowls; top with desired toppings.


Friday, May 25, 2012

Chicken Taco Burgers and Mission Baked Beans


We had a couple of hot days, so I decided to heat up the grill for dinner and make Chicken Taco Burgers.  For side dishes I made Mission Baked Beans and a Mexican Salad, which I will share with you in a separate post.  The recipe for the Chicken Taco Burgers came from the Taste of Home August/September 2009 issue and I cut out the Mission Baked Beans recipe from a magazine.  The author was Mrs. Charles Lewis of Yucaipa, CA.


These recipes compliment each other nicely.


I began with the baked beans because it takes a while for them to cook.  I know, baked beans should be baked, but when it's hot outside I resist turning on the oven and converted this recipe to cook on top of the stove.


This recipe calls for cooked and crumbled bacon, so I begin with that.  I've decided that by cutting the bacon into small strips before cooking them, I get uniform sized pieces that are a bit bigger than when the bacon is cooked first and then crumbled.  This means that you get more bacon flavor in each bite of the dish, and we all love the taste of bacon!


While I prepare the rest of the ingredients, I stir the bacon occasionally as it renders, so that it doesn't stick to the bottom of the saucepan.


Once the bacon is fully cooked. I put it on several paper towels to absorb the excess fat.  I used to put the bacon fat in a bowl and throw it in the trash can once it cooled.  On Pinterest, I discovered that I can line my little bowl with foil, so when the fat has cooled and is solid, I can wrap it up in the foil to throw it away and then I don't have a bowl to wash!


All of the ingredients, other than the cheese, go into the saucepan.  I mix them gently and bring them to a boil over high heat.  Once it reaches a full boil, I turn the heat down to low to let the beans simmer for 45 minutes.  I know this seems like a long time, but the onions need to cook so they aren't crunchy and it needs to reduce to a thick baked bean consistency.  While the beans simmer, I stir them every once-in-a-while so they don't stick to the pan and begin working on the main course, the Chicken Taco Burgers.


These burgers are simple to make and are healthy because they're made from ground chicken.  I place all of the ingredients in a bowl large enough to give me room for mixing.  I've tried using a spoon and a spatula for this, but find that clean hands (minus rings) are the best tools for getting this completely mixed.


You'll know it's fully mixed when you no longer see any areas with the light pink chicken meat.  The taco seasoning and chili powder will give it a darker hue.  The mixture at this point is very soft, much softer than hamburger meat which is easily pressed into patties.


The first time I made these burgers, I tried patting them out on a cutting board, but they stuck to the board and when I tried to lift them off with a spatula, it altered the round shape.  Then I discovered a product called Dispens-a-wax that I found at Smart & Final.  They are 5-inch square pieces of paper that are somewhere between wax paper and parchment paper, and are oh, so handy.  There are 1,000 sheets in the box, so it will last me a very long time.  I even use them when making regular burgers, to put between patties so they don't stick to one another.  They are a real time saver.  With these soft burgers, I put the paper on my cutting board and gently press out the shape of the burger.


Not only do they not stick to my cutting board, but these little sheets of paper make it easier to get them on the grill!  I flip them over onto the grill and then gently peel back the paper and discard it.  I know there is a little bit of waste of meat sticking to the paper, but I feel it far outweighs the hassles I described above!


Because these patties are so soft, they can't be flipped too soon!  I keep them on the grill over medium heat for 5 minutes before even attempting to turn them.  From the picture above, you can tell that after that amount of time, they look more "solid" than the previous picture.


You can see that those aren't just grill marks on the first side, but deep groves due to the softness of the patties.  I grill them for an additional 5 minutes and then flip them again before adding the cheese.  I just think that the melted cheese looks better on the smoother side as opposed to this side with the deep ridges.


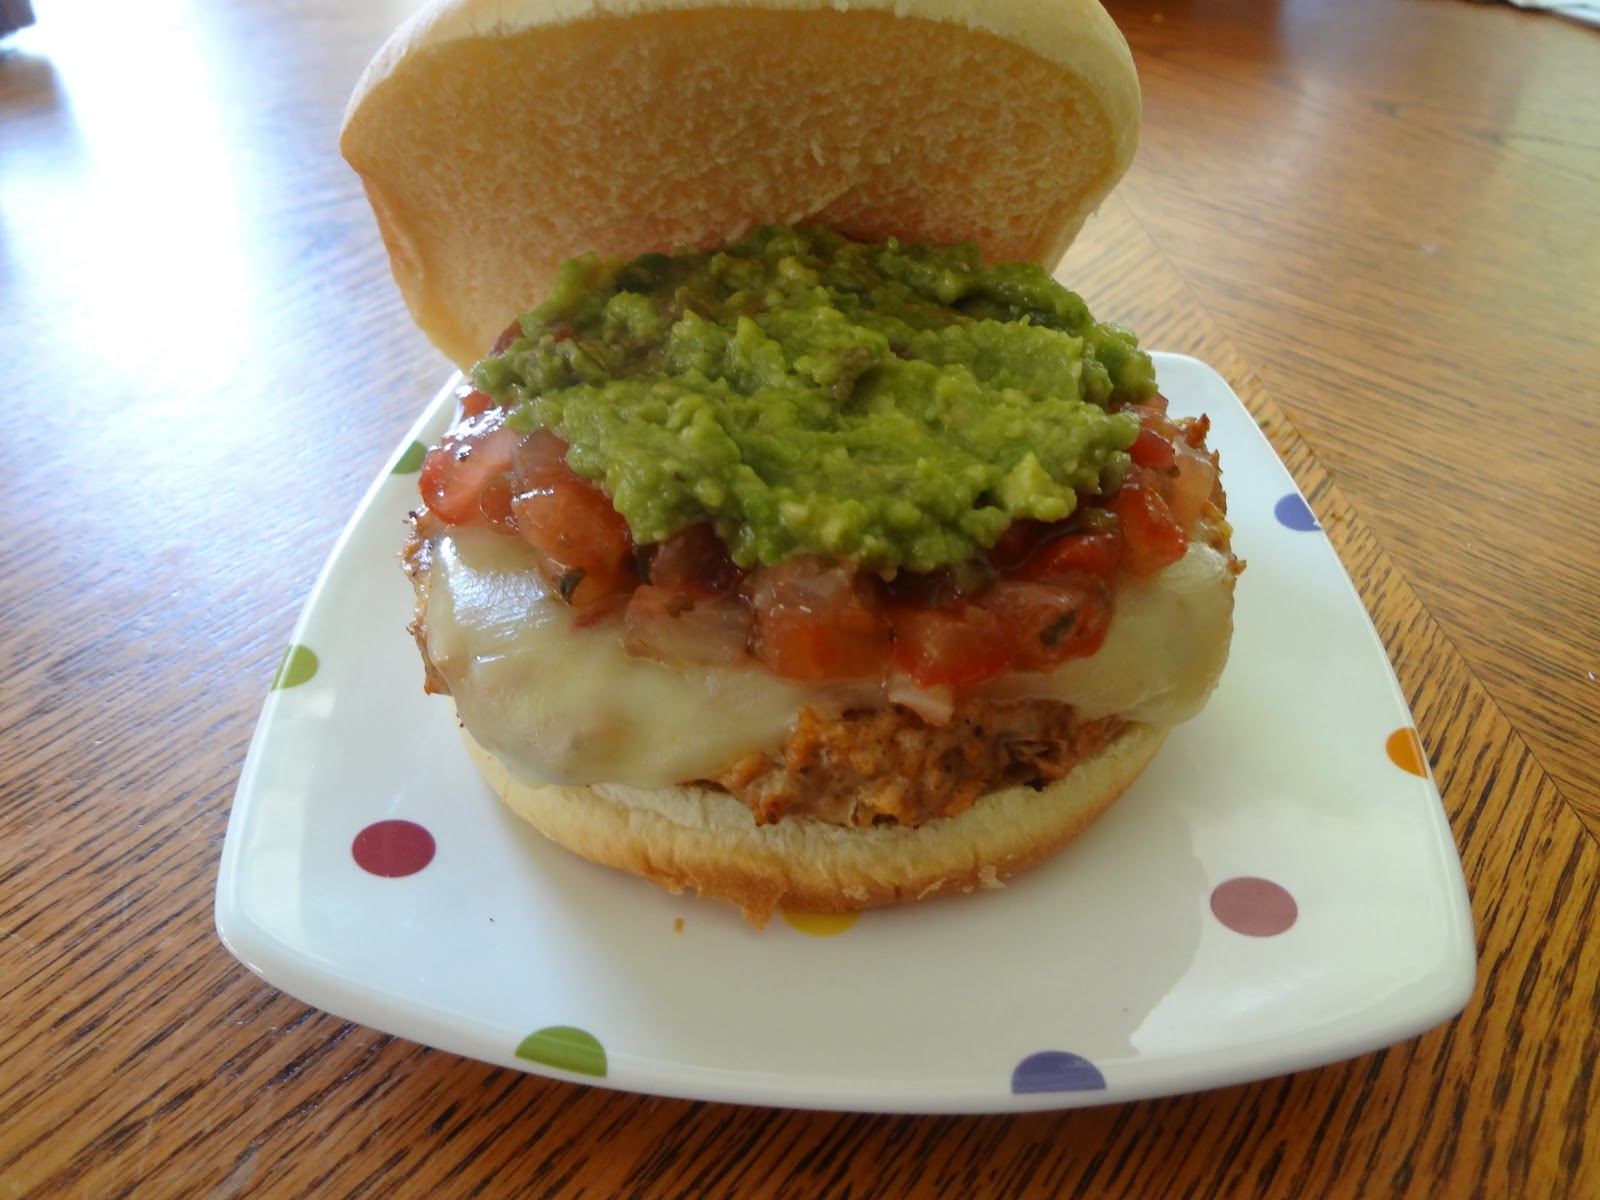
Because it's a taco burger, the normal condiments just won't do.   We always add salsa and if I make fresh guacamole, we add that too!  I forgot to take a picture of the beans once I added the cheese, but the picture at the top shows how wonderful and thick these beans are when they are ready to serve. The spices and enchilada sauce give them a Mexican flavor that makes them a perfect addition to the Taco Burgers.   Enjoy!

Again, I also made my Mexican Salad to complete the meal, but will share that recipe at another time.  On extremely hot days, it's a cool main dish that I serve with fresh quesadillas.  As we near summer and the heat rises, I'm sure I'll be adding it to my blog, so stay tuned!


Chicken Taco Burgers

½ cup finely chopped onion
1 pkg. taco seasoning
2 cloves garlic, minced
½ tsp pepper
2 lbs. ground chicken
1 egg, beaten
8 slices pepper-jack cheese
1 pkg. (8) hamburger buns
Salsa and/or guacamole for toppings

In a large bowl, combine the first 6 ingredients, mixing thoroughly.  This mixture will be soft.  Shape into 6 patties.  Grill patties, covered, over medium heat for 5 minutes.  Flip and grill, covered, an additional 5 minutes; top with cheese, cover and grill for 1 minute to melt cheese.  Place on buns and top with salsa and/or guacamole.


Mission Baked Beans

8 slices bacon, cooked and crumbled
1 can (28 oz.) pork and beans
1 can (15 ½ oz.) chili beans, undrained
¾ cup finely chopped onion
½ cup packed dark brown sugar
1 can (10 oz.) enchilada sauce
1 tablespoon all-purpose flour
2 teaspoons chili powder
1 teaspoon ground cumin
1/8 teaspoon garlic powder
1 cup (4 oz.) shredded Monterey Jack cheese

Combine all ingredients, except cheese, in a large saucepan or Dutch oven; mix gently.  Bring to a boil over high heat; reduce heat and simmer for 45 minutes, stirring frequently so the beans don’t stick to the bottom of the pot. Sprinkle with cheese before serving.