Thursday, July 12, 2012

Baked Steak Burritos

These are one of my youngest son's favorite things I make.  They are easy to put together and are quite tasty.  He especially likes that there are always half a dozen or so left over that I keep in the refrigerator so he can heat one quickly in the microwave when he's hungry.  This recipe gets all 9's from my guys on the Melnarik rating scale!


To begin, I melt a stick of butter in a large skillet.  No, this is not a Paula Deen recipe!  I found it in the Pillsbury 40th BAKE-OFF Contest Cookbook.  The original recipe called for drenching the burritos in enchilada sauce and covering that with more cheese, but my husband doesn't care for enchilada sauce, so I skipped that part and it's still a favorite in this house.  Back to cooking:  I add one package of taco seasoning and mix the two together.


In goes the strips of beef.  As they cook, I keep turning them over in the seasoning and butter, making sure each strip is fully coated.


In the meantime, I put the refried beans in a medium bowl and microwave to heat them.  I stir them to make sure they are soft and easy to spread.


I also heat the tortillas in the microwave so they don't break when folding them.  Then I apply a bit of beans just off-center on the tortilla.


Next, I put on the cheese.  I've learned that if I put the cheese on before the meat, once the tortilla is folded and placed seam side down on the baking pan, the cheese will be on top and will melt down into the meat in the oven.  I don't know why I think this means it gets more evenly distributed, but I just prefer it this way.


A few green onions for flavor are added next.


Last on is the meat.  I usually put enough to cover the beans and cheese, but not too much as it makes it hard to fold it into a burrito.  The next step is to fold it into a burrito.  I am by no means an expert at this.  While looking at the photo above, imagine folding the right side of the tortilla over the meat, then fold the top and bottom toward the center over the side you just folded in.  Then, roll the whole thing towards the left over the left side of the tortilla.  Simple, right?


I flipped one around to show you what it should look like when completed.


I place them all on a baking tray (you can see from this photo that mine aren't very pretty or neat) and into the oven they go.  While the first batch is in the oven, I assemble the rest so I can put them in the oven while we eat dinner.  This gives them plenty of time to cool while cleaning up after dinner before putting them in the refrigerator.


I use the soft taco size tortillas, so the burritos aren't very large.  If my guys are very hungry, they'll eat two.  Paired with a southwestern-type salad, one is plenty for me!  Enjoy!

Baked Steak Burritos

1/2 cup butter (1 stick)
1 pkg. taco seasoning
1 1/2 lbs. boneless beef sirloin tip steak, cut into thin strips
1 (16 oz.) can refried beans
12 soft taco size flour tortillas
3 cups shredded cheddar cheese
3 green onions, thinly sliced

Heat oven to 400 degrees.  Melt butter in large skillet over medium heat.  Stir in taco seasoning mix.  Add beef strips; cook and stir 5 to 6 minutes or until of desired doneness.  Drain.  Meanwhile, place refried beans in microwave-safe dish.  Microwave on HIGH for 2 minutes, stirring once.  Place tortillas between paper towels and microwave on HIGH for 1 minute.  Assembling one at a time, spread beans on tortilla just off center.  Top with cheese, onions and beef.  Roll up, folding in sides.  Place seam side down on an ungreased baking sheet.  Repeat with all tortillas.  Bake at 400 degrees for 10 minutes.

Thursday, July 5, 2012

Liza's Faux Baked Beans


It's summer, so that means using the grill a lot more.  Whether it's burgers and dog or ribs, one of my favorite go to side dishes is baked beans.  This can be a major time commitment if done the traditional way, plus turning on the oven when the weather is hot is never a good idea, so I came up with this tastes-like-slow-cooked-baked beans that can be cooked on top of the stove.  This recipe gets all 9's on the Melnarik rating scale!


This recipe gives the taste of real baked beans and they're ready in half an hour!


I begin by cooking the bacon in a medium saucepan.  I cut the strips across and fry them that way in order to get uniform size pieces.


As I work on other aspect of my meal, I check on the bacon frequently, stirring so it doesn't stick to the pan.


Once fully cooked, I remove the bacon to paper towels to absorb the grease and discard the bacon drippings.  Tip:  Put some foil in a small bowl and put the bacon grease in it.  When it solidifies, pull up the edges of the foil and throw it away.  No cleaning necessary!


When I open the cans of beans, I usually find those big chunks of salt pork near the top.  I always remove those because I think nobody wants to bite into that big piece of salty meat and fat while eating the beans.


Using the same saucepan that I cooked the bacon in, I put in the beans, brown sugar, chili sauce and the  bacon I just cooked.


I mix the ingredients together, bring it to a boil, then reduce the heat and simmer for 20 minutes.  While simmering, I can go about getting the rest of my meal together.  So simple and so good!  Enjoy!


Liza's Faux Baked Beans

2 cans (16.5 oz.) pork and beans
5 slices bacon
1/4 cup firmly packed brown sugar
1/4 cup chili sauce

Cut bacon into small pieces; cook in a medium saucepan over high heat until fully cooked, stirring frequently.  Remove to paper towels; discard bacon drippings.  In same saucepan, combine beans, brown sugar, chili sauce and bacon; stir to combine.  Bring to a boil; reduce heat and simmer for 20 minutes.

Wednesday, July 4, 2012

Liza's Breakfast Hash

This is a pretty easy breakfast that is hearty and quite flavorful.  When I first came up with this I spent time cubing potatoes and cutting onions and bell peppers.  I know fresh is always better, but frozen is the next best thing, so to save time, I use the frozen Potatoes O'Brien.  I use more onions and bell pepper when I do it myself, but I like the time saving aspect of using the frozen mix.  Therefore, I will show you the easier way to do it here.


Also, when I first started making this dish, I would use kielbasa or some other sort of sausage, browning it in a separate pan before adding it to the potato mixture.  One time my husband suggested I try chorizo in it and have been making it that way ever since.  The chorizo adds a bit of heat to the dish, so if you prefer dishes that aren't spicy at all, you may want to use a sausage in this dish.


This takes 3 pans to prepare and I start them all at one time!  In my large wok, I begin cooking the potatoes O'Brien using butter for flavor instead of the oil listed in the directions on the bag.  In another pot I start cooking the chorizo to render out the fat.  The last pot gets some butter in which to cook the scrambled eggs.


I use a medium bowl to beat the eggs before adding them to the pan where I've melted a bit of butter.  While cooking the eggs, every so often I stir the chorizo so it won't stick to the pan and turn the potatoes so they get evenly cooked and browned.


I place four layers of paper towels in the bowl I used to beat the eggs and place the chorizo in them to absorb a lot of the grease.  Beside wanting to get rid of the extra fat, it will keep the chorizo from completely coloring the whole meal the color of the chorizo.  The dish doesn't look as appealing that way, believe me I know from experience!


The potatoes should not be stirred often as that will make them mushy and not allow them to get nicely browned.  I like to cook them until it looks as though each cube has at least one side browned.  As long as the potatoes are cooked, it's a matter of preference as to how brown you want them.


Once the potatoes are ready, I add the scrambled eggs and toss to combine, breaking up any large pieces of egg.


As you can see from the picture above, there is quite a bit of grease that came out of the chorizo.


I add the chorizo to the pan and toss to incorporate it evenly.


I sprinkle the cheese on top and cover the pan to help it melt more quickly.  Then I serve it directly from the pan at the table.


This is a tasty as well as a hearty breakfast that will start any day off right.  Enjoy!


Liza's Breakfast Hash

1 (28 oz.) bag frozen Potatoes O'Brien
1 pound chorizo
8 eggs
1 stick (1/2 cup) butter, divided
2 cups shredded cheddar cheese

In a Dutch oven or wok, melt 5 tablespoons of butter and begin cooking potatoes over medium-high heat, turning every so often to cook and brown evenly.  In the meantime, remove chorizo from casing and cook in a small saucepan over medium heat, breaking up the meat at it cooks.  In another saucepan, melt remaining 3 tablespoons of butter.  In a medium bowl, beat eggs; add to melted butter and cook over medium heat, scraping the pan as the eggs cook.  Place paper towels in the bowl in which the eggs were beaten; add cooked chorizo to drain fat.  When potatoes are fully cooked and browned to your liking, add scrambled eggs, tossing to combine and breaking up any large pieces of egg.  Add chorizo and toss to combine.  Top with shredded cheese, cover and let stand for a few minutes to let the cheese melt.

Tuesday, July 3, 2012

Taco Turkey Sandwich on Herb Flatbread

When the weather is hot, one of the best things to make and eat is a nice cool sandwich.  The bread is one of the things that really makes this sandwich and it's quite easy because it starts with store-bought dough.  I found the recipe for the flatbread in the Pillsbury 39th BAKE-OFF contest cookbook and altered it slightly for my family's tastes.  The idea for the rest of the sandwich came from one that was pictured in a magazine years ago.


This is a family favorite, getting all 9's on the Melnarik rating scale!  This recipe makes 6 sandwiches, but I double it, using two cans of pizza dough and adding the herb mixture to one of them, when I have to feed more people.  If I take it to a large gathering of people such as our annual beach trip, I cut the pieces smaller in order to share with even more people.


I don't want to roll out the dough until I have all of my topping ingredients ready.  Dried rosemary comes in full leaf form, so I use my mortar and pestle to crush the leaves into smaller pieces.


In a small bowl, I mix together the rosemary, basil, salt, garlic and olive oil.


Then, I dice one Roma tomato, place it in another small bowl and with the back of a spoon, crush the pieces slightly.  This is so that the tomato seems to become "one with the bread" instead of just "sitting on top" of it.


Now I'm ready to prepare the dough. I remove it from the can and place it on a non-stick baking sheet, or one sprayed with a non-stick coating.  As you can see from this picture, the dough doesn't always come out of the can looking perfect!


Using my fingers, I repair any holes and starting in the center, press the dough out to form a 12 x 8-inch rectangle.  I use a small rolling pin to make it smooth and to refine the shape.


Next, I cut the dough in half to make a piece for the bottom of the sandwich and one for the top.  Using a spoon, I apply the herb mixture to the piece of dough intended to be the top; using the back of the spoon, I spread this mixture as evenly as possible over the dough.  The tomatoes get sprinkled on top and pressed lightly into the dough.


Into the oven it goes for 9 minutes or until lightly golden brown around the edges.  Tip:  Do not over bake!  Believe me, I've done this in the past.  It didn't look completely baked so I left it in the oven until it was more brown.  This made it much more "crisp" and nearly impossible to cut!  The dough is thin, so it doesn't take long to bake completely.  After a couple of minutes of cooling on the baking sheet, I remove the pieces to a cooling rack to cool completely.  This doesn't take too long, because the bread is so thin.


While the bread cools, I mix together the mayonnaise, sour cream and taco seasoning to make the spread.


I put the bottom piece of bread (the one without the herbs and tomatoes) on a cutting board and spread half of the taco seasoning mixture to the edges.


I cut the remaining three tomatoes into very thin slices and layer them on top of the spread.


The next layer is the turkey.  This can be sliced turkey breast or, as I've used here, the thinly sliced turkey available at the deli.  I fold each slice in half and make two layers covering evenly.


Next on is the pepper jack cheese.  This adds a little kick to the sandwich.  If you prefer not to have any heat at all, you can substitue regular Monterey Jack cheese for the Pepper Jack cheese.  I highly suggest you try it this way first.


Sharp cheddar slices are added next.  My husband isn't so keen on the sharp cheddar, so I make one of the slices medium cheddar.  I just have to remember which corner I put it on so he gets that sandwich once I cut it up.


The rest of the taco seasoning mixture gets spread on the top piece of bread.  Tip:  Invert the top piece on top of the cheddar cheese when adding the spread, that way, if any of the herbs or tomatoes fall off, they land on the cheese, so they are still contributing flavor to the sandwich!


At this point, if the entire sandwich is being served right away, I add lettuce leaves and cut the entire thing into six sandwiches.  If, however, we are not all eating at the same time and/or some will be eaten as leftovers the next day, I cut the sandwich into six pieces and add the lettuce to the individual sandwiches just before serving.  I simply don't like wilted lettuce leaves in my sandwiches and I assume everyone else feels the same way!


The combination of the wonderful flavor of the flatbread with the taco seasoning spread and the mild kick of the pepper jack cheese make this sandwich a winner!  Enjoy!


Taco Turkey Sandwich
on Herb Flatbread

1 (10 oz.) can Pillsbury Refrigerated Pizza Crust
1 teaspoon dried rosemary leaves, crushed
1 teaspoon dried basil leaves
1 teaspoon minced garlic
1/8 teaspoon salt
1 tablespoon olive oil
4 Roma tomatoes, divided
2 tablespoons mayonnaise
2 tablespoons sour cream
1 teaspoon taco seasoning
8 ounces thinly sliced cooked turkey
6 slices (4 oz.) Pepper Jack cheese
6 slices (4 oz.) sharp cheddar cheese
Fresh lettuce leaves

Preheat oven to 425°.  Spray a baking sheet with non-stick cooking spray.  Open can of dough and unroll it, placing it on the baking sheet.  Starting at the center, press out dough with hands to form a 12 x 8-inch rectangle.  Cut dough in half with a sharp knife to create 2 equal pieces; one for the top and one for the bottom of the sandwich.  In a small bowl, combine rosemary, basil, garlic, salt and oil; mix well.  Apply the herb mixture to one piece of dough, using the back of a spoon to spread evenly over the dough.  Dice one of the tomatoes and sprinkle evenly over the dough, pressing slightly into the dough.  Bake at 425° for 9 minutes or until edges are light golden brown.  Cool completely.

In a small bowl, combine mayonnaise, sour cream, and taco seasoning.  Place bottom piece of dough (without herbs) on a work surface; spread with half of the taco seasoning mixture.  Thinly slice the remaining tomatoes; apply evenly.  Add the turkey evenly, top with both cheeses.  Add lettuce leaves.  Spread remaining taco seasoning mixture to top half of bread; place on top of sandwich, cut into 6 pieces.

Thursday, June 28, 2012

Mini Cinnamon Rolls

Cinnamon rolls are one of my favorite things to eat.  I don't eat them often, which makes it a real treat when I get to have one.  I'm not a morning person, so making them from scratch is normally out of the question because of the time needed to let the dough rise.  When I find a recipe that sounds good and cuts out that rising time, I like to give it a try.  This one uses refrigerated crescent roll dough and bakes in only 13 minutes!   


In addition to the ease of putting these treats together and the short time invested in doing so, another great thing about this recipe is that the rolls are baked in a mini muffin tin, so you get 16 mini cinnamon rolls from each batch.  The first time I made them, I took them to a Bible study I was attending and everyone loved them and asked for the recipe.  I originally found this recipe on Pinterest by Iowa Girl Eats.  She didn't give exact measurements on a couple of the ingredients, but I've added them to my recipe below for your convenience.


I begin by putting a little flour on my work surface so the dough doesn't stick.  When I open the can and take out the dough, I "peel" off the first rectangle of dough and place it on my surface.  Then I pinch together the perforated seams, flip the dough over (making sure there is more flour underneath) and pinch the seams on the other side.


I then lightly roll the dough with a rolling pin to smooth out the seams and to make the dough a uniform thickness.


In a small bowl, I combine the brown and white sugars with the cinnamon.


Next, I spread half of the butter on the dough.  This helps to make the cinnamon/sugar mixture adhere a bit to the dough and contributes to the ooey, gooey goodness once baked.  Sorry, I forgot to take a picture of this step before I started adding the cinnamon/sugar mixture.


Using a tablespoon, I sprinkle half of the cinnamon/sugar mixture over the dough, then using the back of the spoon, spread it over the dough, almost to the edges.


The next step is to start rolling the dough into a log, beginning on the long side.  Because of the dry cinnamon/sugar mixture, this won't be a tight roll.


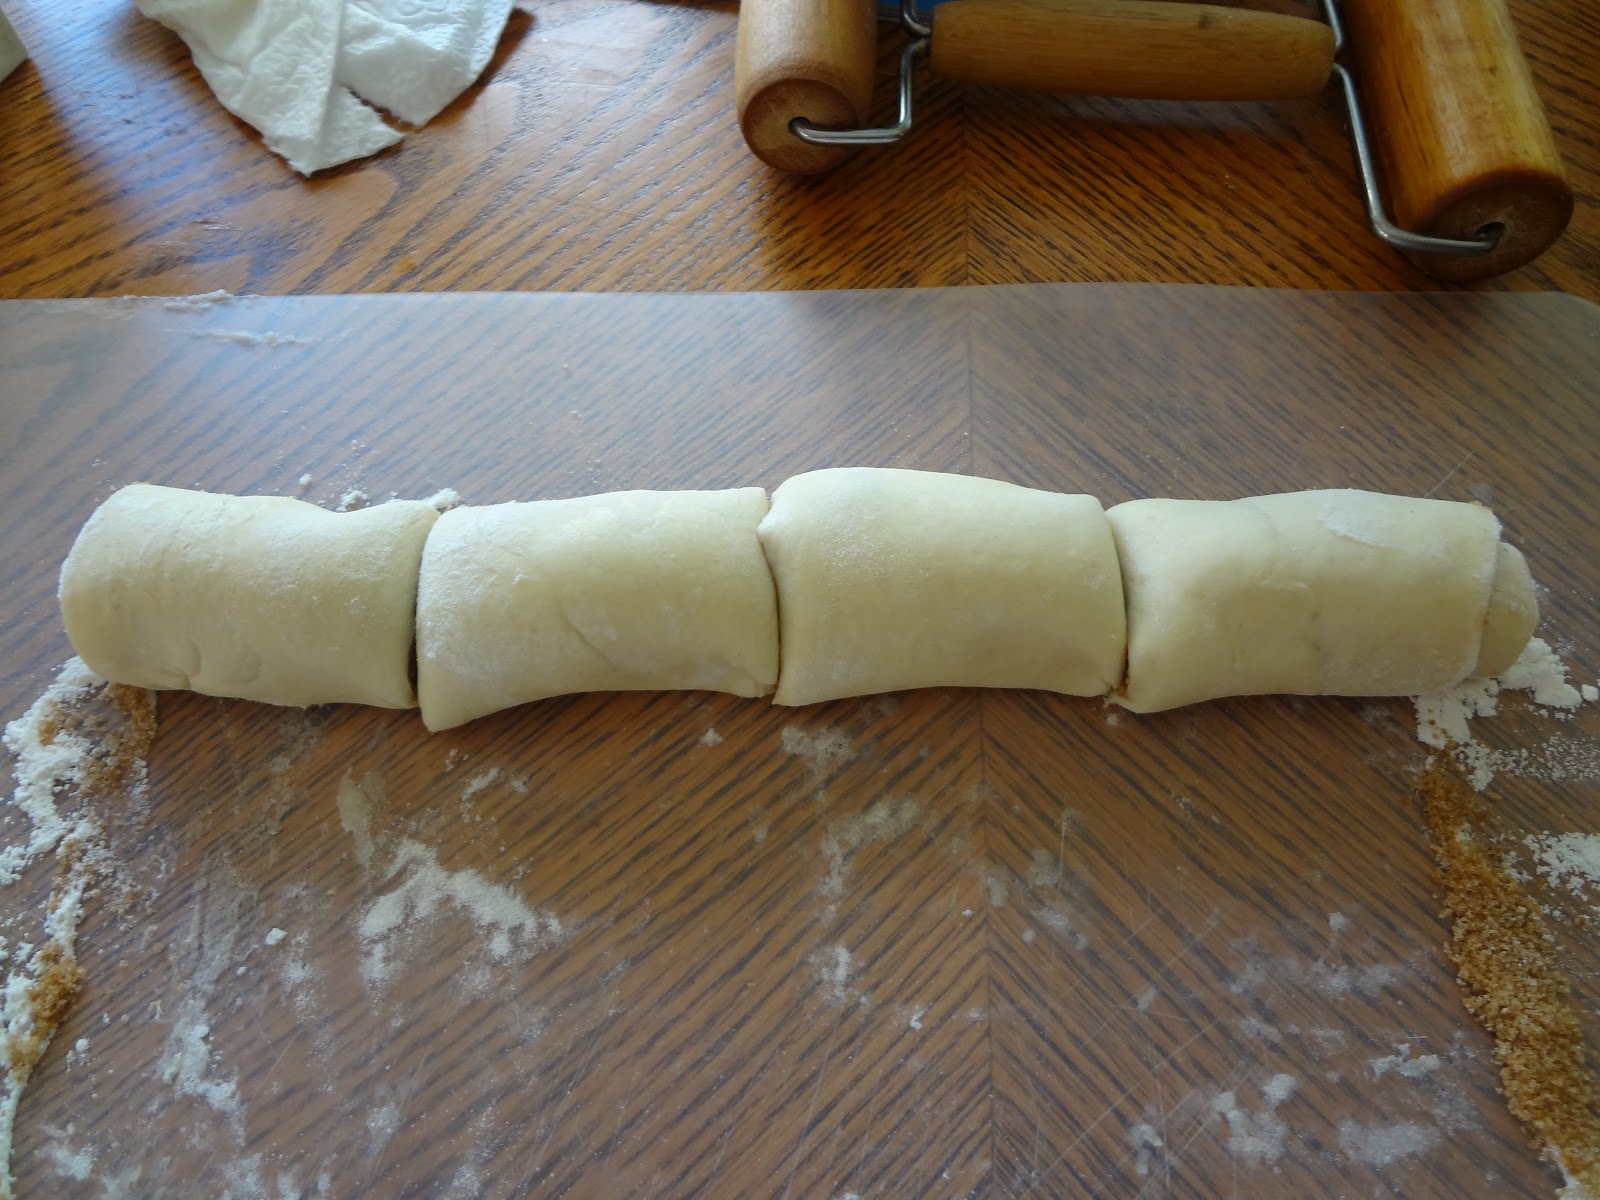
I didn't measure it, but I would guess it is about a foot long when rolled up (left).  Make a cut right in the middle to make 2 pieces (right).


 Cut each of those pieces in half (left), and then each of those pieces in half (right).  I then have 8 pieces.

I spray my mini muffin pan before carefully placing the cinnamon rolls in the pan, cut-side up.  Then I repeat with the other piece of dough from the can.  Most mini muffin pans hold either 12 or 24 muffins, so either one large pan or two of the smaller pans should be used.  Hint:  Whenever you use muffin tins where not every space gets used, put some water about half way up in the empty spaces to aid in even baking.


Don't they look scrumptious?  They are a beautiful golden brown and smell heavenly!


About 5 minutes before the rolls come out of the oven, I begin making the icing.  I work the softened butter into the powdered sugar before adding the maple syrup and milk.


Once all of the ingredients are incorporated and smooth, it should be thick enough to spread where the heat of the roll will allow it to melt into the cinnamon crevices!  Hint:  Let the rolls sit for a minute once they come out of the oven so they aren't so hot that the icing all melts to the bottom of the pan.


I usually frost them in the pan before removing them to a serving platter.


I use a spoon to remove each roll from the pan to serve.  This way I don't loose any of the gooey cinnamon goodness that has made it's way to the bottom of the pan.  The only problem with these tiny cinnamon rolls is their size.  It's easy to keep popping them in my mouth before realizing I've eaten more than I would have if I had eaten one normal size cinnamon roll!  It really is hard to stop eating these scrumptious little cinnamon rolls!  Enjoy!


Mini Cinnamon Rolls
  
1 (8 oz.) tube crescent roll dough
3 tablespoons softened butter
1/3 cup firmly packed brown sugar
2 tablespoons white sugar
1 teaspoon cinnamon
¾ cup powdered sugar
2 tablespoons softened butter
1 teaspoon maple syrup
1 teaspoon milk

Preheat oven to 375°.  Lay out half the dough (4 triangles) on lightly floured work surface and pinch all seams together.  Flip the dough and pinch seams together.  Using a rolling pin, smooth the seams and roll the dough until about ¼ thick, keeping the rectangular shape.  Spread half of the butter on the dough coming almost to the edges.  In a small bowl, combine the sugars and cinnamon.  Sprinkle sugar mixture over butter, covering completely.  Starting at the long side, carefully roll dough into a log.  With a sharp knife, make one cut in the middle of the log, cutting it in half.  Cut each of these pieces in half, then each of the resulting pieces in half again.  You should have 8 pieces.  Place each piece in a mini muffin pan sprayed with a non-stick coating.  Repeat with the other half of dough.  Bake at 375° for 13 minutes, or until golden brown.  Meanwhile, in a small bowl, mix together powdered sugar and butter; and syrup and milk.  Remove buns from oven, let sit for 1 minute before icing.  Enjoy!