Showing posts with label Side Dish. Show all posts

Monday, April 14, 2014

Easter Basket Deviled Eggs

My youngest brother, Matt, works on Sundays and was unable to get Easter Sunday off to join us for a family meal.  This year, he requested Palm Sunday off and it was approved, so 15 of us joined together to celebrate Easter a week early.


In order to get this up quickly, in case you would like to make these cute deviled eggs for your Easter meal this weekend, I won't be posting how to make deviled eggs, just how to decorate them to make them look like a basket of Easter eggs.  I will let you know, however, that when preparing the yolks, I add mayonnaise, sweet pickle relish, and mustard to make mine.


As you can see above, I used a wavy cutter I purchased from Pampered Chef years ago to cut the eggs.  Somehow I thought that would give them more of a basket look.  After removing the yolks to a bowl, where I added the ingredients listed above, I used a plastic bag to pipe the filling into each egg white half.


Then I added a pinch of alfalfa sprouts.  I was hoping they would stay more contained to the yolk area, but those little sprouts have a mind of their own and there were 24 of them to prepare, so I refused to fight them.


Using five different colors on each egg, I added some candy-coated sunflower seeds, which became the eggs in the basket.  I found the colorful sunflower seeds at Trader Joe's, but I've also seen them at party stores.  I kept my eyes open for them when shopping since the first of the year.  By sticking them into the yolk mixture a little bit, it ensured they would not roll off the egg when picked up by the consumer.


The final step was to add the "handle" of the basket using a short piece of chive.  I thought they would be a bit more rounded in appearance.  But, they preferred to bend instead of curve nicely.  There wasn't time to fight them into submission, so each one is a bit different.  I will try to perfect this before I make them the next time.


All in all, I was pleased with how they turned out.  The were a cute addition to the table and they tasted good too!  Enjoy!


Friday, January 17, 2014

Campfire Potatoes

Scalloped potatoes was one of my favorite side dishes growing up.  My mom would make them to accompany her meatloaf, a meal she only made during the cold months.  This recipe tastes so much like her scalloped potatoes, but because they are cooked on the grill I can have that memorable flavor any time of year!


I discovered this recipe in the tear-out section of one of Reiman Publications cooking magazines in 1998.  It is a wonderful side dish for any meat I decide to grill and it gets 8's and 9's on the Melnarik rating scale.


After peeling and slicing my potatoes thinly (I use a mandolin slicer to do the cutting more quickly and evenly) I placed them on a large piece of heavy duty foil.  If I don't have any heavy duty foil, I use a double layer of regular foil.  This packet is fairly heavy once filled, so it needs the extra strength of the heavy duty foil.


Then I added the onions that I halved and sliced.  I do this because my guys don't like to pull what they consider a limp onion ring out of their food.  The onions could be diced, if you prefer.


Next, I sprinkled on the salt and pepper.


I just realized as I was looking at this picture after typing the recipe, that I did things a little backwards this time.  The recipe calls for the butter to be added before the seasonings and cheese, but as you can see here, I added the seasonings and cheese before the butter.  It really doesn't matter the order as long as none of the ingredients are left out!


After adding the cheese, I dotted it with butter and sprinkled on the parsley.


Once I began pulling the foil up around the spuds, I poured in the chicken broth (sorry no photo).  Then I finished folding the foil tightly around the bundle.  I find it easiest to transport the foil packet to the grill on a cookie sheet or cutting board.


After placing the packet on the grill (here I used my small table-top grill as my charcoal grill was being used for the Best Baby Back Ribs!) and cooked them, covered, over medium heat for about 40 minutes.


When done, I removed the packet to a platter and opened the foil carefully to allow steam to escape.  For me, it's comfort food straight from the grill!  Enjoy!


Campfire Potatoes

5 medium potatoes, peeled and thinly sliced
1 medium onion, cut in half and sliced
6 tablespoons butter
1/3 cup shredded sharp cheddar cheese
2 tablespoons minced fresh parsley
1 tablespoon Worcestershire sauce
Salt and pepper to taste
1/3 cup chicken broth

Place the potatoes and onion on a large piece of heavy-duty foil (about 20 in. x 20 in.); dot with butter.  Sprinkle the next 5 ingredients evenly on top.  Fold foil up around potatoes and add the broth.  Seal foil tightly.  Grill, covered, over medium heat for 35 – 40 minutes or until potatoes are tender.  Open foil carefully to allow steam to escape.


Friday, December 28, 2012

Twice-Baked Potatoes


I'm an Irish girl and I love my spuds!  I like them any way you can think to fix them.  I especially like a baked potato, but a twice-baked potato is extra special.  I don't make them often, but I also don't wait for a special occasion to put together this wonderful side dish.


One nice thing about these fancy spuds is that if you are making them for company, the majority of the work can be done ahead of time and then re-bake them in the oven and add the cheese just before serving.  I found this recipe on an insert in my Taste of Home magazine years ago and it gets 9's across the board on the Melnarik rating scale.


I begin by scrubbing the russet potatoes and wrapping them in aluminum foil.  I then bake them in the oven directly on the rack at 375°F for 1 hour.  After fully baked, I remove them from the oven, unwrap them enough to let the steam escape and let them cool for about 5 to 10 minutes so they are easy to handle.


I then cut a thin slice off the top of each potato and, using a tablespoon, begin to scoop out the center of the potato, making sure to leave the sides about 1/4-inch thick.  I place the pulp I remove into a medium bowl.


I leave the sides 1/4-inch thick so they don't break when refilling them with the potato mixture later, but I make it a little thinner on the bottom.  I want most of the potato to have the yummy added items!


To the potato in the medium bowl, I add butter, shredded sharp cheddar cheese, crumbled bacon, salt, a dash of pepper and snipped green onions (chives can be substituted).


I mix this together until thoroughly combined.


After placing the potato shells on a baking sheet, I add the cheesy potato mixture that I just combined.  Because of the additional ingredients, it will take up more room than the plain potato pulp that you removed, so it will sit higher than the cut edge of the spud.  At this point, if they weren't going to be consumed within the next half hour or so, you could let them cool, and refrigerate them until time to re-bake them.


Just before baking, I add the remaining shredded sharp cheddar cheese and into the oven they go for 25 minutes at 375°F.  If they've been refrigerated before baking, I add an extra 10 minutes to the baking time.


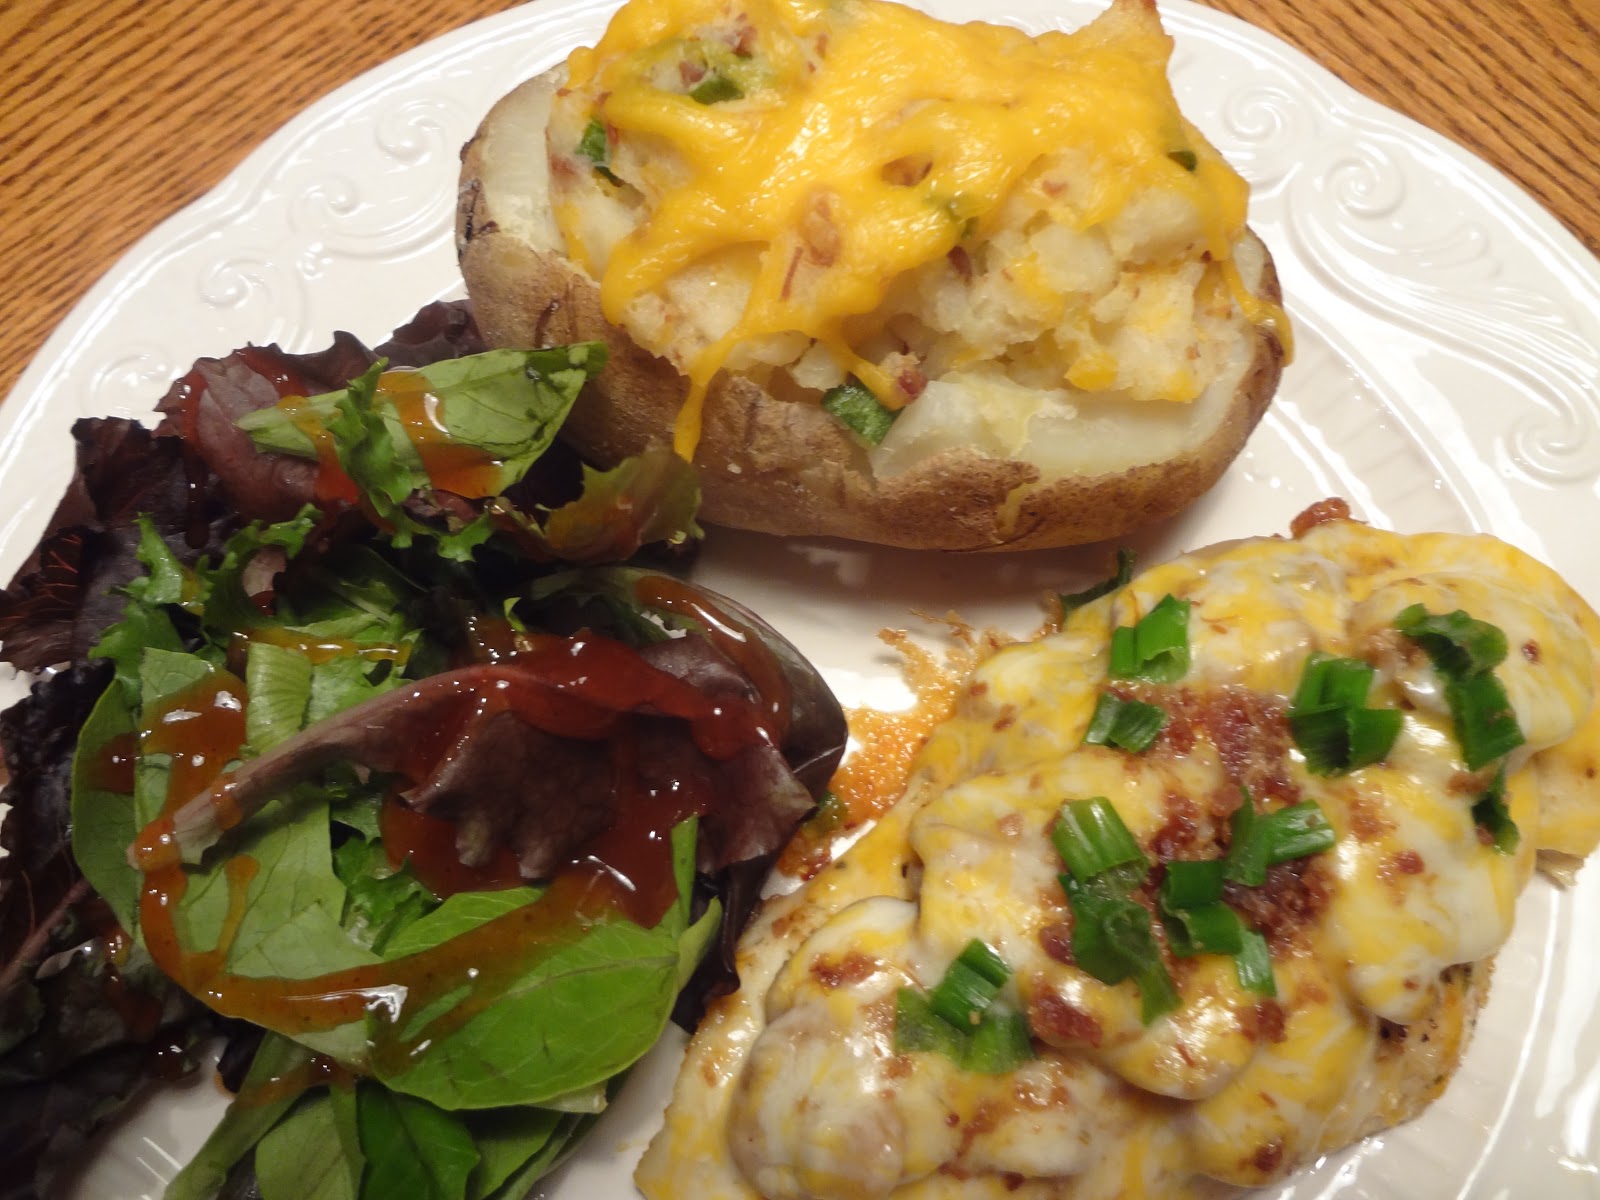
When they come out of the oven, the cheese on top is melted and they are piping hot and ready to eat!


I like to serve my twice baked potatoes with Smothered Chicken (also shared here on my blog) and a side salad.


This side dish does take some time to prepare, but it is so worth it!  Enjoy!


Twice-Baked Potatoes

4 russet potatoes
4 tablespoons butter, softened
3 tablespoons crumbled, cooked bacon
2 tablespoons snipped green onions
½ teaspoon salt
Dash pepper
1 ½ cups shredded sharp cheddar cheese, divided

Bake potatoes at 375°F for 1 hour or until soft.  Allow to cool for 5 – 10 minutes or until cool enough to handle.  Cut a thin slice off the top of each potato.  Scoop out the pulp and place in a bowl; add butter, bacon, green onions, salt, pepper and 1 cup of cheese, stirring to combine.  Spoon into potato shells and place on a baking sheet.  Top with remaining cheese; bake at 375°F for 25-30 minutes or until heated through.


Saturday, December 1, 2012

Kentucky Spoon Bread


This is another family favorite side dish at the holidays.  This is a cornbread that is completely prepared in one casserole dish and is so moist that it requires a spoon for serving.


I've had this recipe for about 30 years and my mother-in-law would call days before Thanksgiving to make sure I was bringing it with me when celebrating with her in the mountains.  A family friend, Bobbie Godsey, whom we attended church with and also was a neighbor, shared this recipe with me.  This dish gets 9's all around in my household and 10's from the rest of the family.  If you've ever had the cornbread at El Torito Restaurant, this dish is even better than that!


I begin by placing a stick of butter in my 2 qt. casserole dish and melting it in the microwave oven.


To the butter I add the canned corn, creamed corn and sour cream, mixing thoroughly to combine.


Then I add the slightly beaten eggs.  I add the eggs separately figuring the cold sour cream has cooled down the melted butter, so that the eggs won't begin to cook when I add them.


The last ingredient is the box of cornbread mix.  I stir this in until thoroughly combined.


It doesn't look very appetizing at this point, but the magic occurs in the oven where it gets baked at 350°F for 45 minutes.  If you are also making my Broccoli Supreme dish, it can be baked at the same time because they both cook for the same amount of time at the same temperature!


When it comes out of the oven, it should be piping hot and nicely browned on top.  It's ready to serve!


This tasty side dish is so easy to assemble and it brings a nice pop of color to the plate!  Enjoy!


Kentucky Spoon Bread

1 stick (1/2 cup) butter
1 – 8 oz. container sour cream
1 – 8 oz. can whole kernel corn, drained
1 – 8 oz. can creamed corn
1 pkg. Jiffy Corn Muffin Mix
2 eggs, slightly beaten

Preheat oven to 350°F.  In a small casserole dish (about 1 ½ to 2 qt.), melt butter in a microwave oven.  Add all ingredients in order listed, mixing well.  Bake at 350°F for 45 minutes, or until golden brown on top.  Serve hot with a spoon.

Broccoli Supreme

This is one of my family's favorite side dishes at the holidays.  It goes very well with turkey and we also serve it at Easter with ham.  My husband, who doesn't really care for broccoli, likes this dish.


This is another recipe I've had for over 30 years.  I first tasted this at a potluck meal at the church I was raised at, and Millie Cochran was gracious enough to share her recipe with me!  This dish certainly isn't low fat, but on special occasions, we don't really worry about that, do we?  It's the flavor of this dish that will keep you coming back for more.  In fact, I could guarantee that you'd be hard pressed to find a broccoli dish you like better!  This dish gets 9's all around from those living in my home and 10's from the rest of the family.


I begin by cooking the broccoli.  My cooking method depends on how I purchase my broccoli.  If I buy it fresh still on the stalks, I remove the florets and put them in a large frying pan, add enough water to cover them and then bring the water to a low simmer.  After simmering for 5 minutes, I drain the water and I'm ready to add the broccoli to the dish.  Lately, I've been buying the broccoli florets washed and ready to use in a bag, which can be microwaved to cook the vegetables.  I use the instructions printed on the bag to cook the broccoli perfectly.  While the broccoli is cooking, in a large bowl, I combine the eggs, cream of chicken and mushroom soup, mayonnaise, sour cream, and pepper.  I usually omit the salt because the cheese and stuffing mix have enough salt for our taste and I use about 1/2 teaspoon of pepper.


To this I add the chopped onion.


Then I add the broccoli.  If I will be baking this dish immediately, I add the broccoli hot.  If I won't be putting it in the oven until later or the next day, I let the broccoli cool before adding it to the soup mixture.  This aids in the dish cooling more quickly in the refrigerator.  When baking this dish after it's been refrigerated, I either bring it to room temperature before putting it in the oven or I add 5 minutes to the cooking time.


Once the broccoli is fully incorporated, I put it in a 9-x13-inch baking pan and spread it into the corners, making sure it's an even layer.


Then, I add the shredded cheese.  I always used an 8 oz. brick of Cracker Barrel Extra-Sharp Cheddar cheese.  I know it's a bit more expensive than other brands, but it's the perfect level of sharpness and the perfect amount for this dish.  I try to distribute it as evenly as possible.


Then I melt a stick of butter.  I usually do this in a measuring cup in the microwave, but it was occupied at the time, so I had to melt the butter the old fashioned way, in a saucepan.


I place the Stovetop Cornbread Stuffing Mix in a medium bowl.  It's important to get the Cornbread type for maximum flavor.  To the dry stuffing mix I add the melted butter and using a table spoon toss these ingredients to evenly coat the cornbread in the butter.


Using the same spoon, I sprinkle the stuffing mixture on top of the cheese layer.  Again, I try to distribute it as evenly as possible.


Into the oven it goes to cook for 45 minutes at 350 degrees.  If you are also making my Kentucky Spoon Bread dish, they can be baked at the same time as they cook at the same temperature for the same amount of time!  When done, everything is cooked nicely, the cheese has melted and the cornbread is slightly crunchy on top.


Any time I share this dish at a common meal, I'm sure to get a request for a copy of the recipe, it's that good!  Enjoy!


Broccoli Supreme

2 pounds fresh broccoli, cooked*
1 can cream of chicken and mushroom soup
¾ cup mayonnaise
1 cup sour cream
2 eggs, well beaten
salt and pepper to taste
1 medium onion, chopped
1 ½ cups (8 oz.) extra-sharp cheddar cheese, shredded
1 pkg. Stovetop Cornbread Stuffing Mix
1 stick (4 oz.) butter, melted

Preheat oven to 350°F.  Cook broccoli.  In the meantime, combine soup, mayonnaise, sour cream, eggs, onion and seasonings.  Add broccoli; mix to combine.  Spread in a 9-x13-inch baking dish.  Sprinkle with cheese.  Melt butter; pour over stuffing mix and toss to coat. Sprinkle over cheese.  Bake at 350°F  for 45 minutes.  Serve hot.

*Purchase 4 pounds of broccoli, remove stalks yielding 2 pounds florets


Saturday, November 10, 2012

Orzo & Sun-Dried Tomato Salad

This pasta salad is a nice side dish for any Italian-style meal.  I think it goes especially well with a sandwich with Italian flavorings.  I recently made this to take for a reception following a funeral.  This dish travels well.


I found this recipe in my August/September 2012 issue of Taste of Home.  The first time I made this salad, we decided that it needed more sun-dried tomatoes, so I doubled the amount this time and I feel it was the perfect amount.  As I took this dish to a reception, my guys did not get to rate it, so you'll have to take my word that this is a tasty salad!


I began by cooking the orzo, which is a rice shaped pasta, in chicken stock in a large saucepan according to the package directions.  I didn't drain the pasta immediately, as I needed it to stop cooking and cool down right away.  What I did instead was place the pan in the sink an slowly run cold water into the pasta.  I would stir the pasta every so often to make sure it wasn't sticking together and to help the cold water to circulate around each piece to aid in cooling.  Once cool, I drained the pasta thoroughly.


I then placed the pasta in a large bowl and added to it the diced sun-dried tomatoes (I took time to chop them finely while the pasta was cooking), the oil, garlic, garbanzo beans, and seasonings.  I then tossed all of these ingredients together to combine.


Then I added the freshly grated Parmesan cheese, fresh basil, and feta cheese.  I used a tomato and basil feta, feeling the flavored cheese would go best with this dish.


This dish looks very inviting with the bright colors of the basil and sun-dried tomatoes.


Because I was taking this dish to a function, I dressed up the bowl by lining it with some leafy green lettuce leaves that I washed and dried.


It sure does make a pretty presentation.  I think it looks good enough to eat!  Enjoy!


Orzo & Sun-Dried Tomato Salad

49 oz. chicken broth
1 pkg. (16 oz.) orzo pasta
1/2 cup chopped oil-packed sun-dried tomatoes plus 4 tsp. oil from the jar
1 garlic clove, minced
1/2 teaspoon salt
1/4 teaspoon pepper
1/3 cup grated Parmesan cheese
4 large fresh basil leaves, thinly sliced
1 can (8.75 oz.) garbanzo beans
1 pkg. (4 oz.) crumbled feta cheese

In a large saucepan, bring broth to a boil.  Stir in orzo; return to a boil.  Cook for 8 - 10 minutes or until tender, stirring occasionally.  Drain orzo; transfer to a large bowl.  Stir in the tomatoes, oil from sun-dried tomatoes, garbanzo beans, garlic, salt and pepper; cool completely.  Add Parmesan cheese, basil, and feta cheese; toss to combine.  Cover and refrigerate until serving time.