Saturday, October 27, 2012

Liza's Mint Brownies

Who doesn't love brownies?  I know I do, but I also love mint, specifically chocolate mint.  So, I decided to try making mint brownies and the result was/is spectacular!


These brownies have the same look and texture of "normal" brownies with the added benefit of mint flavor.  I get raves on these brownies any time I serve them.  My boys get excited if they come home and smell that I've made a batch of these treats.  The only person who doesn't care for them is my husband because he doesn't like mint.  He thinks I've ruined a good batch of brownies when I've added the mint.  We really don't mind, as we figure there are more mint brownies for us!  The rest of us give this recipe 9's and 10's on the Melnarik rating scale.


The first thing I do is prepare my 9- x 13-inch baking pan.  I line it with non-stick foil, leaving a couple of inches of foil to hang over each end.  If you do not have the non-stick foil, then the foil you use will need to be greased.  I do this not only to ensure easy clean up, but also to aid in quicker cooling of the brownies and it allows a much easier way to cut them once cooled.  I will explain fully later.


One of the reasons this recipe is so simply is that I use the Ghiradelli brownie mix.  I try to always have this product on hand in case I need to whip up a dessert for something.  I like to buy the large box from Costco, as it contains 6 pouches, of which I use 2 for this recipe.  Individual boxes are available in most grocery stores also. The amounts of the additional ingredients needed to make the brownies are listed on the package.


To begin, following the directions on the box, in a medium bowl I combine the oil and the egg for one batch of brownies, mixing thoroughly.


To that, I add one package of the brownie mix.


I mix these together using about 40 strokes, so as to not overwork the batter.  There will still be some lumps (some are the chocolate chunks), but don't worry about them.


This first batch of brownie mix gets spread on the foil in the baking pan.


I top this with a layer of mint patties. I had this bag for a while, and during the heat waves at the beginning of October, they must have gotten warm enough that when they cooled, they got this whitish film on them.  They are still perfectly good to use if this happens.  The main thing here is to use the right type of mint patties.  DO NOT USE York Peppermint Patties as they are too thick!  From experience, I know that they don't melt completely into the brownies (this is what you want to have happen) and they can bubble up over the sides of the pan and make a horrible mess in your oven!  I use the Palmer brand.  Using the 14 oz. bag means there are only 2 patties left over.  Each patty is approximately 1-1/2 inches in diameter and not even 1/4 inch thick.  They are perfect for this recipe.  As you can see from the picture, I completely cover the brownie batter with mints, cutting some patties in half to fit. 


I mix up a second batch of the brownies in the exact same way as the first and spread it on top of the mints.  Into the oven it goes for 10 minutes longer than the box calls for when baking a 9- x 10-inch dish (or double recipe) of the brownies.


When they come out of the oven, they smell heavenly.  I leave them in the pan on a cooling rack for about 10 minutes.


Because brownies are so dense, they take a very long time to cool.  Lining the pan with foil helps speed the process a little bit.  By using the extended foil at the ends of the pan as handles, I lift the whole thing out of the pan and place it on the cooling rack.  This way, the brownies are no longer surrounded by the hot pan which would need to cool before the brownies begin to cool, and the air can get completely around them to help them cool faster.  Sometimes I elevate my cooling rack on inverted snack cups (see my Stromboli recipe) to help with the air flow.  I'm not saying they will cool fast, just more quickly than they would if they were left to cool in the pan.


The other benefit to using the foil is the ease in cutting the completed brownies.  I move the foil with the brownies to a cutting board (to protect my table).  Then, using a sharp large knife and and a rocking motion, I can cut them in no time!  This is much faster than using the sawing method while cutting brownies in the pan.


From the first picture at the top, you can see that the mints have melted completely into the brownies, which are moist and delicious.  Whenever I take these mint brownies to a function, I always prepare a small sign indicating they are mint brownies.  That way, if there are other people like my husband, they won't be disappointed.  Also, you won't find any thrown away in the trash, as true mint chocolate lovers will savor every morsel!  Enjoy!


Taco Cornbread Squares

I know when my boys were younger, if I tried a new recipe that would in any way taste like tacos, it was sure to please.  This is one of those recipes.  I hadn't made this dish in quite some time, but as my guys gobbled it up they were raving about it.


This casserole really makes a pretty presentation with all of the vivid colors.  I got this recipe from a co-worker years ago and my guys liked it from the first time I made it.  Back then, I wasn't asking them to rate new recipes, but now this dish gets 8's and 9's on the Melnarik rating scale.


I begin by putting the ground beef and chopped onion in pan and cooking then until the meat is browned and the onions soft and translucent.


While that is cooking, I begin to prepare the cornbread for the first layer of the casserole.  In a medium bowl, I combine the milk and the egg, stirring to break up the egg yolk.


I add the cornbread mix to that and stir to combine.


This cornbread mixture gets poured into a greased 9-inch square pan and is put in the oven to bake at 350° for 15 minutes.


While the cornbread is in the oven and once the meat and onions are cooked, I drain off the fat.  Then I add the taco seasoning, mixing thoroughly to combine.


To the meat mixture I add the refried beans, mixing thoroughly.  Once combined, I let that simmer until the cornbread is ready to come out of the oven.


In the meantime, I put the sour cream in a medium bowl.


To the sour cream, I add 1 cup of the shredded cheese, mixing well to combine.


When the cornbread comes out the oven, it should not be browned yet as it will be going back into the oven again.  However, it should be fully baked so that it's ready to take the next layers.


The meat mixture gets spread directly on top of the cornbread layer.  I apologize, I must have forgotten to take a picture of the next layer, which is the sour cream and cheese layer.  This goes on next and the dish gets put back in the oven for an additional 20 to 25 minutes until it is heated through and the cheese is melted.


When the casserole comes out of the oven, it's ready to dress with the remaining cheese, shredded lettuce and tomatoes.  If one of my boys has a friend join us for dinner, I add the toppings directly to the casserole assuming the entire thing will be eaten at the one sitting.  But, if I expect leftovers, we apply the toppings to each individual serving so that the casserole can be reheated in the microwave and the toppings added later.  Enjoy!


Taco Cornbread Squares

1 lb. ground beef
1 medium onion, chopped
1 package (8.5 oz.) cornbread/muffin mix
1 egg
1/3 cup milk
1 envelope taco seasoning mix
1 can (1 lb.) refried beans
1 cup (8 oz.) sour cream
1-1/2 cups (6 oz) shredded cheddar cheese, divided
1 medium tomato, chopped
1 cup shredded lettuce

Preheat oven to 350°.  In a large saucepan, brown ground beef and onions until meat is no longer pink; drain.  In the meantime, in a medium bowl, combine the cornbread mix, egg and milk.  Spread in a greased 9-inch square baking pan.  Bake at 350° for 15 minutes.  Once the meat is cooked and drained, add the taco seasoning and mix well.  Add the refried beans and mix well.  Spread over cornbread.  Combine sour cream with 1 cup of cheese; spread over meat mixture.  Bake for 20 – 25 minutes or until heated through and cheese is melted.  Top with remaining cheese, lettuce and tomatoes.

Sunday, September 30, 2012

Crock Pot Chicken Soft Tacos

This has got to be the most simple meal I've ever put together!  I utilizes a slow cooker, so the kitchen remains cool during the hot summer days, and it's a perfect go-to meal when my guys have crazy schedules and I'm feeding everyone at different times.


I found this recipe on Pinterest, but it originated at mychocolatetherapy.blogspot.com.  I guess the author likes more than just chocolate!  This is very similar to the Slow Cooker Mexican Pulled Pork Tacos I posted recently, except that I don't even have to get an extra bowl dirty mixing the sauce.  This recipe got 8s and 9s on the Melnarik rating scale.


The first time I try a new recipe, I usually make it exactly as written, unless there is an ingredient I know my family doesn't care for (i.e. I always omit olives).  In this case, the author suggested Newman's Own brand salsa.  The jar lid indicates this is a medium salsa, but we all felt as though it could use a little more heat, so next time, I will use a different brand which will give me our desired heat level.  I used the Lawry's brand taco seasoning, as that is our favorite. 


You're not going to believe how easy this is:  In the bottom of my crock pot, I dumped the jar of salsa and the packet of taco seasoning.


Using a spoontula, I mixed those two ingredients together.  


Then I added the chicken, stirring as I added each breast to make sure they all were covered in the sauce.


After cooking them on high for 4 hours (they can also be cooked on low for 8 hours), they were completely cooked and the sauce was a bit thinner.


I removed the chicken to a cutting board, where I shredded it using two forks.


As I shredded each breast, I returned it to the crock pot.


Once I stirred the shredded chicken back into the sauce, it was ready to be built into soft tacos.


Using flour tortillas, I added some of the chicken, then topped it with shredded medium cheddar cheese, shredded lettuce and diced tomatoes.  Sour cream and guacamole can also be added, if desired.  These are tasty soft tacos that are so simple to make and there was a enough chicken left over for another evening meal, plus a couple of lunches!  Enjoy!

Crock Pot Chicken Soft Tacos

1pkg. taco seasoning mix
1 (16 oz.) jar salsa
6 boneless skinless chicken breasts (2 lbs.)

In a 4 qt. crock pot, combine taco seasoning mix and salsa.  Add chicken, turning in sauce so all pieces are coated. Cover and cook on low for 6 to 8 hours or on high for 4 to 6 hours.  Using 2 forks, shred chicken and stir into sauce.  Serve on tortillas with toppings of your choice.

Suggested toppings:
shredded cheddar cheese
shredded lettuce
diced tomatoes
guacamole
sour cream

Cheesy Corn Cakes with Avocado Salsa


This recipe just looked interesting and yummy, so I decided to give it a try.  I love corn and it was pretty simple to make, but I think the avocado salsa makes this dish.


I found this recipe on Pinterest but it originated at simply-delicious.co.za.  This isn't the healthiest side dish because it's fried, but if you like corn and avocados, this recipe is for you.  My family gave this dish 8s and 9s on the Melnarik rating scale.


In a large bowl, I combined the creamed corn, corn kernels, eggs, paprika, and salt.


To that mixture, I added the shredded cheddar cheese.  This recipe calls for sharp cheddar, but if you're like me and want the cheese flavor to come through more, use extra sharp cheddar.  I stirred everything together until well combined.


Then I added the flour and baking powder, mixing well.


I added the milk a little bit at a time until the batter was not too thick, yet not making it too thin.  It needed to drop off the spoon easily but not spread like a pancake in the frying pan.


To my frying pan, I added some oil and heated it over a medium-high flame.  Then I dropped in spoonfuls of the batter.  As you can see, the one in the front spread into a wonky shape, but most of them remained round.  Once I could see at the edges that the bottom was nicely browned, I flipped them and cooked the other side.


Once fully cooked, I placed the corn cakes on folded paper towels to let the towels absorb some of the fat.


In the meantime, I began to prepare the avocado salsa.  I'm sure there is an easier way, but I chose to dice the avocado in the skin, so the chunks were more uniform in size.


As I separated the flesh from the skin, using a spoon, it was already in small in cubes.


To the avocado, I added the chopped red onion, and the diced red chili pepper.


Then, I added the salt and pepper to taste plus the fresh lemon juice and tossed gently to combine.


As I said before, I think the salsa made this dish and I would make it again to accompany other meals.


The warm corn cakes are crunchy on the outside and soft on the inside and when topped with the avocado salsa are a great side dish to serve with a Southwestern or Mexican style meal.  Enjoy!


Cheesy Corn Cakes with Avocado Salsa

2 cups corn
1 (8 oz.) can creamed corn
2 eggs
1 ½ cups grated sharp cheddar cheese
½ teaspoon paprika
1 teaspoon salt
1 ½ cups flour
1 teaspoon baking powder
½ cup milk
salsa:
2 avocados, chopped
1 small red onion, diced
1 red jalapeno, diced (remove seeds if you don’t want it really hot)
juice of ½ a lemon
salt and pepper to taste

In a large bowl, combine the corn kernels, creamed corn, eggs, cheddar cheese, paprika and salt; mix well.  Add the flour and baking powder; mix well.  Gradually stir in the milk until the batter is not too thick and drops off a spoon easily (it should also not be so thin that it spreads too much when you fry the cakes).  Heat a large frying pan and add some oil.  Fry spoonfuls of the batter until bubbles appear at the top; flip.  Allow to cook on the other side.  Remove from the pan once both sides are browned and cakes are fully cooked and place on paper towels to drain.  In the meantime, combine all the ingredients for the salsa and mix well.  Serve warm cakes with the avocado salsa.


Thursday, September 27, 2012

Slow Cooker Mexican Pulled Pork Tacos

This dish has got to be the most simple and yet tasty dish I've ever made and it cooks in a slow cooker or crock pot.  It's great if my family needs to eat at different times as the meat stays warm in the crock pot until they are ready to eat.  This is one of my new favorite recipes!


I found this recipe on Pinterest, but it originated at canyoustayfordinner.com.  I've already made a point of thanking her for sharing this recipe.  Three of us ate this for dinner one night, but my oldest son wasn't home for dinner that night so took some to work the next day for lunch.  He made a point of calling me to tell me how awesome his lunch was!  Needless to say, this recipe got all 9s on the Melnarik rating scale!


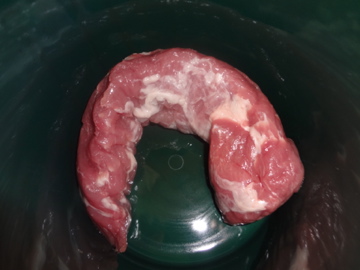
You won't believe how few steps there are to make this dish.  It begins with placing a pork tenderloin in the bottom of a crock pot.


In a medium bowl, the tomato sauce gets combined with the garlic, spices and sugar.


That mixture gets poured over the pork to completely cover it.  Put the lid on and cook it either on low for 8 hours or on high for 4 hours.  Then using a fork (most recipes call for 2 forks to shred, but this was so tender that it only needed one fork to shred) shred the meat into the sauce.  The meat was so tender, I was basically stirring it with my fork to shred it and mix it into the sauce.


To serve it, I put it in small flour tortillas and topped it with shredded cheddar cheese, sour cream, lettuce and tomatoes.  This has to be one of the tastiest tacos I've ever eaten!  Enjoy!


Slow Cooker Mexican Pulled Pork Tacos

1 lb. pork tenderloin
1 15 oz can tomato sauce

1 tablespoon chili powder

1 tablespoon ground cumin
1 tablespoon brown sugar
1 teaspoon cayenne pepper
½ teaspoon salt
3 cloves garlic, minced

Place pork in the bottom of your slow cooker.  In a small bowl, stir together all remaining ingredients.  Pour evenly over pork.  Cook on low for 8 hours or on high for 4 hours.  When done, shred the pork using two forks, pulling against the grain of the meat.  Serve in warmed tortillas with shredded lettuce, chopped tomatoes, grated cheddar cheese and sour cream.  Garnish with chopped scallions.