Showing posts with label Casserole. Show all posts

Wednesday, August 14, 2013

Bacon and Hash Brown Egg Bake


We were having over-night guests, so I wanted to make a breakfast casserole that I could prepare the day ahead and bake in the morning.  Of course, this was the perfect opportunity to try a new recipe.  This one sounded a bit different because of the Dijon mustard and vegetables, so I thought I'd give it a try.


I found this recipe on Pinterest, but originated at BettyCrocker.com.  How could I go wrong with a Betty Crocker recipe?  The preparation was easy and it was a hit with everyone who partook.  This dish got 7's and mostly 8's on the Melnarik rating scale.


To begin, I cut the bacon into 1-inch wide strips and cooked them over high heat in a medium skillet until crisp.


I removed the bacon from the pan with a slotted spoon and placed it on several layers of paper towels to drain and cool.


After removing all but 1 tablespoon of the bacon drippings, I added the onion, red bell pepper and sliced mushrooms to the skillet.  I cooked the vegetables over medium heat, stirring occasionally, for about 5 minutes, until the vegetables were tender.


I then stirred in the salt, pepper and Dijon mustard.


In a large bowl, I combined the eggs and milk, using a whisk.


The mixture should be fully blended, but not whipped until it is foamy.


After greasing a 9- x 13-inch baking dish, I evenly placed half of the thawed hash brown potatoes on the bottom.


Then, I evenly distributed the vegetables.


On top of that, I added half of the cheese.


The rest of the hash browns were added as the next layer.


I poured the egg mixture evenly on top and covered the baking dish in plastic wrap.  I placed it in the refrigerator to chill overnight.


I placed the remaining cheese and the cooled bacon in bowls, covered them with plastic wrap and placed them in the refrigerator also.


About 1 1/2 hours before serving breakfast, I preheated the oven to 325°F.  I removed the baking dish from the refrigerator, took off the plastic wrap and placed it in the preheated oven to cook for about an hour.  When it came out of the oven, the egg was nicely cooked and the cheese was melted.


Taking the leftover cheese from the day before, I sprinkled it evenly over the dish.


I then added the bacon I had reserved, sprinkling it as evenly as possible over the cheese.


Back into the oven it went for an additional 5 minutes to melt the cheese and heat the bacon through.


The dish was easy to cut into squares for serving and pared with some wheat toast, it was a hearty breakfast.  It was a nice way to serve some vegetables at breakfast, and who doesn't love bacon!  Enjoy!


Bacon & Hash Brown Egg Bake (Betty Crocker)

1 pound bacon, cut into 1-inch pieces
1 medium onion, chopped (1/2 cup)
1 medium red bell pepper, chopped (3/4 cup)
1 package (8 oz.) sliced fresh mushrooms
2 tablespoons Dijon mustard
½ teaspoon salt
½ teaspoon pepper
¾ cup milk
12 eggs
1 package (2 lb.) frozen hash browns, thawed
2 cups shredded Cheddar cheese (16 oz.)

In a 12-inch skillet, cook bacon until crisp.  Using slotted spoon, remove from pan to small bowl; cover and refrigerate.  Drain drippings, reserving 1 tablespoon in pan.  Add onion, bell pepper and mushrooms; cook 4 minutes over medium heat, stirring occasionally.  Stir in mustard, salt and pepper.  In large bowl, beat milk and eggs with wire whisk.  Spray 9-x13-inch baking dish (3 qt.) with cooking spray.  Spread half of hash browns in baking dish.  Add onion mixture evenly on top.  Sprinkle with half of the cheese; refrigerate remaining cheese.  Spread remaining hash browns over top.  Pour egg mixture over entire casserole.  Cover; refrigerate 8 hours or overnight. 

Preheat oven to 325°F.  Uncover baking dish; bake 50 to 60 minutes or until thermometer inserted in center reads 160°F.  Sprinkle with remaining cheese and the bacon.  Bake 3 to 5 minutes longer or until knife inserted in center comes out clean, top is puffed and cheese is melted.  Let stand 5 minutes before serving.


Sunday, March 10, 2013

Italian Sausage Casserole

As I thought about what I should make for dinner on Valentine's Day this year, I realized that my blog would be celebrating it's 1 year anniversary!  My first posts were about the meals I made a year ago on Valentines Day.  One of the easiest ways to make a Valentine's themed main dish is to make a pasta dish with a red sauce, making sure the sauce shines through a heart-shaped hole in the mozzarella cheese.


This year I decided to try a new recipe from my February/March 2013 issue of Simple and Delicious.  My guys are always up for any dish that has pepperoni and pasta.  This dish got all 8's on the Melnarik rating scale.


To begin, I began cooking the penne according to the package directions and preheated my oven to 350ºF.  Then, in a Dutch oven I combined the Italian sausage, chopped onions and bell peppers, and sliced mushrooms.  I cooked this mixture over medium heat until the sausage was browned and the vegetables were tender, breaking up the sausage as it cooked.  I then drained off the fat.


I added the pepperoni and continued to cook on medium until the pepperoni was heated through.


Then, I added the spaghetti sauce mix, stirring to thoroughly combine.


To that, I added the tomato paste, making sure it was fully incorporated.


Next, I added the water, garlic salt and olive oil, again, stirring to combine.  In the future, I would add the garlic salt at the same time as the spaghetti mix.  It just makes sense to me to add all the dry ingredients at the same time and by adding it directly to the meat, the heat of the pan will sear them to the meat.


Finally, once the penne was fully cooked, I drained it and added it to the sauce.  I mixed it until all of the pasta was covered in the sauce.


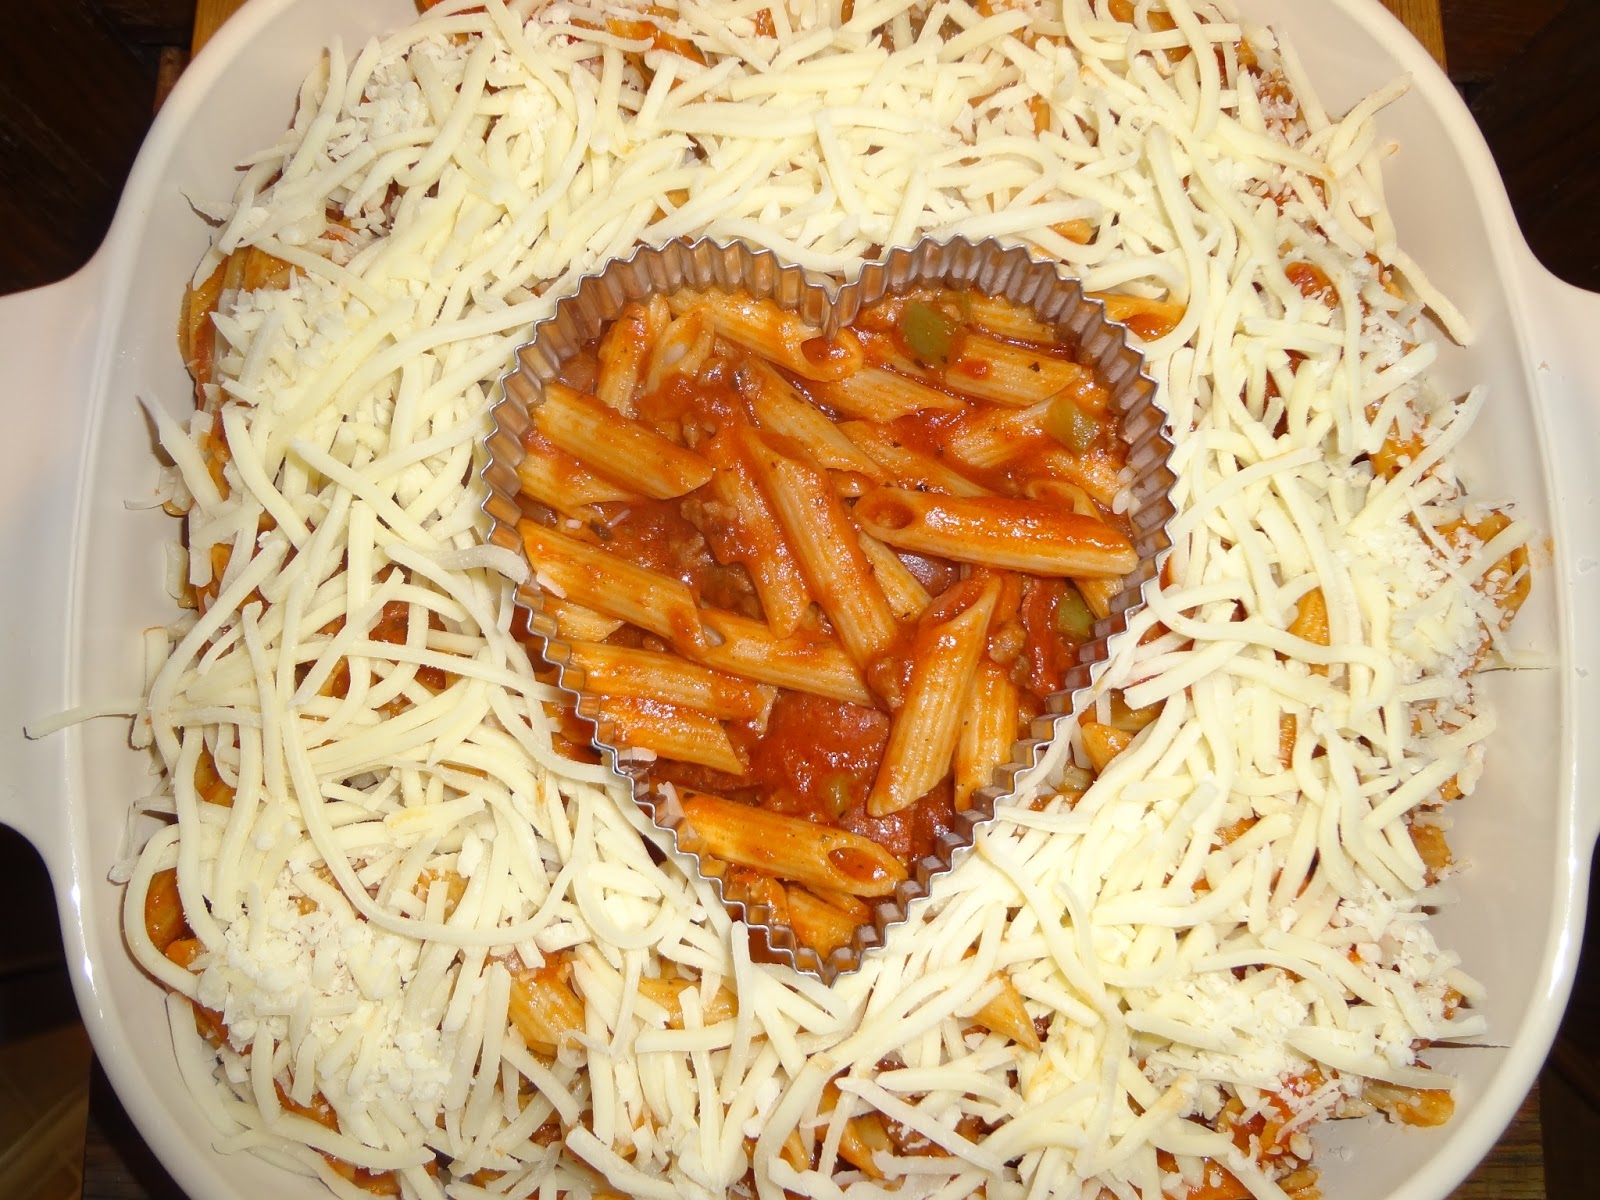
I then transferred the mixture to my baking dishes.  In this case, I was feeding my oldest son before he left for class, so I used one small casserole dish for him and a larger one for the rest of the family.  Pictured here is the small one I put together for him.  The entire recipe should fit in a 9- x 13-inch baking dish.  I placed a metal (important that it's metal as it will go into the oven!) heart-shaped cookie cutter in the center of the casserole.


Next, I added the shredded mozzarella cheese, making sure it touched the outside of the cookie cutter.  This ensures a perfectly shaped heart once the cookie cutter is removed.


Of course, in my larger casserole dish I had to use a larger cookie cutter.


I put the casserole in the oven and baked it at 350ºF for 25 minutes.  When I removed it from the oven, I took a sharp paring knife and cut around the outside of the cookie cutter and, using a paper towel to protect my fingers from the heat, I removed the cookie cutter.  I paired this dish with a Savory Biscuit Bubble Bread (see post below) that I baked in a heart-shaped pan.  It's just a simple way to show my family that I love them on Valentine's Day!  Enjoy!


Sausage and Pepperoni Pizza Pasta

1 (14.5 oz) package uncooked penne
1 pkg. (1 lb.) Italian sausage
1 cup sliced fresh mushrooms
1 medium green pepper, chopped
1 medium onion, chopped
1 pkg. (3 ½ oz.) sliced pepperoni
3 ½ cups water
2 cans (6 oz. each) tomato paste
2 envelopes thick and zesty spaghetti sauce mix
¼ cup olive oil
½ teaspoon garlic salt
2 cups (8 oz.) shredded part-skin mozzarella cheese

Preheat oven to 350ºF.  Cook penne according to package directions.  Meanwhile, cook the sausage, mushrooms, pepper and onion in a Dutch oven over medium heat until meat is no longer pink and the vegetables are tender; drain.  Add pepperoni and cook until heated through.  Stir in water, tomato paste, spaghetti sauce mix, oil and garlic salt.  Bring to a boil.  Reduce heat; simmer, uncovered, for 4 – 5 minutes or until heated through.  Drain pasta; sir into sausage mixture.  Transfer to a greased 9- x 13-inch baking dish.  Sprinkle with cheese.  Bake uncovered, at 350ºF for 25 – 30 minutes or until bubbly.

Saturday, January 12, 2013

Beef and Bean Casserole

This is a dish that anyone would love, even kids.  Not only that, but it's got to be one of the most simple casseroles to prepare!


This is a well-loved recipe that my mom made for our family from the time I was a little girl.  We would request that she make this meal often.  This is one of many recipes she gave to me when I got married and my family loves it too!  This dish gets all 9's on the Melnarik rating scale!


I begin by placing the ground beef in a large saucepan and cooking it over high heat.  I break up the meat as it cooks until it is no longer pink, then I drain off the fat.


To the beef, I add the salt, beans, brown sugar, and onion.  When I open the can of beans, there is that little cube of mostly fat (it's the pork part of the pork and beans) on the top.  I always remove it, so I'm not adding extra fat, before adding the beans to the dish.  I stir these ingredients to combine them thoroughly.


Then I stir in the barbecue sauce and heat until bubbly.  I aways use K.C. Masterpiece brand barbecue sauce.


I transfer the hot mixture to a 2 quart baking dish.  After removing the biscuits from the can, I cut them in half and arrange them in an eye appealing pattern on top of the beef mixture.  I then put the dish in the oven to bake at 375°F for 25 minutes.


I then remove the dish from the oven, sprinkle the cheese evenly over the biscuits and return it to the oven for an additional 5 minutes to melt the cheese.


It doesn't get much simpler than that!  This recipe serves four people, so if you have hearty eaters or more than four to feed, I suggest doubling the recipe as my mom did and bake it in a 9- x 13-inch baking dish.  Every time I make this casserole, it takes me back to when I was a little girl!  Enjoy!


Beef and Bean Casserole

1 pound ground beef
1 teaspoon salt
1 (15 oz.) pork & beans
¾ cup barbecue sauce
2 tablespoons brown sugar
1 tablespoon instant minced onion
1 can (7.5 oz.) biscuits
1 cup shredded sharp cheddar cheese

Preheat oven to 375°F.  In a skillet, cook ground beef until no longer pink; drain.  Stir in salt, beans, barbeque sauce, brown sugar, and onion; heat till bubbly.  Transfer to a 2 qt. baking dish.  Remove biscuits from can and cut in half to form half circles.  Place on top of beef mixture.  Bake at 375°F for 25 minutes or until biscuits are golden brown.  Sprinkle cheese on top of biscuits; return to oven for an additional 5 minutes to melt cheese.

Yield:  4 servings

Friday, December 28, 2012

Taco Fiesta Chicken Lasagna

I know that lasagna is traditionally an Italian dish, but just to be different, I enjoy making this lasagna with a Mexican flavor.  The nice thing about this recipe is that it needs to be prepared the day before, so there is no real work the day you serve it as it only needs to be baked.  That makes it a great dish when having guests for dinner.  While the lasagna is in the oven, an appetizer can be prepared or a fresh salad can be tossed as an accompaniment.


I found this recipe in one of those little recipe books which are sold at the register in the market.  This is a go to dish when I know I won't have a lot of time to prepare a full meal, especially when I'm serving more than just our little family.  The nice thing is that there are usually leftovers for another meal or lunches.  My guys give this 8's and 9's on the Melnarik rating scale.


In a large bowl, I combine the tomatoes and taco sauce.


To that, I add the cubed chicken, stirring to combine.  This can be leftover chicken, or sometimes, I use the grilled chicken strips that are sold in the market.


In a medium bowl, I combine the refried beans and sour cream.


To assemble the lasagna, I begin by spraying a 9-x13-inch baking dish with nonstick spray.  Then I spread about 1 cup of the chicken mixture in the bottom of the pan.


Next, I add 5 lasagna noodles, breaking them to fit in the rounded corners of the pan.


I add 1/2 of the bean mixture over the noodles, spreading as evenly as possible.


I then add 1 1/2 cups of the chicken mixture over the bean layer.  I know it's hard to add this evenly, but do the best you can.


About 1 cup of the cheese is sprinkled evenly on top of the last layer.


That is followed by half of the onions, distributing them as evenly as possible.


Then I repeat with another layer of noodles, broken to fit.


The rest of the bean mixture is added next.


This is followed by another 1 1/2 cups of the chicken mixture.


Another cup of cheese is sprinkled on top of the chicken mixture.


The last of the onions get added next.


The last layer of noodles goes on next, again breaking to fit.


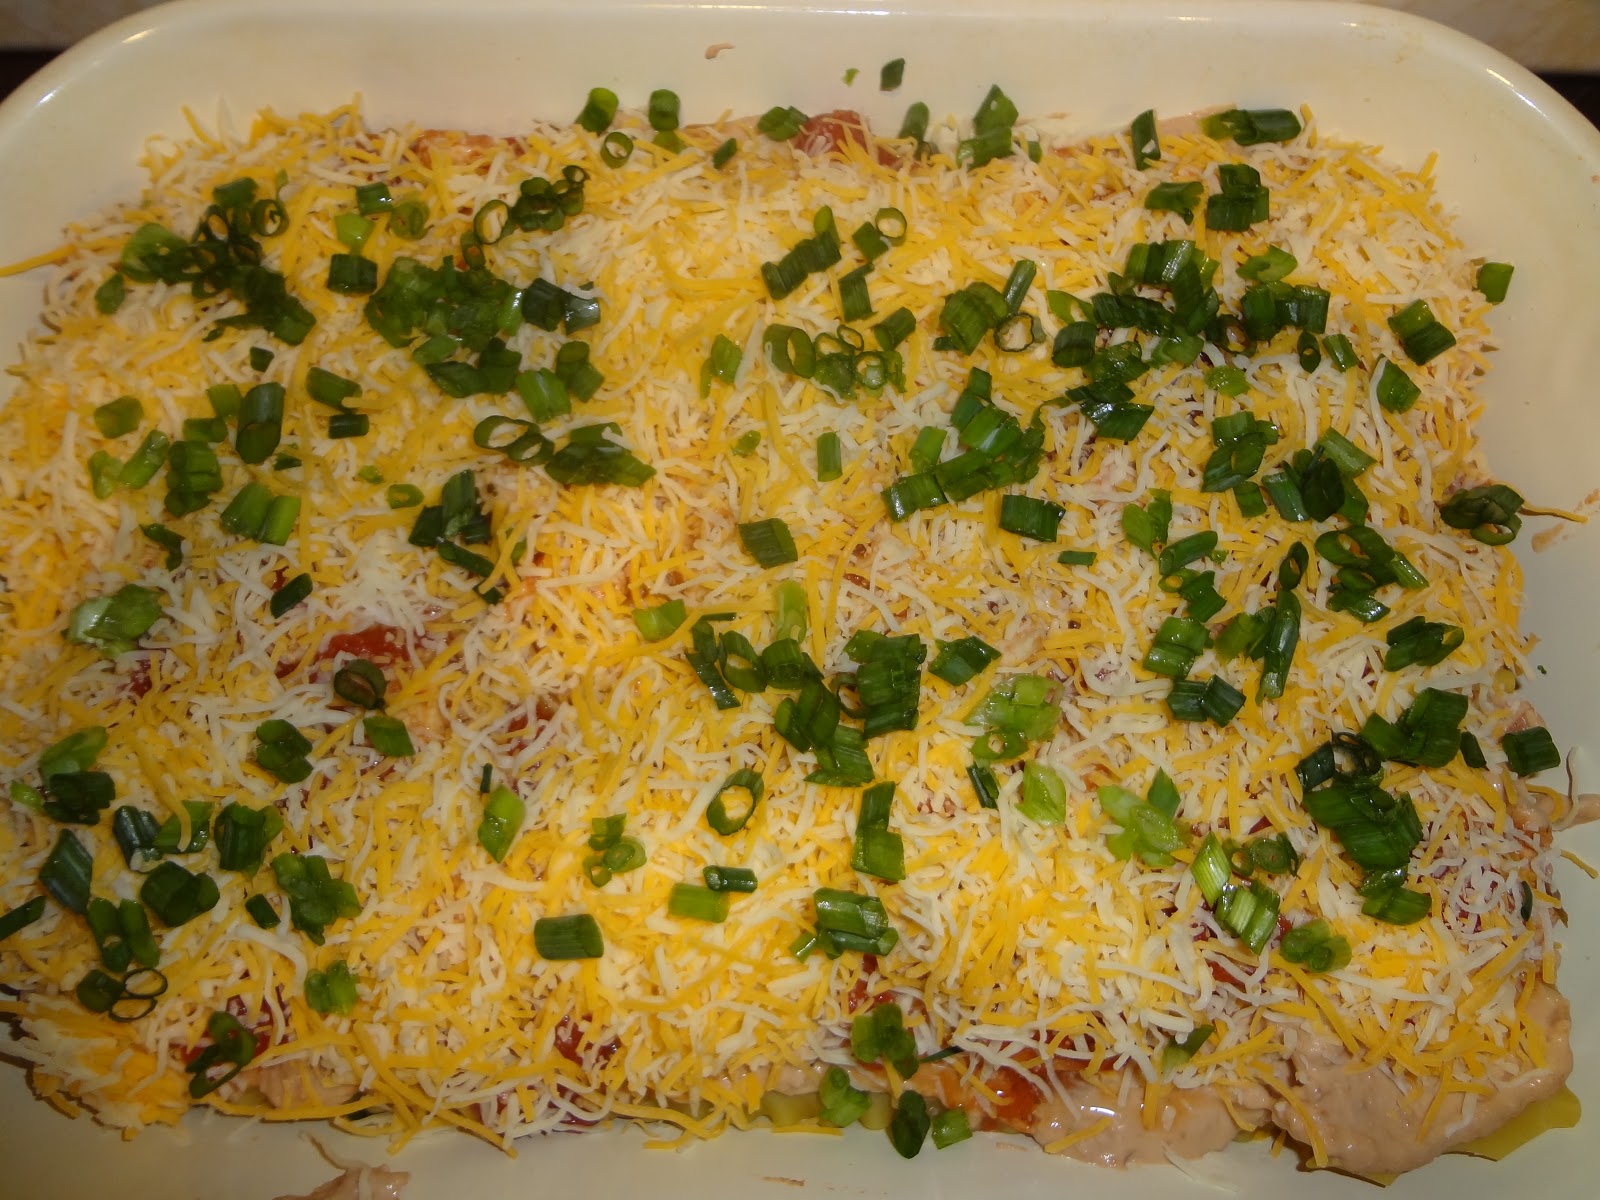
This layer gets topped with the last of the chicken mixture, and I still had some green onions, so I added them.


The last layer is the rest of the cheese.  It's important to make sure that the final layer of noodles is completely covered.  I then cover the entire dish with the nonstick aluminum foil and place it in the refrigerator until baking time the next day.  If you do not have the nonstick foil, you can spray regular foil with a nonstick spray and put it on the dish spray side down.


This dish does take a considerable amount of time to bake, so allow for that.  Part of the reason is that it's been in the refrigerator, so it takes longer to heat before the cooking begins.  For this reason, I put it in the oven, then turn it on, so that as the oven heats, it can begin to heat up the lasagna also.  It gets baked covered at 350°F for 50 minutes.  Then it gets uncovered and baked about another 20 minutes.  It's easier to cut when I let it sit about 10 minutes before cutting.


Each piece can be topped with fresh cilantro, sour cream, chopped tomato and/or shredded lettuce.  Fiesta means party and with all the vibrant colors in this lasagna, it's like having a party on your plate!  Enjoy!


Taco Fiesta Chicken Lasagna

2 (14 ½ oz.) cans diced tomatoes with mild green chiles, undrained
¼ cup taco sauce
3 cups cubed cooked chicken
1 (16 oz.) can refried beans
½ cup sour cream
15 uncooked lasagna noodles
12 oz. (3 cups) shredded Mexican cheese blend (Monterey Jack and Cheddar)
½ cup chopped green onions
2 tablespoons chopped fresh cilantro

Spray a 9-x13-inch (3 quart) glass baking dish with nonstick cooking spray.  In a large bowl, combine tomatoes and taco sauce; mix well.  Stir in chicken.  In a medium bowl, combine refried beans and sour cream; mix well.

Spread about 1 cup chicken mixture in bottom of sprayed baking dish.  Top with 5 uncooked noodles, breaking to fit if necessary.  Spread with half of bean mixture and 1 ½ cups chicken mixture.  Sprinkle with 1 cup of the cheese and half of onions.

Layer 5 more noodles, remaining bean mixture, 1 ½ cups chicken mixture and 1 cup cheese.  Top with remaining 5 noodles, chicken mixture, onions, and cheese.  (Be sure top noodles are covered.)  Spray a 15-x12-inch sheet of foil with cooking spray and cover dish with sprayed side down.  Refrigerate at least 8 hours or overnight.

Heat oven to 350°F.  Bake covered lasagna for 50 minutes.  Uncover baking dish; bake an additional 18 to 22 minutes or until bubbly and thoroughly heated.  Let stand 10 minutes before serving.  Sprinkle with cilantro.  If desire, garnish each serving with dollop of sour cream, chopped tomato and shredded lettuce.