Saturday, January 12, 2013

Green Enchiladas

About seven years ago, following knee surgery, many friends blessed us with dinner while I was recuperating.  Living in Southern California, we'd had many enchiladas with the traditional red sauce, but we had never had them made with a green sauce.  My husband, in particular, thought they were the best enchiladas he had ever tasted!


Our pastor's wife and my friend, Rhonda Boone introduced us to these fabulous enchiladas and was quite happy to share her recipe with me.  I have made this dish many times because it is a family favorite.  My guys give these enchiladas 8's and 9's on the Melnarik rating scale.


I begin by adding the onion to a saucepan heated with a little oil over medium heat and cook until they are translucent and soft.


This is one of the recipes I like to use the rotisserie chicken in.  I usually buy it at Costco, let it cool for a while, then pick all the meat off the bones.  I transfer it to a freezer zip-lock bag and put it in the freezer until ready to use.  After defrosting the chicken and chopping it into smaller that bite-size pieces, I place it in a medium bowl and add the onions and 1/2 cup of the enchilada sauce.


The mixture should be moist, but not wet.  If it needs a little more sauce to get it to the consistency in the picture above, I add a little more.  Then I set it aside until the rest of the ingredients are ready for assembly.


The corn tortillas will break if I try to assemble the enchiladas at this point, so I follow the advice of my Mexican friends and fry them in oil for a few seconds to make them supple.  This also ensures that the enchiladas won't stick to the baking dish.  In a small frying pan, I heat  about 1/2 inch of oil over medium-high heat.  The oil should be hot, but not smoking.  Then I add one tortilla just until their are bubbles in the oil all around the edge (about 3 seconds).  Then, using tongs, I flip it over to the other side.


Immediately, it will begin to puff up with bubbles all around the edge of the tortilla.  Another 3 seconds and it should be removed from the pan.  Before beginning, I've arranged at least 4 layers of paper towels on the counter next to the stove.  As each tortilla comes out of the pan, I place it on the paper towels to soak up the excess oil.  All of the tortillas are prepared in the same way, one at a time. The idea is to soften the tortilla, not to leave it in the hot oil so long that it becomes a tortilla chip!


Now I'm ready to assemble the enchiladas.  After blotting a tortilla with a fresh paper towel, I place it on my work surface.  Across the middle, I add a couple of tablespoons or so of the Mexican blend cheese.


On top of that, I add some of the chicken mixture.  The idea is to not have so much filling that it's too full to roll.


I then begin rolling up the tortilla, tucking in the edge that had been closest to me under the filling as I continue to roll.


I then place each enchilada in my baking dish, seam side down.  If I'm making this dish for more than just my family, I use a 9- x 13-inch baking dish, but in this case, I use smaller baking dishes so I'll have one for dinner for that evening and one I can either use later in the week, or freeze for later in the month.  As I add each one, I push it right up against the previous one, trying to add as many as possible to the dish.


Once the baking dishes are filled, I add the remaining enchilada sauce, making sure all of the enchiladas are covered in the sauce.  The enchiladas can be frozen at this point to be baked at a later date.


The sauce gets topped with a generous amount of cheese.  My Mexican friends say you can't have too much sauce or too much cheese!  Into the oven the baking dishes go for 30 minutes at 350°F.


When they come out of the oven, the cheese has melted and they are piping hot and ready to serve.


I like to serve these enchiladas with refried beans and a Mexican rice.  When I made this dish recently, I also made a small dish of enchiladas using the red sauce, and when my husband and oldest son compared the two, they both declared the green enchiladas as superior in flavor!  Enjoy!


Green Enchiladas

1 chicken, cooked and deboned
1 large onion, chopped
1 – 2 tablespoons olive oil
1 (28 oz.) can green chili enchilada sauce (I use La Victoria brand)
26 – 30 corn tortillas
½ cup vegetable or canola oil for heating tortillas
5 – 6 cups shredded Mexican blend cheese (Monterey Jack & Cheddar)

Chop chicken into small pieces (smaller than bile-size) and place in a medium bowl.  In a small saucepan, sauté onion in olive oil until soft and translucent.  Add onion and about ½ cup enchilada sauce to the chicken.  Mix, adding just enough enchilada sauce to make the mixture moist.  Put vegetable or canola oil in small skillet and heat until hot, but not smoking.  Heat tortillas one at a time in the oil for about 3 seconds on each side; stack on paper towels to drain.  Fill each tortilla with some cheese and chicken mixture, making sure it’s not too full to roll.  Place seam side down in a 9- x 13- inch baking dish.  Continue until pan is full and all of the chicken mixture has been used.  Pour the rest of the enchilada sauce evenly over the top of the rolled enchiladas, sprinkle with remaining cheese.  Bake at 350°F for 30 minutes.

These also freeze very well, so if you aren’t cooking for many people, you may want to fill several small dishes, freezing some after adding the enchilada sauce to the top of the enchiladas.  Defrost fully before baking. 

Wednesday, January 2, 2013

Shredded Beef Nachos (Crock Pot)

This is a great dish to serve a bunch of hungry teenagers; I know from experience.  It's also great for those times when I know I'll be gone all day and won't have much time to prepare a meal, plus everyone seems to be eating at different times.  I usually serve it as a meal and the leftovers are used by my boys as a snack later in the week.


I think boys like almost anything that can be eaten with their fingers!  That and the crunch of the chips makes this a winner with my guys.  I found this recipe in slow cooker recipe book at the check out counter in the market and I love that there is so little work involved in preparing this dish.  That made it a perfect choice during the busy holidays!  My guys give this recipe 8's and 9's on the Melnarik rating scale.


After trimming the chuck roast of any extra fat around the outside, I place it in a cool crock pot.  Tip:  Only hot foods should be placed in a heated crock pot, cold or room temperature foods should be placed in a cool crock pot before cooking.


I added the minced garlic to the top of the roast and distributed it as evenly as possible.


In a small bowl, I combined the taco seasoning mix and brown sugar.  I always use dark brown sugar unless a recipe specifies otherwise.


This mixture was then sprinkled over the beef.  I covered the crock pot and cooked it on low for 8 hours.  If time is an issue, it can also be cooked on high for 4 - 5 hours.


Once fully cooked, the roast had shrunk a bit and there was a flavorful sauce at the bottom of the pot.


The meat was so tender, I had to remove it from the crock pot in sections.  I placed it on a cutting board and shredded it using 2 forks, discarding any fat.


The shredded beef was returned to the crock pot and mixed in with the juices.  That's all it took and it was ready to serve.  This is how we assemble our nachos:

We place tortilla chips on a microwave safe plate and, using a slotted spoon, top them with some of the shredded beef (left).

We top the beef with a pre-shredded Mexican cheese blend -Monterey Jack and cheddar (right).


We put the plate in the microwave for 1 minute on high to melt the cheese (left).


Then we add any desired toppings such as salsa, sour cream, cilantro,
green onions, and/or fresh tomatoes (right).


These nachos can be served as a snack or as a meal.  Any way you serve them, they're sure to be a hit!  Enjoy!


Shredded Beef Nachos

Nachos
1 (3 lb.) boneless beef chuck roast, trimmed of fat
2 garlic cloves, minced
1 pkg. Taco seasoning mix
3 tablespoons brown sugar
Tortilla chips

Suggested Toppings:
Cheddar/Monterey Jack cheese, shredded
Sour cream
Salsa
Green onion
Olives
Cilantro
Diced tomatoes

Place beef roast in a 3 ½ or 4 quart slow cooker.   Distribute garlic evenly over beef.  In a small bowl, mix together taco seasoning and brown sugar; sprinkle over roast.  Cover and cook on low 8 – 9 hours.

Before serving, place topping ingredients in individual serving dishes.  Remove beef from slow cooker; place on a large plate or cutting board.  Shred beef with 2 forks; return to slow cooker and mix well.

To serve, have guests place chips on serving plates; using tongs or a slotted spoon top chips with shredded beef.  Top the beef with cheese and any other desired toppings.

Beef mixture can be held on low setting for up to 2 hours.

Potato Cheese Soup


My family has been making this recipe for years, and it's certainly one of our favorite dishes.  It's fairly easy to make and travels well in a crock pot to take to a common meal with friends.


My family lovingly refers to this cheesy potato dish as "Potato Cheese Stuff."  This is because it was originally called Potato Cheese Casserole when my mom happened upon it, but it's more like a soup when piping hot, so my friends started calling it soup.  Sometimes, I thin it and serve it as soup, other times I don't add the milk and use it as a side dish.  More often than not, I take it to a pot-luck style meal where it's considered soup, so that's how I'm presenting it to you!  This recipe gets all 9's on the Melnarik rating scale.


To begin, I peel and cut the potatoes and boil them.  People boil spuds in all sorts of ways, but I've found the fastest way is to cut them into chunks that are no thicker than about 1/2 inch.  The thicker the pieces, the longer it takes to cook to the center of each piece.  


After cutting them, I place them in a Dutch oven, which I've filled about 1/3 with water.   I actually turn the heat on high as soon as I add the first potato, to save on cooking time.  As I add each potato, it brings the temperature down a bit, so the pot never begins to boil until a few minutes after I add the last spud.  The picture above was taken just after I added the last one.  Once the pot comes to a full boil, I cook the potatoes for 10 minutes.  While the potatoes are cooking, I melt the butter in the microwave and shred the extra-sharp cheddar cheese.


Once the potatoes are fully cooked (I test them by sticking a fork into them to determine if they are tender), I drain the water and place them in a large bowl.  I then add the melted butter and toss gently.  As ingredients get added, the chunks get smaller as the potatoes get broken up a bit.  We like to have some small pieces in the final product, so we mix gently as we combine the rest of the ingredients.


Next, I add the shredded cheese, and again toss lightly.  My cheese of choice for this dish is Cracker Barrel Extra-Sharp Cheddar Cheese.  I've used other brands in the past and have to add more cheese to get the great cheesy flavor that one brick of the Cracker Barrel gives this soup.  The sharpness of the cheese (the amount of aging time) gives more flavor without having to use more cheese than the recipe calls for.  My rule of thumb is the sharper, the better.


The heat of the potatoes will begin to melt the cheese while I take care of the next step, which is to combine the cream of chicken soup, sour cream, green onions, salt and pepper in a medium bowl.


The soup mixture then gets added to the potato and cheese mixture, again combining gently.  At this point, there are three choices for how to finish up the dish.  If I was taking it to a gathering, I would put it in a crock pot and cook it on low for 4 hours.  (It can also be made to this point, put in the crock of a crock pot, covered with plastic wrap and refrigerated until ready to cook.  I remove the plastic and cover it before beginning to cook.)  About 1/2 hr. before serving, I add the milk if I'm serving it as soup in bowls.  The second option, which was the cooking method suggested on the original recipe, is to transfer it to a casserole dish and bake it in the oven at 350°F for 25 minutes.  This would be the option to choose if you wanted it to be thicker and served as a side dish.  The third option, which is the fastest method and the one I chose this time, is to transfer the mixture to a Dutch oven to cook.


I did use the same Dutch oven that I had cooked the potatoes in initially; I just washed it before using it again.  You can see how thick the mixture is at this point.


I turned the heat on to a medium setting, where I began to heat the soup.  I stirred it frequently so it didn't stick to the bottom of the pot.  Once heated through, you can see that the cheese has completely melted and it's not as thick as it was before.  It can be served as a side dish at this point, because it won't run all over the plate.


To make it a better consistency to be served as soup, I add 1 cup of milk, stirring in 1/2 cup at a time to make sure it is fully incorporated.  Because I've added cold milk, I let it cook another 5 minutes or so until it is heated through.


When comparing the picture above to the one before adding the milk, you can tell it's much thinner.  Even the side of the pan is evidence of that.  The soup is still on the thick and hearty side, which is the way we like it.  If you prefer a thinner soup, add more milk in 1/2 cup increments until you get your desired consistency.


This hearty, cheesy soup is great on it's own, but we love to have it with Broccoli Supreme (already posted on this blog) and ham.  Also, you will always get compliments if you take this dish to any common meal you attend!  Enjoy!

Potato Cheese Soup

6 large Russet potatoes, boiled
¼ cup (1/2 stick) butter, melted
2 cups (8 oz.) extra-sharp cheddar cheese, shredded
1 can cream of chicken soup
2 cups (16 oz.) sour cream
½ cup green onions, chopped
1 tablespoon salt
½ teaspoon pepper
1 cup milk

Place cooked potatoes in a large bowl; add melted butter and mix lightly.  Add shredded cheese; mix lightly.  In a medium bowl, combine soup, sour cream, green onions and seasonings.  Add soup mixture to potatoes, mixing lightly to combine.

Cooking options:
·Place in casserole dish and bake at 350°F for 25 minutes (serve as side dish).
·Place in 5 qt. crock pot and cook on low for 4 hours, adding milk ½ hour before serving.
·Place in Dutch oven and cook over medium heat until cheese is melted and mixture is heated through.  Add milk ½ cup at a time to thin to soup consistency, heat through.

Friday, December 28, 2012

Taco Fiesta Chicken Lasagna

I know that lasagna is traditionally an Italian dish, but just to be different, I enjoy making this lasagna with a Mexican flavor.  The nice thing about this recipe is that it needs to be prepared the day before, so there is no real work the day you serve it as it only needs to be baked.  That makes it a great dish when having guests for dinner.  While the lasagna is in the oven, an appetizer can be prepared or a fresh salad can be tossed as an accompaniment.


I found this recipe in one of those little recipe books which are sold at the register in the market.  This is a go to dish when I know I won't have a lot of time to prepare a full meal, especially when I'm serving more than just our little family.  The nice thing is that there are usually leftovers for another meal or lunches.  My guys give this 8's and 9's on the Melnarik rating scale.


In a large bowl, I combine the tomatoes and taco sauce.


To that, I add the cubed chicken, stirring to combine.  This can be leftover chicken, or sometimes, I use the grilled chicken strips that are sold in the market.


In a medium bowl, I combine the refried beans and sour cream.


To assemble the lasagna, I begin by spraying a 9-x13-inch baking dish with nonstick spray.  Then I spread about 1 cup of the chicken mixture in the bottom of the pan.


Next, I add 5 lasagna noodles, breaking them to fit in the rounded corners of the pan.


I add 1/2 of the bean mixture over the noodles, spreading as evenly as possible.


I then add 1 1/2 cups of the chicken mixture over the bean layer.  I know it's hard to add this evenly, but do the best you can.


About 1 cup of the cheese is sprinkled evenly on top of the last layer.


That is followed by half of the onions, distributing them as evenly as possible.


Then I repeat with another layer of noodles, broken to fit.


The rest of the bean mixture is added next.


This is followed by another 1 1/2 cups of the chicken mixture.


Another cup of cheese is sprinkled on top of the chicken mixture.


The last of the onions get added next.


The last layer of noodles goes on next, again breaking to fit.


This layer gets topped with the last of the chicken mixture, and I still had some green onions, so I added them.


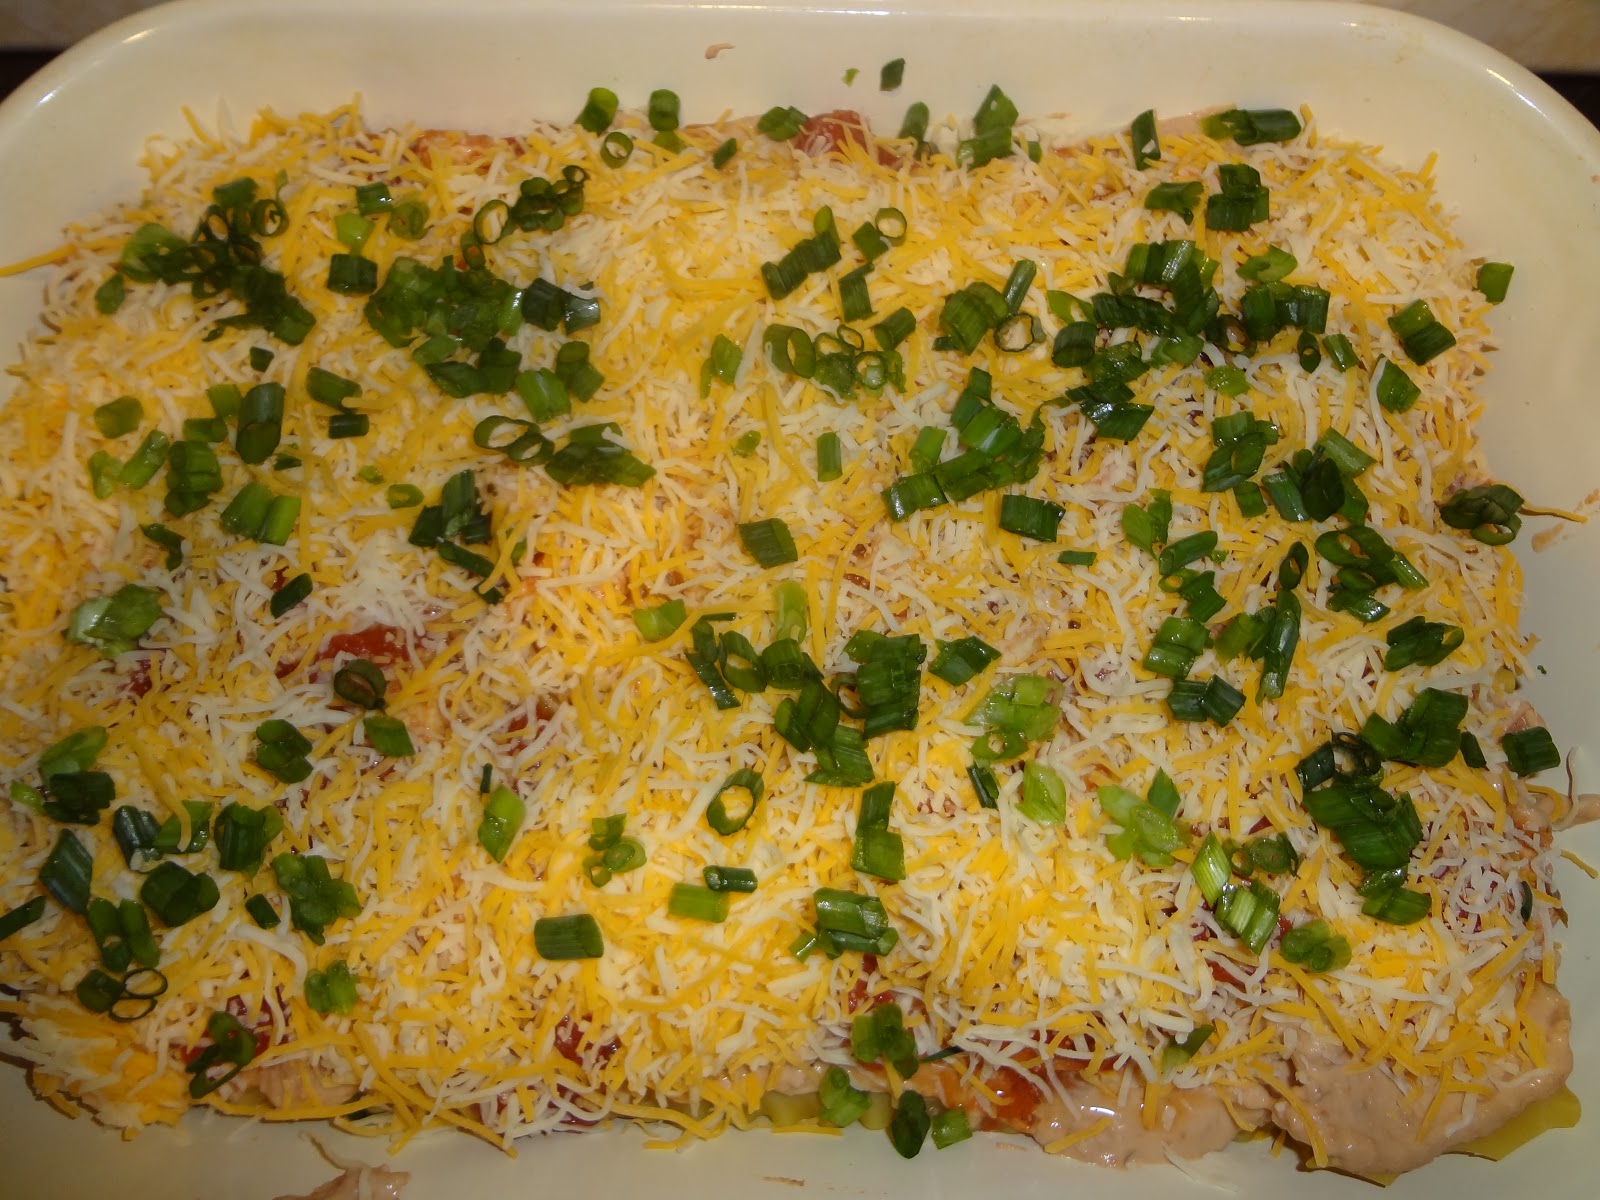
The last layer is the rest of the cheese.  It's important to make sure that the final layer of noodles is completely covered.  I then cover the entire dish with the nonstick aluminum foil and place it in the refrigerator until baking time the next day.  If you do not have the nonstick foil, you can spray regular foil with a nonstick spray and put it on the dish spray side down.


This dish does take a considerable amount of time to bake, so allow for that.  Part of the reason is that it's been in the refrigerator, so it takes longer to heat before the cooking begins.  For this reason, I put it in the oven, then turn it on, so that as the oven heats, it can begin to heat up the lasagna also.  It gets baked covered at 350°F for 50 minutes.  Then it gets uncovered and baked about another 20 minutes.  It's easier to cut when I let it sit about 10 minutes before cutting.


Each piece can be topped with fresh cilantro, sour cream, chopped tomato and/or shredded lettuce.  Fiesta means party and with all the vibrant colors in this lasagna, it's like having a party on your plate!  Enjoy!


Taco Fiesta Chicken Lasagna

2 (14 ½ oz.) cans diced tomatoes with mild green chiles, undrained
¼ cup taco sauce
3 cups cubed cooked chicken
1 (16 oz.) can refried beans
½ cup sour cream
15 uncooked lasagna noodles
12 oz. (3 cups) shredded Mexican cheese blend (Monterey Jack and Cheddar)
½ cup chopped green onions
2 tablespoons chopped fresh cilantro

Spray a 9-x13-inch (3 quart) glass baking dish with nonstick cooking spray.  In a large bowl, combine tomatoes and taco sauce; mix well.  Stir in chicken.  In a medium bowl, combine refried beans and sour cream; mix well.

Spread about 1 cup chicken mixture in bottom of sprayed baking dish.  Top with 5 uncooked noodles, breaking to fit if necessary.  Spread with half of bean mixture and 1 ½ cups chicken mixture.  Sprinkle with 1 cup of the cheese and half of onions.

Layer 5 more noodles, remaining bean mixture, 1 ½ cups chicken mixture and 1 cup cheese.  Top with remaining 5 noodles, chicken mixture, onions, and cheese.  (Be sure top noodles are covered.)  Spray a 15-x12-inch sheet of foil with cooking spray and cover dish with sprayed side down.  Refrigerate at least 8 hours or overnight.

Heat oven to 350°F.  Bake covered lasagna for 50 minutes.  Uncover baking dish; bake an additional 18 to 22 minutes or until bubbly and thoroughly heated.  Let stand 10 minutes before serving.  Sprinkle with cilantro.  If desire, garnish each serving with dollop of sour cream, chopped tomato and shredded lettuce.