Showing posts with label Chocolate. Show all posts

Thursday, November 29, 2012

Chocolate Eclair Dessert

This dessert is a staple for our family at the holidays.  In fact, if it isn't one of the choices for dessert on any given holiday, there can be hayhem!  This dish is fairly easy to put together and the best part is that it has to be assembled the day prior to serving!  This means no effort, other than cutting and serving, on the day of the event!


I got this recipe before I was married from a friend's mother, Bobbie Godsey, who attended the church I grew up in and also lived down the street.  It was originally called Chocolate Eclair Cake, but it really isn't anything like a cake, so I renamed it years ago.  I've taken this dessert to countless functions, where  it gets rave reviews.  Someone recently told me I should be selling this dessert to restaurants as he thought it was better than anything he's ordered in the past and he eats out a lot!


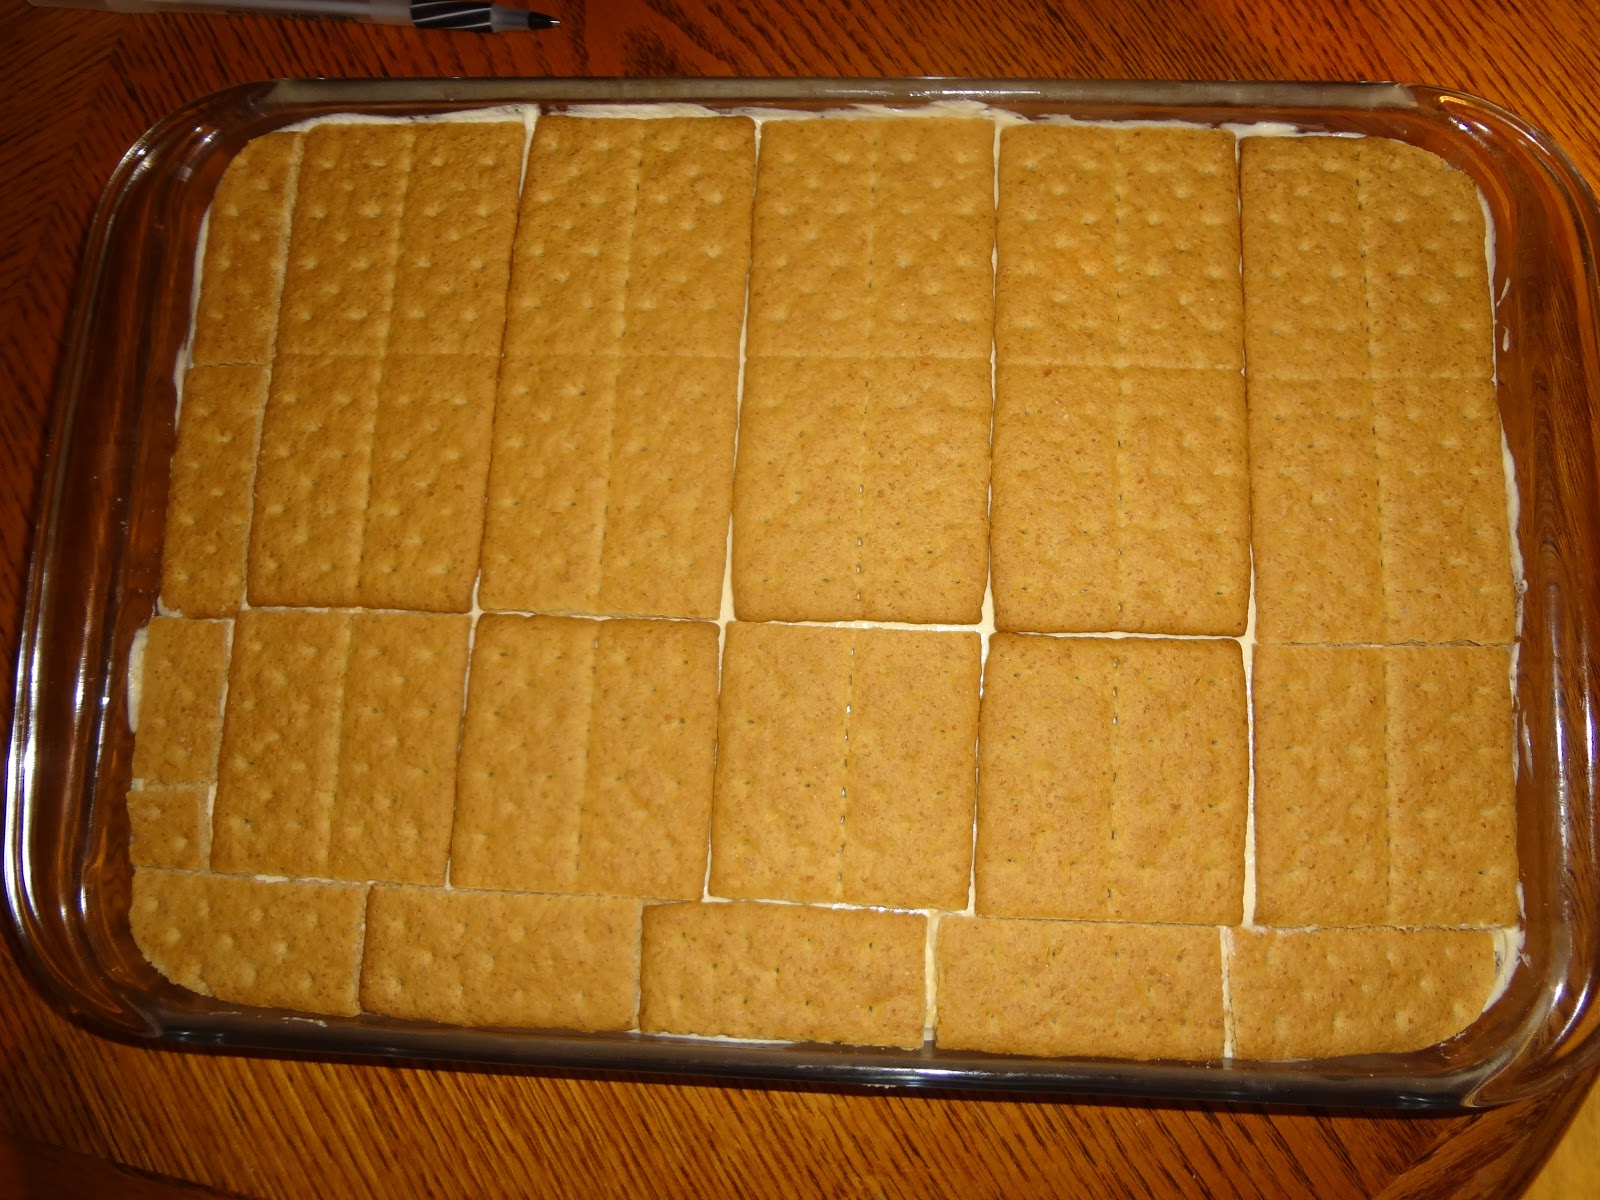
After greasing my 9-x13-inch baking dish with butter (you can use non-stick spray also), I placed a layer of graham crackers in the bottom.  It's hard to tell in this photo, but my dish has rounded corners, so using a very sharp knife, I slightly rounded the corners of the crackers that sat in the corners.


In a large bowl, I mixed together the milk and the pudding mix using a whisk until it was smooth, and slightly thickened.  It's important to purchase the French Vanilla pudding for this recipe to achieve the perfect flavor.


I then folded in about half of the thawed Cool Whip.  It's important to fold in the whipped topping to give it a light texture.


Then, I folded in the rest of the Cool Whip.  I've found that when I fold in half at a time, it's easier to combine everything while retaining the volume.


I added about half of the pudding mixture to the top of the graham crackers in the baking dish.  I spread this out into a nice, somewhat smooth and even layer.  It's important to get it as level as possible, because there will be two more layers of graham crackers added and the dessert shouldn't be higher at one side.


Next, I added the second layer of graham crackers, again cutting the crackers that will fit into the corners.


Then I added the rest of the pudding mixture, again spreading evenly and smoothly.  As you can see from the picture, I used my off-set spatula to spread the mixture as I find it easier to get it into the corners and make the whole thing smooth.


The final layer of graham crackers was next.  Because the dish is a bit wider at the top than at the bottom, it requires some more cutting to completely cover the last layer.  It's important to make sure the pudding mixture is completely covered because the final layer is the chocolate, which needs to "stick" to the graham crackers to allow it to be cut easily when serving.  You also want to make sure all the crackers on this layers are perfectly level.  If they aren't it will show once you apply the chocolate.


From this photo, you can see how much I cut to round the corner of the cracker to fit perfectly into the pan.  Again, I was aiming at getting complete coverage.


To make the chocolate layer, I began by melting 2 squares of unsweetened chocolate in a small saucepan over low heat.


In the meantime, in a medium bowl, with the back of a table spoon, I began working the softened butter into the powdered sugar.  It will not be thoroughly combined before you need to add some liquid to aid in the process.


I added the syrup next.  This makes it easier to combine everything and begins to give the mixture a glossy finish.


As the chocolate was melting, I stirred it occasionally, so it didn't burn. 


Once the chocolate was melted, I added it to the first three ingredients, which were well combined and smooth.


After the chocolate was added, the mixture looked grainy.  Do not worry, this is normal.  After adding one tablespoon of the milk, the smooth texture returned.


I then added the second tablespoon of milk.  Adding each tablespoon one at a time makes it easier to work it into the chocolate mixture.  I hadn't made this dessert in years because someone else in the family usually brings it to our family holiday celebrations, but I wanted to add the recipe to my blog, so I made it for a different function just before Thanksgiving.  


It looks good in the photo above, right?  At this point, after the second tablespoon of milk, I thought that it was perfect and chose not to add the final tablespoon.  It wasn't until I applied it to the top layer of graham crackers that I realized I was wrong and should have included all of the milk the recipe called for.  (Don't do what I did, do what I say to do!)  When you stir it in the bowl, within a few seconds, all of the stir marks should disappear.  But this will only happen after all of the milk has been incorporated.


As you can see from the photo above, there are spreading marks.  The chocolate should be more runny and end up very smooth looking.  Picture the chocolate on and eclair pastry.  Ahh, thus the name of the dessert!  The next time I make this dessert, I will add a picture of how it should look.  I won't make the same mistake twice!


No matter what it looks like, this dessert is still a rich treat!  Enjoy!


Chocolate Éclair Dessert

2 pkg. (3.5 oz.) French Vanilla instant pudding
3 cups milk
1 carton (8 oz.) Cool Whip, thawed
1 box Graham crackers
2 oz. unsweetened baking chocolate
2 Tbsp. white Karo syrup
3 Tbsp. softened butter
3 Tbsp. milk
1 ½ cups powdered sugar

Grease a 9x13-inch baking dish (I use butter).  Line the bottom of the dish with one layer of graham crackers, trimming to fit.  In a large bowl, mix pudding with milk; fold in Cool Whip.  Spread half of pudding mixture on graham crackers.  Top with another layer of graham crackers, trimming to fit.  Spread remaining pudding mixture on top of second layer of graham crackers.  Add a final layer of graham crackers, trimming to fit.  By hand, mix together the remaining ingredients and spread on top layer of graham crackers.  Refrigerate 24 hrs. before serving.  Keep refrigerated.

Monday, November 26, 2012

Chocolate and Peanut Butter Acorns

Here's a cute little sweet treat to serve during the fall at Thanksgiving, a luncheon, or a tea party.


I originally saw this idea on Pinterest and knew immediately that I'd be making these acorns for Thanksgiving.  They originated at Curbly.com.  They're so cute and so easy to assemble.


There are three basic ingredients with each element "glued" together using a little frosting.  For each acorn, you will need one Nutter Butter Bite cookie, one Hershey's kiss chocolate candy and one milk chocolate chocolate chip.


Using a piping bag or a zip-lock bag filled with a little bit of frosting, pipe a dot of frosting on the Hershey's kiss.  Place the Nutter Butter Bite on top of the frosting.  Place a small dot of frosting on the chocolate chip and place it in the middle of the cookie.  That's it!


I think they are adorable, and if you like the combination of chocolate and peanut butter, you'll love the flavor also!  Enjoy!

Monday, August 13, 2012

Chewy Chocolate Cookies

This cookie recipe is a favorite of my boys.  The cookie doesn't look like much because it's small and on the flat side, but it's slightly crisp on the outside and the inside is soft and chewy.  Because of that, I used to call them brownie cookies.  I like to put one on my tongue and let it melt before chewing.  


I found this recipe at the bottom of an ad for Hershey's Cocoa and have been making these cookies for at least 15 years.  I just made a batch to take on our annual beach trip, and when my boys discovered them, they both exclaimed to everyone how much they love these cookies.  Needless to say, they all disappeared!


To begin, the butter must be softened to room temperature.  Whenever I forget to do this, I put one stick of butter at time in the microwave and run it on high for 5 seconds.    I wait a couple of minutes and run it again on high for 5 seconds.  I check it to see if it has a little "give" when I squeeze it.  If it does, I remove it from the microwave and put it in my mixer bowl.  If it doesn't, I give it another 5 seconds on high in the microwave.  Any more time than that, and the butter will begin to melt.  I then start the mixer with only the butter in the bowl.  As it gets broken up by the beater, it is able to soften more quickly.  I don't add the sugar until the butter alone is soft and creamy.  Another idea, which I haven't tried yet, is to grate the cold butter using a cheese grater; the smaller pieces of butter will warm up more quickly than the entire stick!  Once the butter is soft, I beat it together with the sugar until creamy.


Then, I add the eggs one at a time, beating until fully incorporated after each egg.  I always turn off the beater when adding each egg, just in case a small piece of the shell sneaks in so I can easily remove it.  Hint:  To check for the freshness of an egg, I drop the whole egg (still in the shell) in a glass of water.  If it sinks, it's fresh, but if it floats to the top, it's rotten and I throw it away. 


I add the vanilla and beat again until thoroughly mixed in.


In the meantime, in a medium bowl, I combine the flour, cocoa, baking soda and salt.


I add this mixture gradually to the butter mixture in the mixing bowl.  It gets mixed in more easily if I add it a little at a time and it keeps me from getting a cloud of the flour mixture thrown back in my face!


This is a very soft cookie dough, which is a light shade of brown.


Because the dough is soft, it spreads quite a bit when baking, so I leave about 2 inches between each cookie.  The recipe says to drop the dough by teaspoonfuls onto the cookie sheet, but I prefer to use my Pampered Chef small scoop.  I find it faster and the cookies are more round and uniform in size this way.  


Into the oven they go for 9 minutes.  The cookies may not appear done after that amount of time, but they really are.  If you leave them in any longer than that, they may not be soft and chewy.  The picture above shows how they puff while baking and the picture below shows how they flatten while cooling.  


Because they are so soft, they need to remain on the cookie sheet for about 1 minute before removing them to a cooling rack.  They will fall apart if you try to move them too soon.  By the way, a couple of months ago, I got a new range with a convection oven!  I am so excited, as I had my previous range for over 26 years!  When reading the manual about how to operate the convection oven feature, it was advised to use cookies sheets with low or no sides when baking cookies as they worked best.  I went shopping almost immediately and found these Calphalon 12" x 17" baking sheets, which are non-stick.  What an amazing product!  The non-stick feature works so well that as I was moving one cookie sheet full of cookies, I knocked it slightly and the cookies all started moving toward one end.  If these cookies weren't so soft, I probably would have been able to lift them directly off the cookie sheet with my fingers instead of using a spatula!

These yummy chocolate cookies are so addictive you can't eat just one!  Enjoy!


Chewy Chocolate Cookies
  
1 ¼ cups (2 ½ sticks) butter, softened
2 cups sugar
2 eggs
2 teaspoons vanilla
2 cups unsifted all-purpose flour
¾ cup cocoa
1 teaspoon baking soda
½ teaspoon salt

Preheat oven to 350°F.  Cream butter and sugar in large mixer bowl.  Add eggs and vanilla; blend well.  In a separate bowl, combine flour, cocoa, baking soda and salt; add to creamed mixture gradually, blending well.  Drop by teaspoonfuls onto ungreased cookie sheet.  Bake at 350°F for 9 minutes.  (Do not overbake.  Cookies will be soft.  They will puff during baking and flatten upon cooling.) Cool on cookie sheet until set, about 1 minute; remove to wire rack to cool completely.

Yield:  Approximately 6 dozen