Wednesday, August 14, 2013

Salsa Chicken Shortcakes

I like this dish because it can be prepared and served in less than 30 minutes, plus it's a very different way to serve chicken.  Also, on a warm day, the oven isn't on long enough to heat the kitchen to the point of being unbearable.


I found this recipe years ago in the Pillsbury 38th BAKE-OFF Contest Cookbook at the market.  I don't make these tasty sandwiches often, but when I do, they are gobbled down as quickly as I can get them to the table.  This recipe gets 8's and 9's on the Melnarik rating scale, plus some more 9's from some of my boy's friends.


As you can see, I almost forgot to take a picture of the first step, which is baking the biscuits according to the package directions.  I always buy the Pillsbury Grands! biscuits so they are large enough to make a decent size sandwich.


For the filling, I began by placing the chicken with the garlic in a large skillet in which I had heated some oil over medium heat.  In this case, I used some already cooked chicken breasts, which I cubed.  The recipe calls for raw chicken breasts that are to be cubed and cooked over high heat with the garlic.  I've done it both ways in the past.  The reason I added the previously cooked chicken to the skillet with the garlic is to allow the chicken to heat as the garlic cooks, which will help meld the flavors.


Once the garlic was cooked and the chicken was heated through, I added the cumin and stirred until the chicken was coated.  The heat of the pan helped sear the seasoning to the chicken.


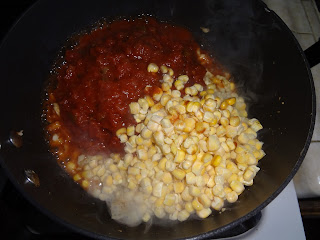
Then, I added the frozen corn (no need to defrost) and the salsa, mixing thoroughly.  I continued to cook over medium heat for about 10 minutes until the mixture thickened slightly and the corn was heated through.


To assemble, I cut each biscuit in half crosswise.  I put some of the chicken mixture over the bottom halves, topped them with the top half and added a bit more of the chicken mixture.  I cut each slice of Pepper Jack cheese into 4 strips and criss-crossed 2 of them over the top of each sandwich.  The heat of the sandwich melted the cheese a bit over the top.  The easiest way to eat these tasty sandwiches is with a knife and fork.   These are so tasty, it's next to impossible to eat just one!  Enjoy!


Salsa Chicken Shortcakes

1 can (10.8 oz.) Pillsbury Grands Refrigerated Flaky Biscuits
1 tablespoon oil
4 boneless skinless chicken breast halves (about 1 pound) cut into ¾-inch pieces
1 garlic clove, minced
1 ¾ cups thick and chunky salsa
1 cup frozen corn
1 teaspoon cumin
4 oz. sliced Pepper Jack cheese, cut into 1-inch strips

Heat oven to 350°F.  Prepare and bake biscuits as directed on can.  Meanwhile, heat oil in large skillet over medium-high heat until hot.  Add chicken and garlic; cook and stir 5 to 7 minutes or until chicken is no longer pink.  Add salsa, corn, and cumin; mix well.  Reduce heat to medium; cook 10 minutes or until mixture thickens slightly.


To serve, split each warm biscuit.  Place bottom halves on individual serving plates.  Spoon half of chicken mixture over biscuits.  Cover with biscuit tops, remaining chicken mixture; top with cheese.

Broccoli Cole Slaw

I'm always looking for recipes for side dishes that are just a little bit different.  I'd say this one definitely fits the bill.  It's a cole slaw that uses the broccoli slaw instead of cabbage and the "sauce" is oil & vinegar based instead of the usual creamy mayonnaise base.  Different isn't always bad.  In this case, it's very good!


I found this recipe on foodnetwork.com, which said the recipe was courtesy of Linda Fuller and Christine Lakhani.  Even though my husband prefers creamier cole slaws, he said he liked this one, too.  The rest of my guys gave it an 8 and 9 on the Melnarik rating scale.


I began by melting the butter in a large skillet over low-medium heat.  In the meantime, I removed the seasoning packets from the Ramen noodle packets and crushed the noodles.  When the butter was melted, I added the noodles and the slivered almonds to the skillet and sauted them until the almonds began to brown slightly.  I stirred them frequently, as the nuts can burn easily if left unattended for too long.


In a large bowl, I placed the broccoli slaw mix straight from the bag.  I added the almond/noodle mix and the sunflower seeds.  I tossed these ingredients together to mix thoroughly.


In a 2-cup measuring cup, I whisked together the canola oil, brown sugar, apple cider vinegar and the seasoning packet from the Ramen noodles.


I added the dressing to the bowl and tossed everything together to combine.  I used the Chicken flavored Ramen this time, but other flavors can be used.  This night, I served it as a side dish with Barbecue Beef Sandwiches, which are cooked in a crock pot (I'll post this recipe later).  My oldest son added it to the sandwich as if it was a pulled pork sandwich and raved about it so much, I ate mine that way also!  Enjoy!


Broccoli Cole Slaw

2 packages (3 oz. each) Chicken ramen noodle soup
3.4 stick butter
¼ cup slivered almonds
2 bags (12 oz.) broccoli coleslaw
¼ cup sunflower seeds

Dressing Mix:
¾ cup canola oil
¼ cup brown sugar
¼ cup apple cider vinegar
1 Chicken ramen noodle seasoning packet


Put the ramen noodles in a bog and crush them with a rolling pin while melting butter in a large skillet over low/medium heat.  Add the crushed noodles and slivered almonds to the skillet and sauté, stirring occasionally.  Meanwhile, whisk together all the dressing ingredients in a small bowl.  Place the shredded broccoli into bowl and toss with the noodles, almonds, and sunflower seeds.  Pour dressing over salad and toss to coat.  Garnish with green onions.

Southwestern Rub

This post is a little different from others in the past, because it is for a rub (mixture of seasonings) which can be added to chicken, pork or beef.  I primarily use it on chicken, but wanted you to know you have options!


I found this rub in a magazine containing recipes for marinades, rubs and sauces which was being sold at the check-out stand in the market.  I always grill the meat I rub it on, so this seasoning combination is perfect to use in hot weather, when I don't want to heat my kitchen by using the oven.  This rub gets mostly 8's on the Melnarik rating scale.


In a small bowl, I begin by mixing all of the dry ingredients (chili powder, cumin, salt and cayenne pepper).


Then, I add the vegetable oil and diced garlic, mixing until thoroughly combined.


I rub this mixture on both sides of my chicken breasts, cover them with plastic wrap and place them in the refrigerator for at least 30 minutes.  They should not be refrigerated any longer than 24 hours.


I grilled the chicken over medium heat for about 25 minutes, turning the chicken once during the cooking time.  That's all there is to it!  In order to keep the Southwestern flavor theme going with this meal, I made it this time with a Southwestern Caesar Salad and some Mission Baked Beans as side dishes.  Enjoy!

Southwestern Rub

1 tablespoon chili powder
1 tablespoon vegetable oil
1 teaspoon ground cumin
¼ teaspoon salt
¼ teaspoon ground red pepper (cayenne)
1 large clove garlic, finely chopped

Mix all ingredients.

Spread rub evenly on 1 pound boneless meat (chicken, pork, beef) or 2 ½ pounds ½-inch thick pork chops.  Cover and refrigerate at least 30 minutes but no longer than 24 hours.  Grill meat as desired.

Tuesday, August 13, 2013

S'mores Bites

I've loved S'mores since the first one I had when I was a Girl Scout years ago.  I've tried a few recipes over the years that are supposed to replicate that wonderful combination of graham cracker, chocolate and marshmallow.  This is the closest to the original in flavor that I've found and it's not quite so messy.  The only difference is that the marshmallow isn't warm and gooey, but this version travels better!


I saw this recipe on Facebook a couple of weeks ago and thought it would be a perfect new treat to try out for our Annual Beach Trip.  In order to find the recipe when I needed it, I had to "share" it so it would be permanently on my timeline.  Unfortunately, I don't know who the original author was to give credit where it is due.  This new goodie was a major hit with our friends on the beach trip, neighbors and friends of my boys.  Yes, I made a double batch and plenty of people wanted to be taste testers!


To begin, I turned on the oven to 350°F to preheat it.  Then, in a medium bowl, I combined the graham cracker crumbs and the powdered sugar.  I used my mini food processor to make the crumbs, because I believe it does the best job of getting a fine crumb, but if you don't have one, place the graham crackers in a zip-lock bag and use a rolling pin to crush them thoroughly.


After melting the butter in the microwave (it can also be melted in a saucepan on the stove top), I added it to the graham cracker mixture and mixed thoroughly.


The resulting mixture was very moist, yet crumbly.


I did my best to evenly distribute the crumbs into a mini muffin tin.


Using two tools I have, first the tamper on the right to get the crumbs into the bottom of each cavity.  Then, the shaper on the left to make the shell form.  The original recipe said to use a fork, but I think clean fingers might work better.


They didn't look perfect, but they were ready to go into a preheated oven at 350°F for 5 minutes.  When they were done, they were bubbly around the edges.


While the shells were in the oven, I broke apart two of the Hershey bars into their individual rectangles.  I used Hershey bars because that is the traditional chocolate bar used in the original S'mores.  How convenient that each bar has 12 sections, so 2 bars provided the perfect amount for this step!  When I removed the muffin pan from the oven, I was surprised to see the graham cracker mixture had puffed up so the cup-like shell was no longer visible.  Once I had added the chocolate to each cup and they had cooled a little, the shape seemed to be returning to each cup.  The chocolate did begin to melt from sitting on top of the hot shells.


Using scissors that I dipped into ice water, I cut each regular size marshmallow in half crosswise and placed them cut-side down on top of the chocolate.  I dipped the scissors in the ice water before cutting each marshmallow.  This prevented them from becoming so sticky they would be useless.


Back into the oven at 350°F for another 3 minutes.  When they came out of the oven, they were nicely puffed and almost filled each cubby in the pan.


The original recipe called for melting the remaining chocolate and after the S'more Bites had cooled to dip each one in it.  This seemed like too much work to me, and would probably waste some of the chocolate.  So, while they were in the oven the last time, I broke up the last two chocolate bars and as soon as the cups came out of the oven, I placed one rectangle on each.  The hot marshmallow made the chocolate melt immediately, so I took a knife and gently spread the chocolate around a bit and tried to cover the top of the marshmallow.  Easy, peasy and no wasting chocolate!


After letting them cool in the pan for 15 minutes, they were easy to remove with a spoon to a cooling rack to finish cooling completely.  A pretty easy way to take S'mores on the road!  Enjoy!


S’more Cups

7 whole graham crackers, finely crushed
¼ cup powdered sugar
6 tablespoons butter, melted
4 bars Hershey’s milk chocolate bars
12 large marshmallows

Preheat oven to 350°F.  Finely crush graham crackers into crumbs.  Combine graham cracker crumbs and powdered sugar in a small bowl.  Add melted butter and mix thoroughly.  Distribute crumbs in a 24-cup mini muffin pan; press to form shallow cups.  Bake at 350°F for 5 minutes or until edges are bubbling.

While the crust is in the oven, break two of the candy bars into rectangles.  Remove pan from oven; place one rectangle into each cup.  Cut marshmallows in half crosswise using scissors dipped in ice-cold water.  Place one marshmallow half, cut-side down, into each cup.  Return to oven for 3 minutes or until marshmallows are just slightly softened.  While in oven, break remaining candy bars into rectangles.  Remove pan from oven; immediately place one rectangle on top of each marshmallow.  Using a knife, gently spread melted chocolate over top of marshmallows.

Cool in pan for 15 minutes.  Remove from pan and cool completely.  Can be stored in an airtight container for 1 week (if they last that long).