Friday, December 28, 2012

Cheesy Chicken and Broccoli Casserole

This is another family favorite dish that I make several times during the colder months.  It's a casserole that's easy to prepare and it tastes great, too!


My sister shared this recipe with me years ago and my boys are always pleased when I tell them this is what we're having for dinner.  This dish gets 8's and 9's on the Melnarik rating scale.


It begins with cubed chicken breasts, which I arrange evenly in the bottom of a 9x9-inch baking dish.  This can either be leftover chicken or the grilled chicken strips that are easy to find at the market.  I've also used leftover turkey breast meat in this dish.  


To this I add the layer of broccoli.  The original recipe called for frozen broccoli, which had been defrosted.  More often than not, these days I buy the fresh broccoli florets in the bag, which are washed and ready to use.  I following the cooking directions on the bag before adding them to the baking dish.  If you're not using frozen broccoli, the broccoli must be cooked before using it in this casserole.


Then I add a layer of American cheese (I always used REAL American cheese, not the cheese food product!).  I cut the pieces to fit and overlap them so all of the broccoli is completely covered.  Because my broccoli was added just after cooking it, the heat began to melt the cheese even before I took this picture.  The important thing is to make sure the cheese at the edges of the dish are below the top of the pan before adding the next layer, or there will be a big mess!


In a medium bowl, using a whisk, I combine the cream of chicken soup with the evaporated milk.  It's important that you use the evaporated milk instead of the sweetened condensed milk!


I then add this mixture directly on top of the cheese.  You can see that while mixing the soup and milk, the cheese melted even more.


I spread this mixture evenly, making sure it gets to the edges of the baking dish.  Because I made sure the cheese was lower than the edge of the pan, this mixture did not overflow the dish and will not do so during baking and make a mess of the oven.  I covered the casserole with foil and baked it in the oven at 350°F for 35 minutes. 


We think this casserole is best when served over fresh and hot mashed potatoes.   So, while it's in the oven, I prepare the mashed potatoes.  I peel the spuds and cut them into pieces that are no more than 1/2-inch thick.  I've found that the faster I need the potatoes to cook, the smaller I cut the pieces.  I place them in a large saucepan, cover them with water and cook over high heat.  Once the water begins to boil, I cook the potatoes for 10 minutes.


Once cooked and fork tender, I drain the potatoes and add them to a large bowl in which I have cubed a stick of butter.  The heat from the potatoes melts the butter.


At that point, the casserole is ready to come out of the oven.  I remove the foil carefully so as to not burn myself with the steam.


I then add the French's french fried onions, distributing them evenly.  Then I place the casserole back in the oven to get the onions crispy on top.  This only takes about 5 minutes more.


In the meantime, using a hand mixer, I mash the potatoes and butter, adding salt as needed.  To make the potatoes extra creamy, I add a little pour of milk and whip again with the hand mixer.


When the casserole comes out of the oven, the onions are crispy and the cheese and soup have melted into the broccoli and chicken layers and it smells wonderful.


I serve this dish family style, where I bring the bowl of mashed potatoes and the casserole to the table and everyone helps themselves.  We like to put the mashed potatoes on the plate first, then top with the casserole.  This is a myriad of textures from the creamy potatoes on the bottom to the crunchy onions on top.   And it tastes good, too!  Enjoy!


Cheesy Chicken & Broccoli Casserole

3 cups cooked chicken
1 package (12 oz.) frozen broccoli, defrosted*
7 slices American cheese
1 can cream of chicken soup
1 can (5 oz.) evaporated milk
1 can French’s French Fried Onions

Preheat oven to 350°F.  Spread chicken in a 9x9-inch baking dish.  Evenly distribute broccoli over chicken layer.  Layer with cheese, cutting to fit.  In a medium bowl, whisk together soup and milk; pour over cheese, spreading to completely cover cheese.  Cover with foil and bake at 350°F for 35 minutes.  Remove from oven and take off foil; sprinkle onions on top and bake an additional 5 minutes uncovered until onions are crispy.


*fresh broccoli florets, which have been cooked may be substituted

Smothered Chicken

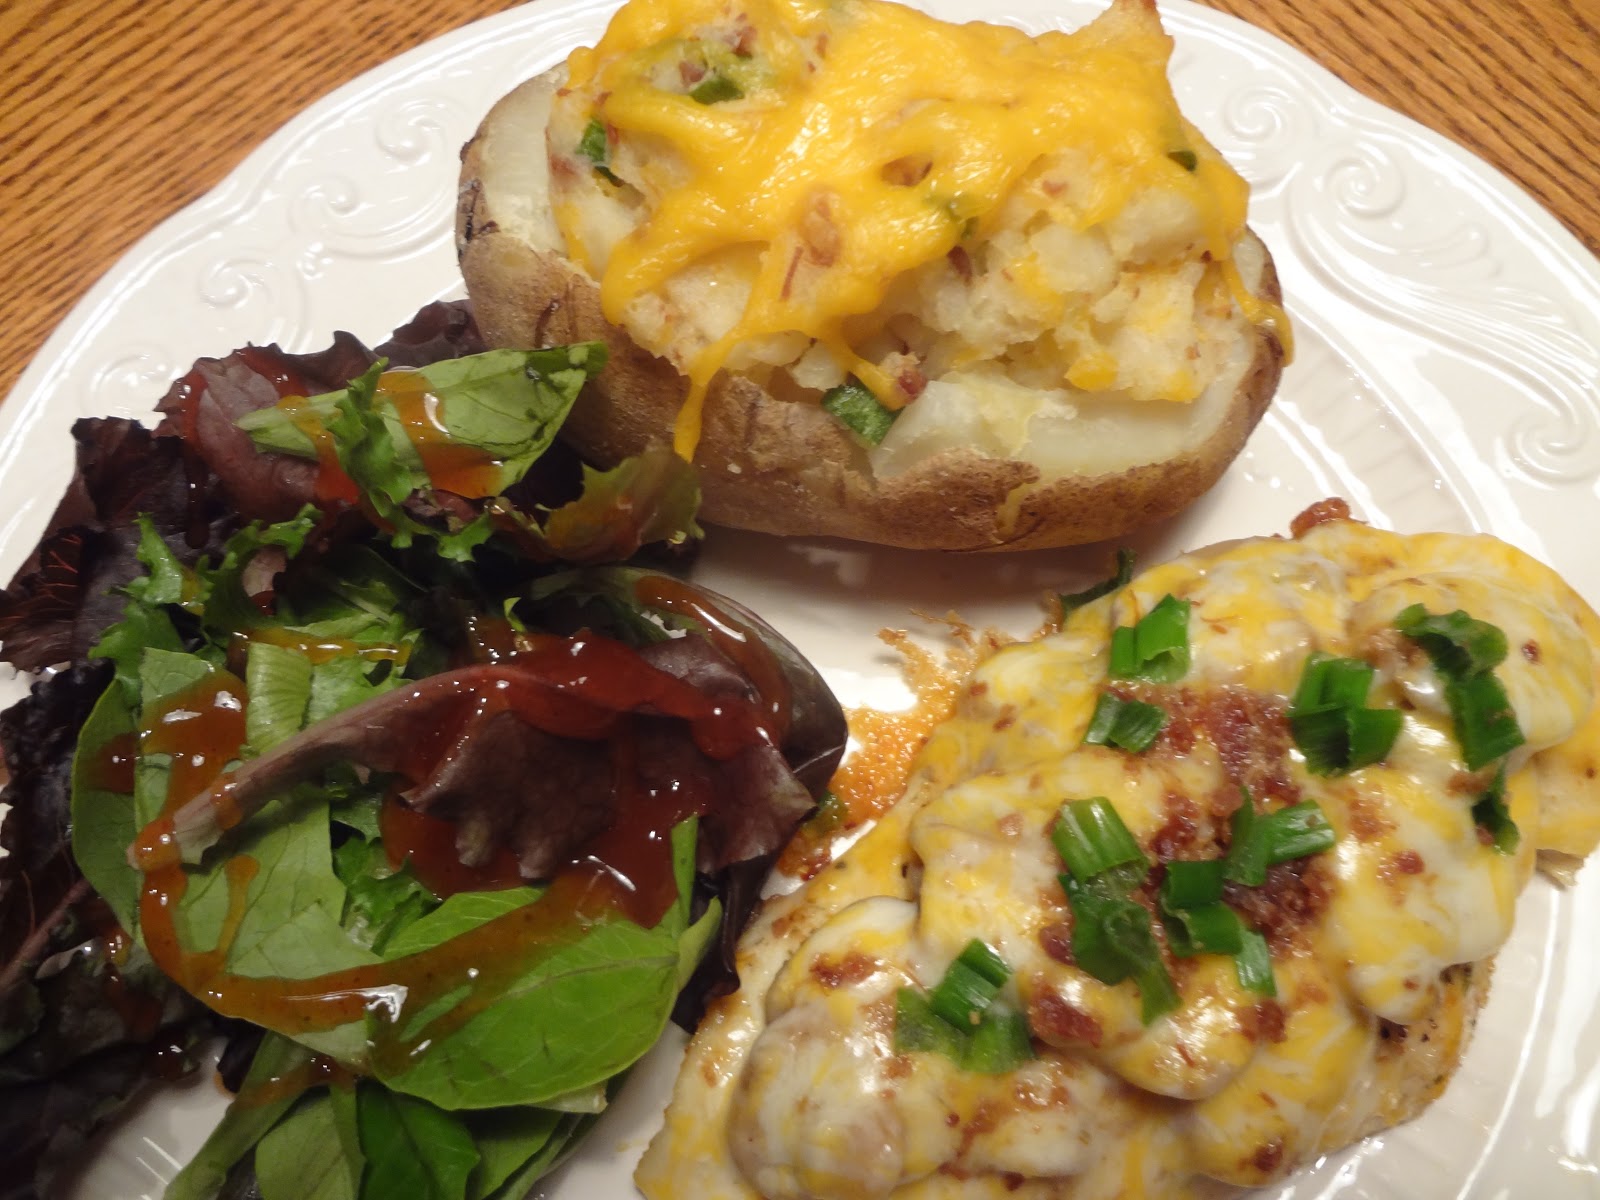
This dish is a family favorite when combined with a Twice-Baked Potato (also shared here on my blog) and a green salad.  In fact, I received one of my favorite compliments from my oldest son the first time I made this meal.  After taking the first few bites, he said "This is why we don't eat out!"


This chicken takes hardly any time to prepare, which gives me more time to prepare a more involved side dish.  I found this recipe in my November/December 2002 issue of Quick Cooking and it was a family favorite from the first bite.  This dish gets 9's on the Melnarik rating scale.


After flattening a boneless, skinless chicken breast to 1/4-inch thickness, I sprinkle each side with some garlic powder and seasoned salt.  Any type of seasoned salt can be used.  Or, if you're watching your salt intake, a salt-free product like Mrs. Dash can be substituted.


After placing the seasoned chicken in a skillet and cooking it over medium heat in a little oil for 4 minutes, I turn each piece and add the mushrooms.  We were having a guest for dinner this night and one piece of chicken did not get mushrooms, because my youngest son doesn't care for them.


I then topped each piece of chicken with the Mexican cheese blend (this is the pre-shredded Monterey Jack and Cheddar blend without the spices), the crumbled bacon and chopped green onions.


I cover the skillet and let the chicken cook an additional 4 minutes, until fully cooked.


When finished, the juices run clear and the cheese has melted perfectly on top.


Again, I like to serve this chicken with a twice-baked potato and a green salad.  It's a colorful meal and a tasty one, too!


To me, this is comfort food, but it's also special enough to serve to guests!  Enjoy!


Smothered Chicken

4 boneless, skinless chicken breast halves
Garlic powder and seasoned salt to taste
1 tablespoon vegetable oil
1 (4.5 oz.) can sliced mushrooms, drained
1 cup (4 oz) Mexican cheese blend (Monterey Jack and Cheddar)
½ cup chopped green onions
½ cup bacon bits

Flatten chicken to 1/4-inch thickness.  Sprinkle with seasonings on both sides.  In a large non-stick skillet on medium heat, brown chicken in oil for 4 minutes.  Turn chicken over; top with mushrooms, cheese, onions and bacon.  Cover and cook until chicken juices run clear, approximately 4 minutes.

Twice-Baked Potatoes


I'm an Irish girl and I love my spuds!  I like them any way you can think to fix them.  I especially like a baked potato, but a twice-baked potato is extra special.  I don't make them often, but I also don't wait for a special occasion to put together this wonderful side dish.


One nice thing about these fancy spuds is that if you are making them for company, the majority of the work can be done ahead of time and then re-bake them in the oven and add the cheese just before serving.  I found this recipe on an insert in my Taste of Home magazine years ago and it gets 9's across the board on the Melnarik rating scale.


I begin by scrubbing the russet potatoes and wrapping them in aluminum foil.  I then bake them in the oven directly on the rack at 375°F for 1 hour.  After fully baked, I remove them from the oven, unwrap them enough to let the steam escape and let them cool for about 5 to 10 minutes so they are easy to handle.


I then cut a thin slice off the top of each potato and, using a tablespoon, begin to scoop out the center of the potato, making sure to leave the sides about 1/4-inch thick.  I place the pulp I remove into a medium bowl.


I leave the sides 1/4-inch thick so they don't break when refilling them with the potato mixture later, but I make it a little thinner on the bottom.  I want most of the potato to have the yummy added items!


To the potato in the medium bowl, I add butter, shredded sharp cheddar cheese, crumbled bacon, salt, a dash of pepper and snipped green onions (chives can be substituted).


I mix this together until thoroughly combined.


After placing the potato shells on a baking sheet, I add the cheesy potato mixture that I just combined.  Because of the additional ingredients, it will take up more room than the plain potato pulp that you removed, so it will sit higher than the cut edge of the spud.  At this point, if they weren't going to be consumed within the next half hour or so, you could let them cool, and refrigerate them until time to re-bake them.


Just before baking, I add the remaining shredded sharp cheddar cheese and into the oven they go for 25 minutes at 375°F.  If they've been refrigerated before baking, I add an extra 10 minutes to the baking time.


When they come out of the oven, the cheese on top is melted and they are piping hot and ready to eat!


I like to serve my twice baked potatoes with Smothered Chicken (also shared here on my blog) and a side salad.


This side dish does take some time to prepare, but it is so worth it!  Enjoy!


Twice-Baked Potatoes

4 russet potatoes
4 tablespoons butter, softened
3 tablespoons crumbled, cooked bacon
2 tablespoons snipped green onions
½ teaspoon salt
Dash pepper
1 ½ cups shredded sharp cheddar cheese, divided

Bake potatoes at 375°F for 1 hour or until soft.  Allow to cool for 5 – 10 minutes or until cool enough to handle.  Cut a thin slice off the top of each potato.  Scoop out the pulp and place in a bowl; add butter, bacon, green onions, salt, pepper and 1 cup of cheese, stirring to combine.  Spoon into potato shells and place on a baking sheet.  Top with remaining cheese; bake at 375°F for 25-30 minutes or until heated through.


Saturday, December 8, 2012

Roasted Tomato Bisque

I had my Royal Ladies' Tea Society Christmas Tea in my home a few days ago and tried this new recipe out on my friends.  This soup was a big hit with all of the ladies and I'm sure it will be with you also!  I also made it again in January for my family, with whom it was a great hit also!


I love to visit my favorite tea room, Belladonna (Lancaster, CA), in December because Donna serves her amazing Sun-Dried Tomato and Feta soup.  It's the most amazing tomato soup I've ever had!  When I found this recipe in my November/December 2011 issue of Tea Time Magazine, I was hoping to find  a soup that came in a close second!  I think this recipe meets that goal!


After lining a baking sheet that has sides with aluminum foil, in a large bowl, I combined the olive oil, garlic, salt and pepper.


After washing and cutting the tomatoes in half, I added them to the bowl, tossing them to coat with the oil and seasonings.


After slicing the onions I added them to the bowl, tossing them until fully coated.  It doesn't matter how thick you make your slices as all of the vegetables will be pureed after roasting, but you don't want to cut them too thin as they will overcook during the roasting process.  


I then transferred the vegetables to the baking sheet.  I put the tomatoes cut side down, figuring after the first half hour when the recipe says to stir the vegetables, I would use tongs to turn them over and it would be easy to make sure they had all been turned.


Into the oven the pan went for 1/2 hour at 450°F.  After that time, I turned all the vegetables and put them back in the oven for another 1/2 hour.  The picture above shows what they looked like after the full hour of roasting.


I let them cool for just over 10 minutes before placing 1/2 of the vegetables in my food processor to puree them.  When making this soup for the tea, I then transferred the puree to a Tupperware bowl and then into the refrigerator, as I did the roasting one day and reheated it the following day, adding the rest of the ingredients.  When I made this again for my family, I transferred the pureed vegetables to a Dutch oven, so the rest of the ingredients could be added right away.


Because the vegetables were still hot while processing them, I left the small food chute open to let the steam escape.  After processing the rest of the vegetables, I added them to the first half.


To finish the soup, after placing the pureed vegetables in my Dutch oven, I added the tomato paste, sugar, salt, lemon juice, and Worcestershire sauce.  I used a whisk to combine these ingredients and brought them to a simmer over medium heat.


Once combined, the soup was quite thick at that point.


Next I gradually added the chicken stock.  You can see that the soup was much thinner.  I let this simmer for 10 minutes.


Then I added the Parmesan cheese, stirring to combine.  The cheese started to melt right away.


Next I added the heavy cream.  The picture doesn't show it well because it sank into the soup as I poured it.  What you see are the last drops from the measuring cup.  


The last ingredient to be added was the fresh basil.  The bisque was ready to serve!


This soup was the first course at our tea and I'm sure the ladies would have asked for more if they hadn't known there were so many other yummy foods to follow.  Almost everyone asked for the recipe, though!  I forgot to add a small basil leaf to the top to make it look as special at it tasted, but did so when I made it for my family in January, as you can see from the picture above.  This recipe yields 2 quarts of soup, so even after serving small portions to the ladies (tea foods are always served in small portions) I had some to share with neighbors (who loved it and asked for the recipe) as well as have my oldest son try a cup.  After the first taste, he was singing praises.  He immediately made himself a grilled cheese sandwich to accompany the soup, which became his dinner that evening.  He also asked if I could make it again so he could take it to work every day for lunch!  Yes, it's that good!  Enjoy!


Roasted Tomato Bisque


2 ½ pounds Roma tomatoes, halved
1 large yellow onion, sliced
1 tablespoon minced garlic
2 tablespoons olive oil
1 ½ teaspoons salt, divided
1 teaspoon ground black pepper, divided
1 quart chicken broth
1 (6 oz.) can tomato paste
2 tablespoons sugar
1 tablespoon lemon juice
1 tablespoon Worcestershire sauce
2 cups finely grated Parmesan cheese
½ cup heavy whipping cream
1/3 cup chopped fresh basil

Preheat oven to 450°F.  Line a baking sheet with sides or roasting pan with aluminum foil.   Set aside.  In a large bowl, combine tomatoes, onion, garlic, olive oil, ½ teaspoon salt, and ½ teaspoon black pepper, tossing gently to coat vegetables.  Place in prepared pan.  Roast for 1 hour, stirring halfway through cooking time.  Remove from oven, and cool for 10 minutes.  In the container of a blender or food processor, puree vegetables until smooth.  In a Dutch oven, combine vegetable puree, chicken broth, tomato paste, sugar, lemon juice, Worcestershire sauce, remaining 1 teaspoon salt and remaining ½ teaspoon pepper, whisking until smooth.  Bring to a simmer over medium heat.  Cook for 10 minutes.  Add cheese, cream and basil, stirring until cheese is melted.  Garnish individual servings with basil leaves, if desired.


Saturday, December 1, 2012

Kentucky Spoon Bread


This is another family favorite side dish at the holidays.  This is a cornbread that is completely prepared in one casserole dish and is so moist that it requires a spoon for serving.


I've had this recipe for about 30 years and my mother-in-law would call days before Thanksgiving to make sure I was bringing it with me when celebrating with her in the mountains.  A family friend, Bobbie Godsey, whom we attended church with and also was a neighbor, shared this recipe with me.  This dish gets 9's all around in my household and 10's from the rest of the family.  If you've ever had the cornbread at El Torito Restaurant, this dish is even better than that!


I begin by placing a stick of butter in my 2 qt. casserole dish and melting it in the microwave oven.


To the butter I add the canned corn, creamed corn and sour cream, mixing thoroughly to combine.


Then I add the slightly beaten eggs.  I add the eggs separately figuring the cold sour cream has cooled down the melted butter, so that the eggs won't begin to cook when I add them.


The last ingredient is the box of cornbread mix.  I stir this in until thoroughly combined.


It doesn't look very appetizing at this point, but the magic occurs in the oven where it gets baked at 350°F for 45 minutes.  If you are also making my Broccoli Supreme dish, it can be baked at the same time because they both cook for the same amount of time at the same temperature!


When it comes out of the oven, it should be piping hot and nicely browned on top.  It's ready to serve!


This tasty side dish is so easy to assemble and it brings a nice pop of color to the plate!  Enjoy!


Kentucky Spoon Bread

1 stick (1/2 cup) butter
1 – 8 oz. container sour cream
1 – 8 oz. can whole kernel corn, drained
1 – 8 oz. can creamed corn
1 pkg. Jiffy Corn Muffin Mix
2 eggs, slightly beaten

Preheat oven to 350°F.  In a small casserole dish (about 1 ½ to 2 qt.), melt butter in a microwave oven.  Add all ingredients in order listed, mixing well.  Bake at 350°F for 45 minutes, or until golden brown on top.  Serve hot with a spoon.